
Doc Hub
DOCHUB in Uniq365 will help user to save doc and attach in the transaction form.

_____________________________________________________________________________________________________________________________________________
How to save the picture in DOC HUB?
Pre-requisites:
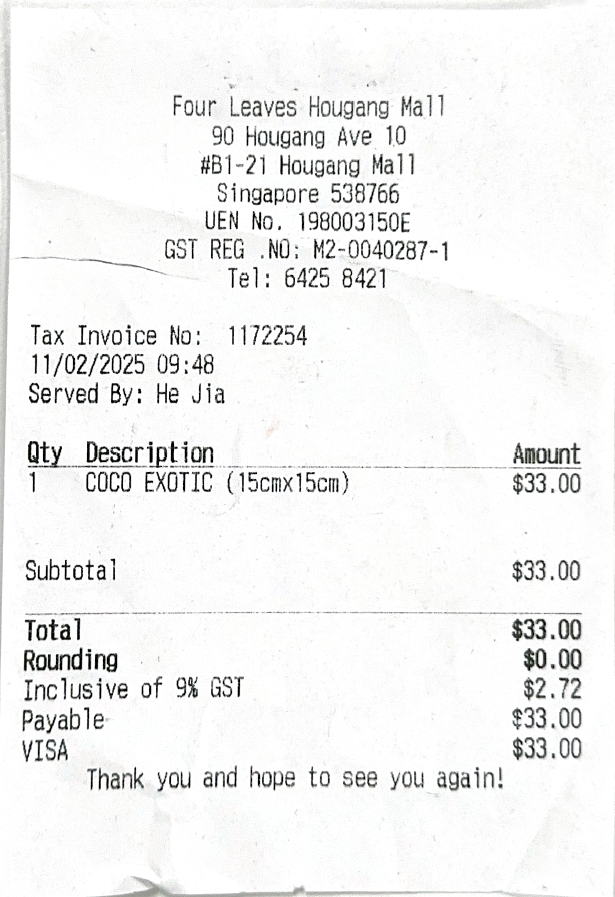
Take a picture of the document to save, as in attached sample.
ü Document must be in jpeg, png or pdf
ü Limited to 25MB
_______________________________________________________________________________________________________________________________________________
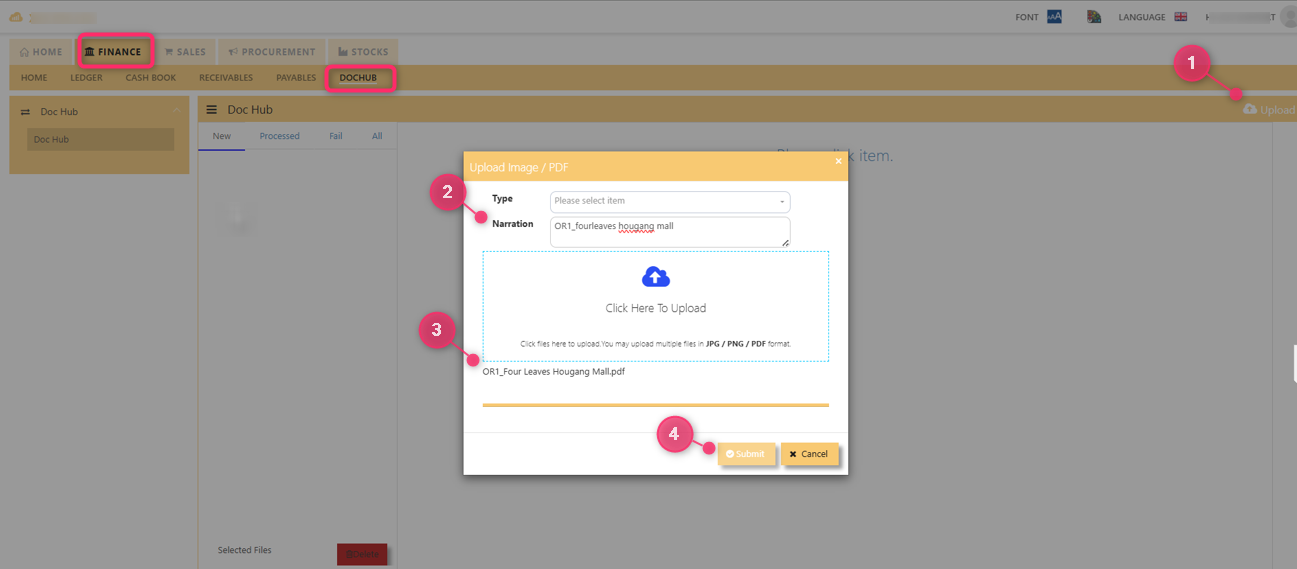
How to upload the picture in DOC HUB?
- UPLOAD – click
- TYPE – optional
- NARRATION – add narration or description
- CLICK HERE TO UPLOAD - click and select from external folder
- SUBMIT – click to save the upload
- CANCEL - to discontinue upload
FILE NAVIGATION:
- NEW – list of newly uploaded file
- PROCESSED – list of on-process upload
- FAIL – failed upload
- ALL – list of successfully uploaded and created cash book, supplier invoice and customer receipt

____________________________________________________________________________________________________________
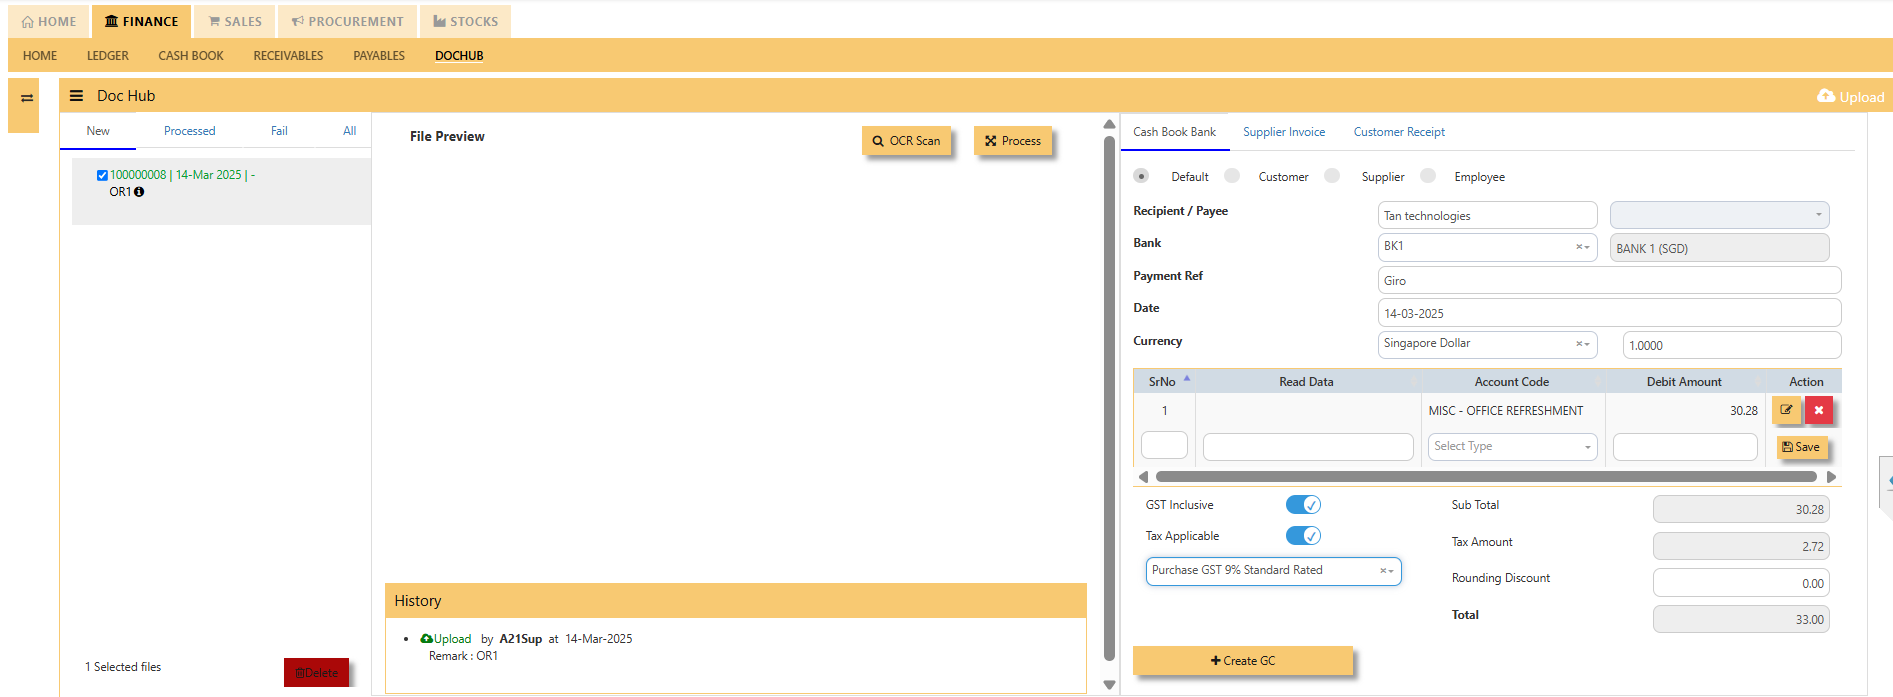
DOC HUB TO CASH BANK BOOK [CREATE GC]
HOW TO ADD FROM DOC HUB TO CASH BANK?
- OCR SCAN – click or
- PROCESS – click
- CASH BANK BOOK - select
- SELECT DEFAULT, CUSTOMER, SUPPLIER or EMPLOYER
- RECIPIENT/PAYEE - key in
- BANK – select
- PAYMENT REF – key in
- DATE – default today
- CURRENCY – default to sgd and key in exchange rate
- ACCOUNT CODE – select account code
- AMOUNT – key in
- GST INCLUSIVE – click
- TAX APP-click and select gst type
- CREATE GC - click
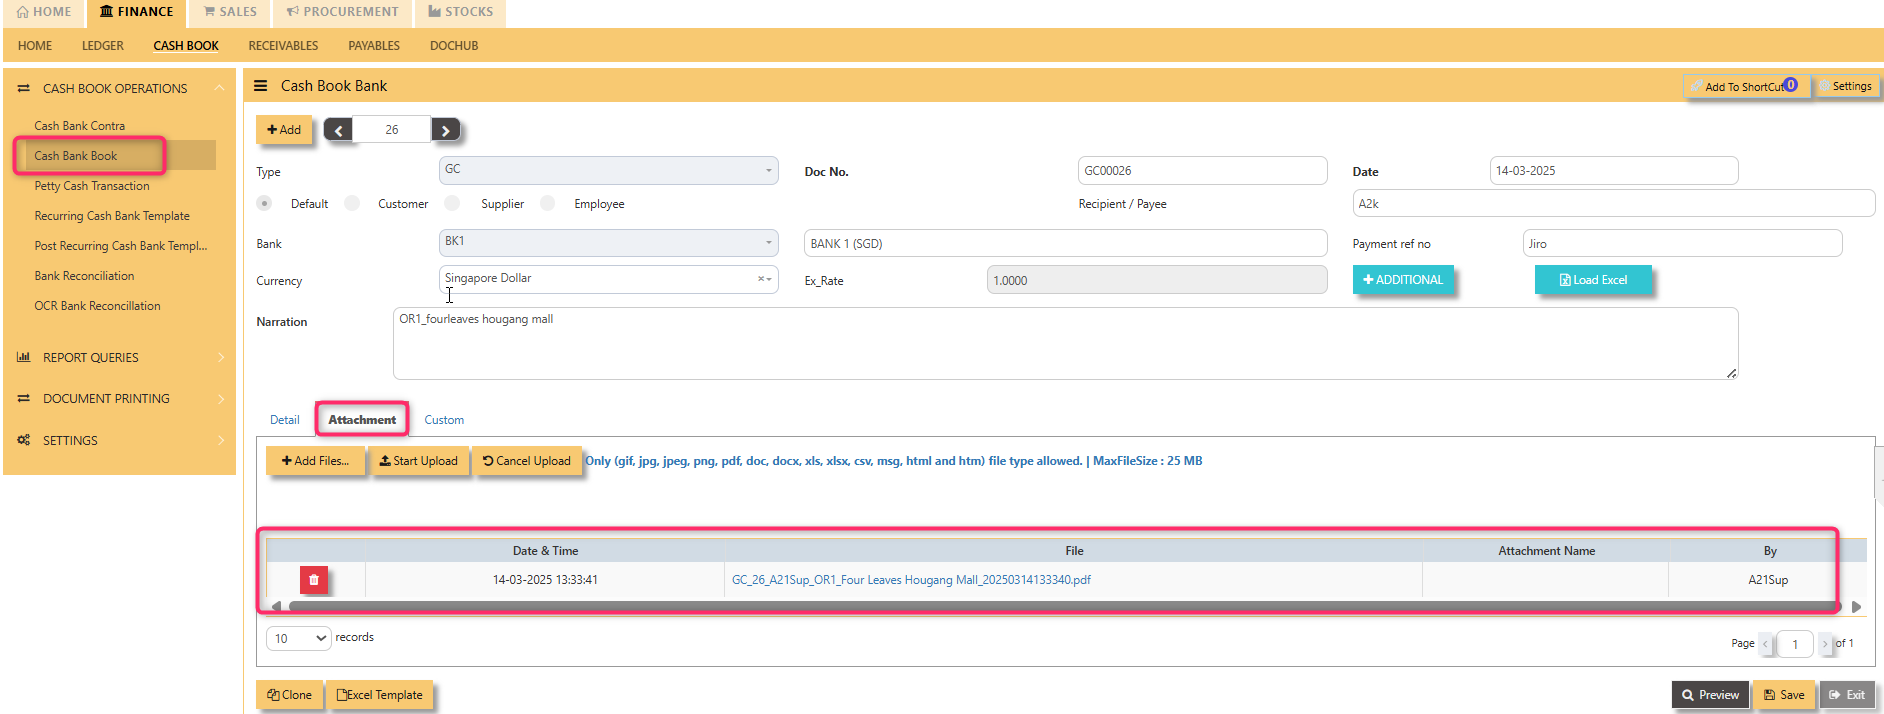
CASH BOOK ENTRY or GC ENTRY will be auto-created, in HEADER and DETAIL tab will reflect according to the doc hub as entered:
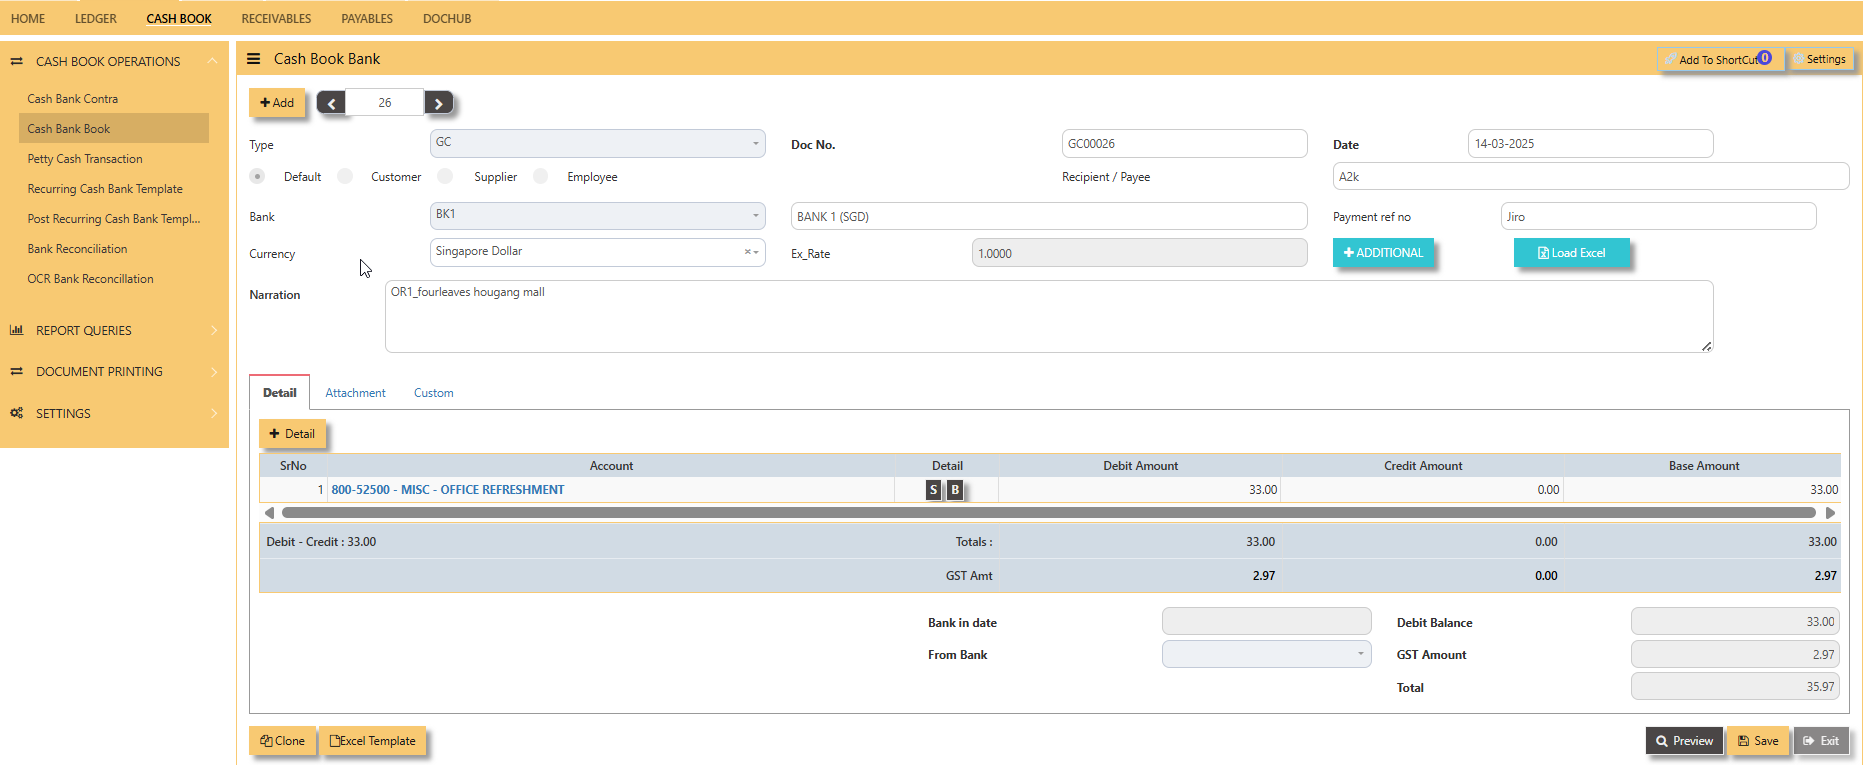
Then, ATTACHMENT tab, will list the saved doc-
- DATE AND TIME– date and time of upload
- FILE – filename of document
- BY – user login
-

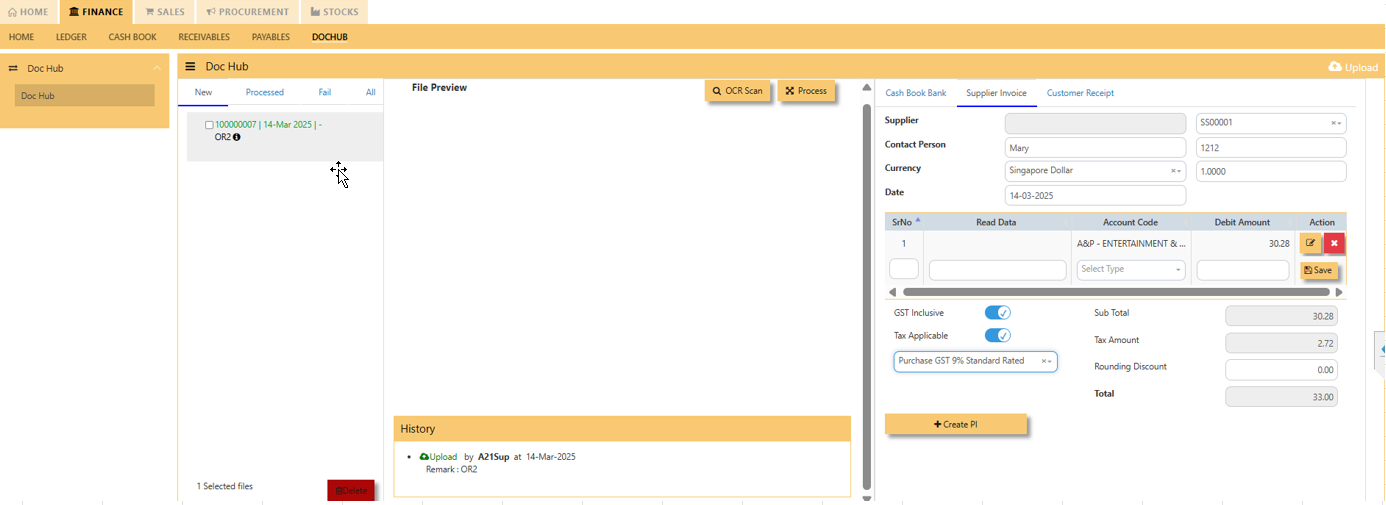
DOC HUB TO SUPPLIER INVOICE [CREATE PI]
HOW TO ADD FROM DOC HUB TO PAYABLE INVOICE OR PI?
- OCR SCAN – click or
- PROCESS – click
- SUPPLIER INVOICE TAB - select
- SUPPLIER CODE - select
- CONTACT PERSON - key in
- REF – key in
- CURRENCY – default to SGD
- DATE – default today
- ACCOUNT CODE – select account code
- AMOUNT – key in
- GST INCLUSIVE – click
- TAX APP-click and select gst type
- CREATE PI - click to save
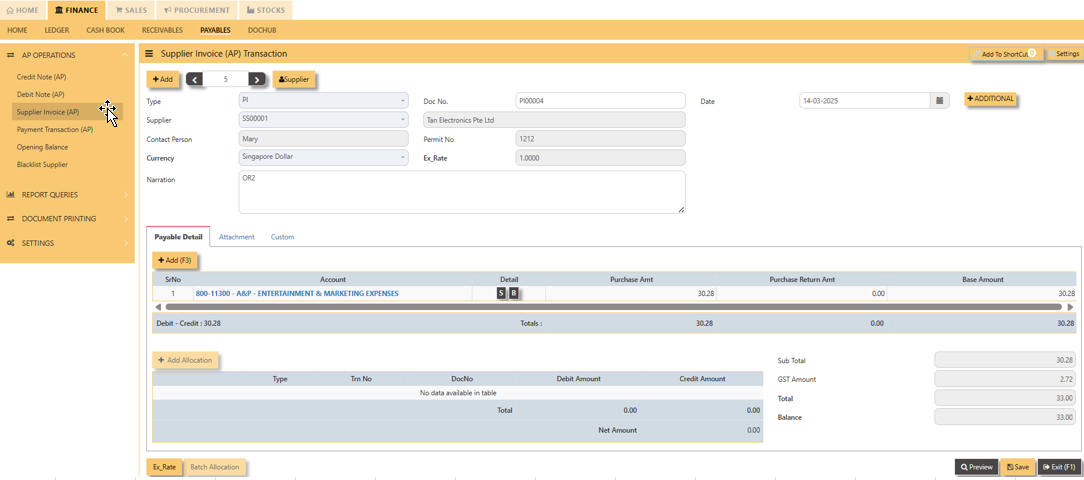
PI ENTRY will be auto-created, in HEADER and DETAIL tab will reflect according to the doc hub as entered:
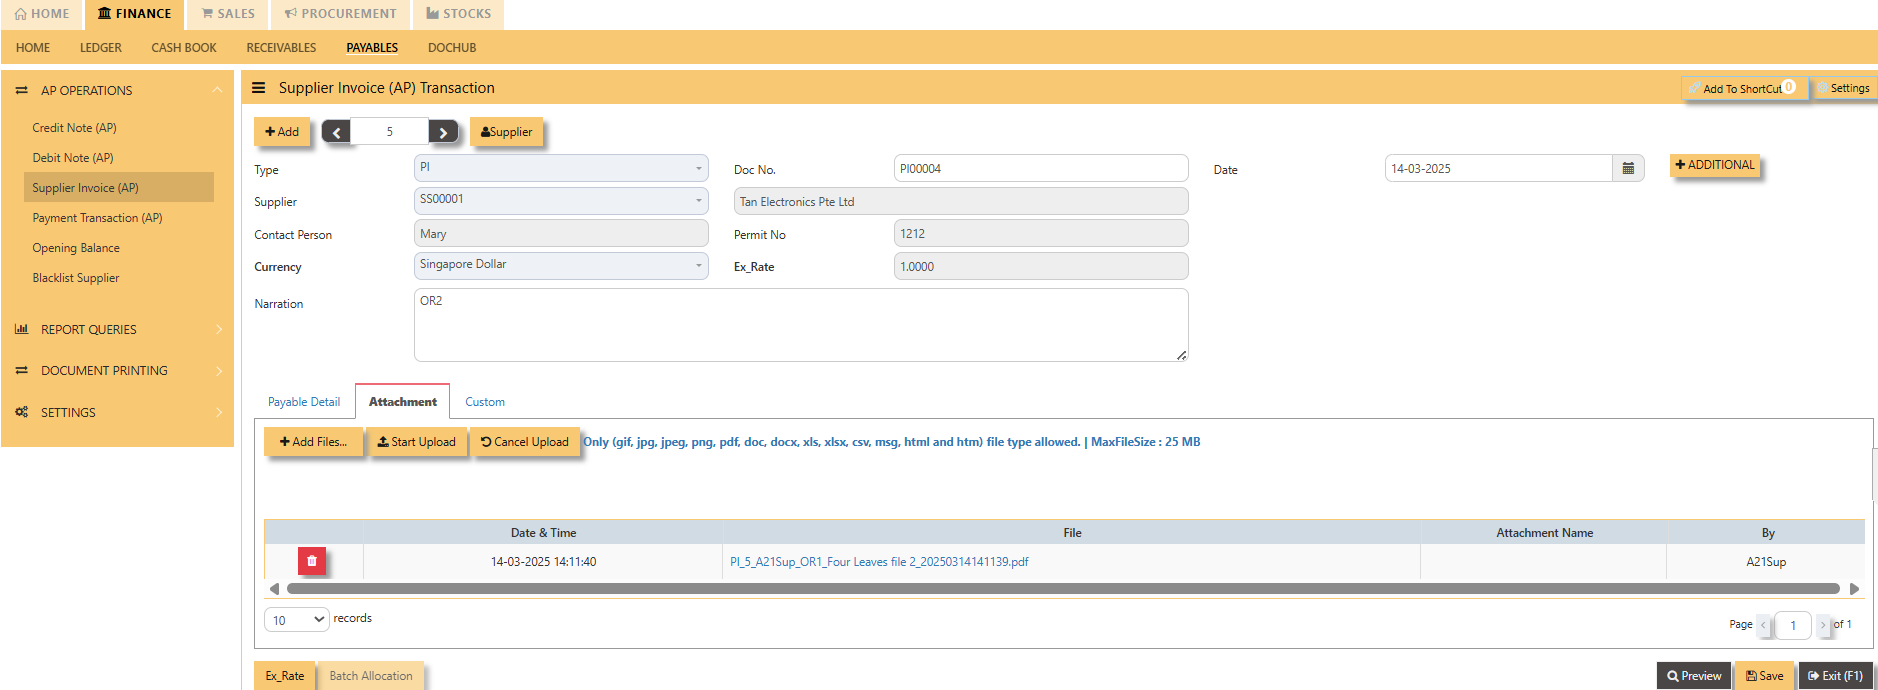
Then, ATTACHMENT tab, will list the saved doc-
- DATE AND TIME– date and time of upload
- FILE – filename of document
- BY – user login
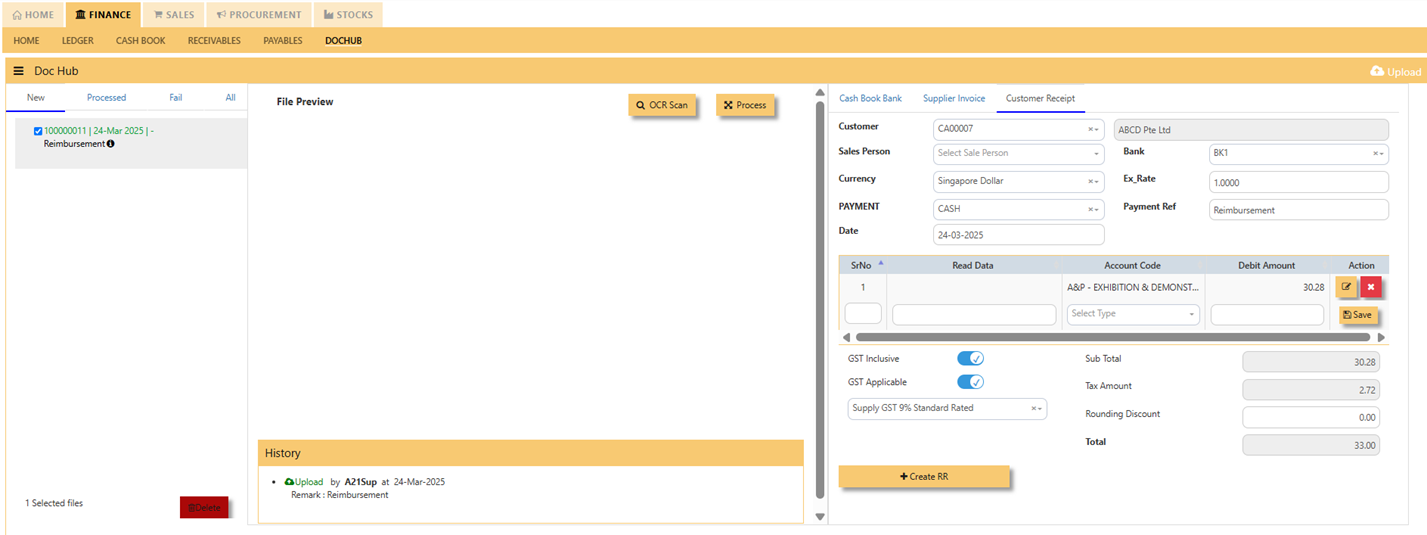
DOC HUB TO CUSTOMER RECEIPT [CREATE RR]
HOW TO ADD FROM DOC HUB TO CUSTOMER RECEIPT OR RR?
- OCR SCAN – click or
- PROCESS – click
- CUSTOMER RECEIPT TAB - select
- CUSTOMER CODE - select
- SALESPERSON - select
- BANK – select
- CURRENCY and EX RATE– default to SGD and 1.0
- DATE – default today
- ACCOUNT CODE – select account code
- AMOUNT – key in
- GST INCLUSIVE – click
- GST APPLICABLE-click and select gst type
- CREATE RR - click to save
RR ENTRY will be auto-created, in HEADER and DETAIL tab will reflect according to the doc hub as entered:
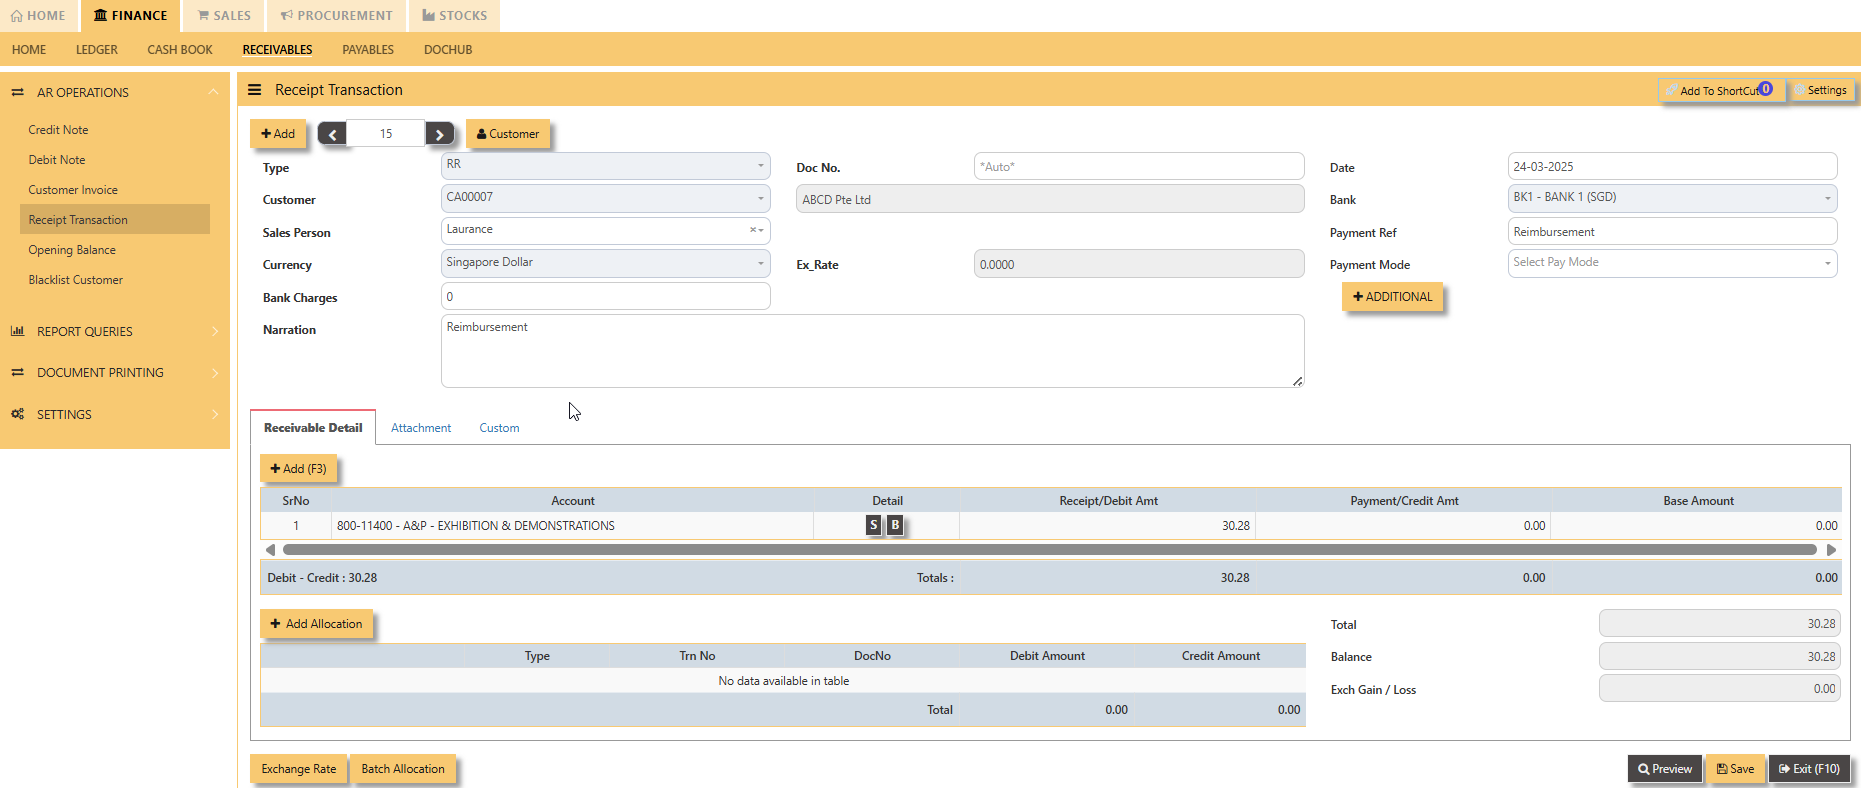
Then, ATTACHMENT tab, will list the saved doc-
- DATE AND TIME– date and time of upload
- FILE – filename of document
- BY – user login
