
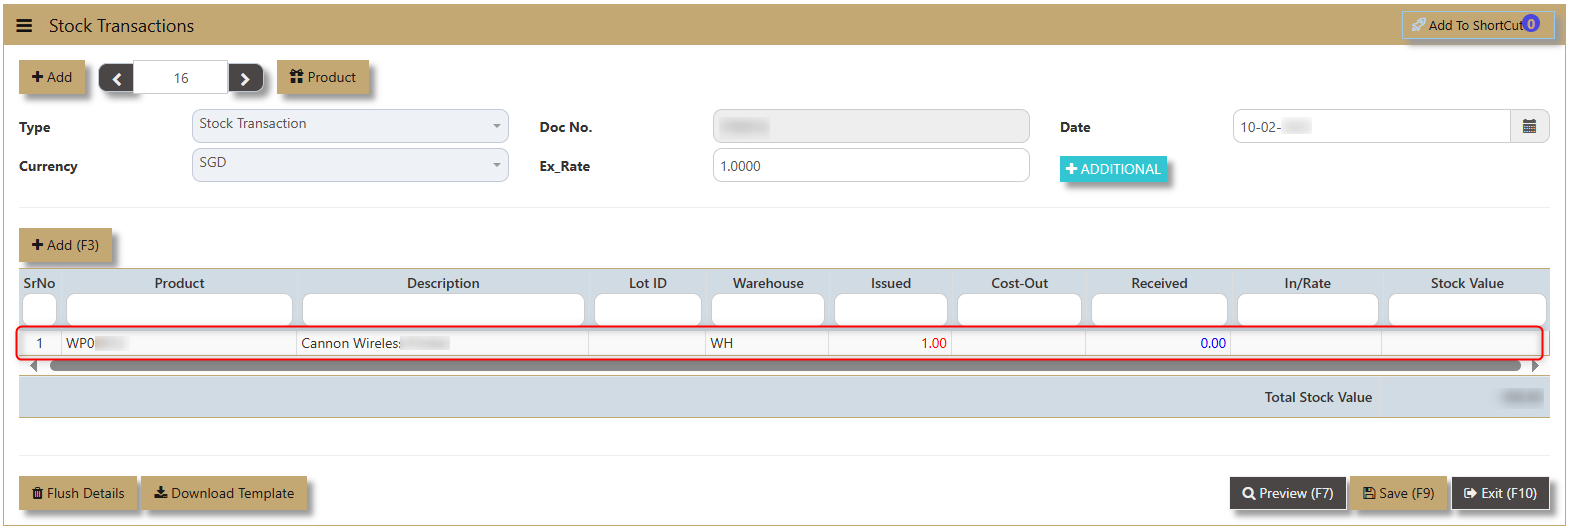
Stock Transactions
TheIn UNIQ365 stock transaction is the other option that handles the movement of inventories beside creation of sales or purchase transactions. The issue and receipt of stocks are not related to sales and purchases.
How to Create Stock Transactions?
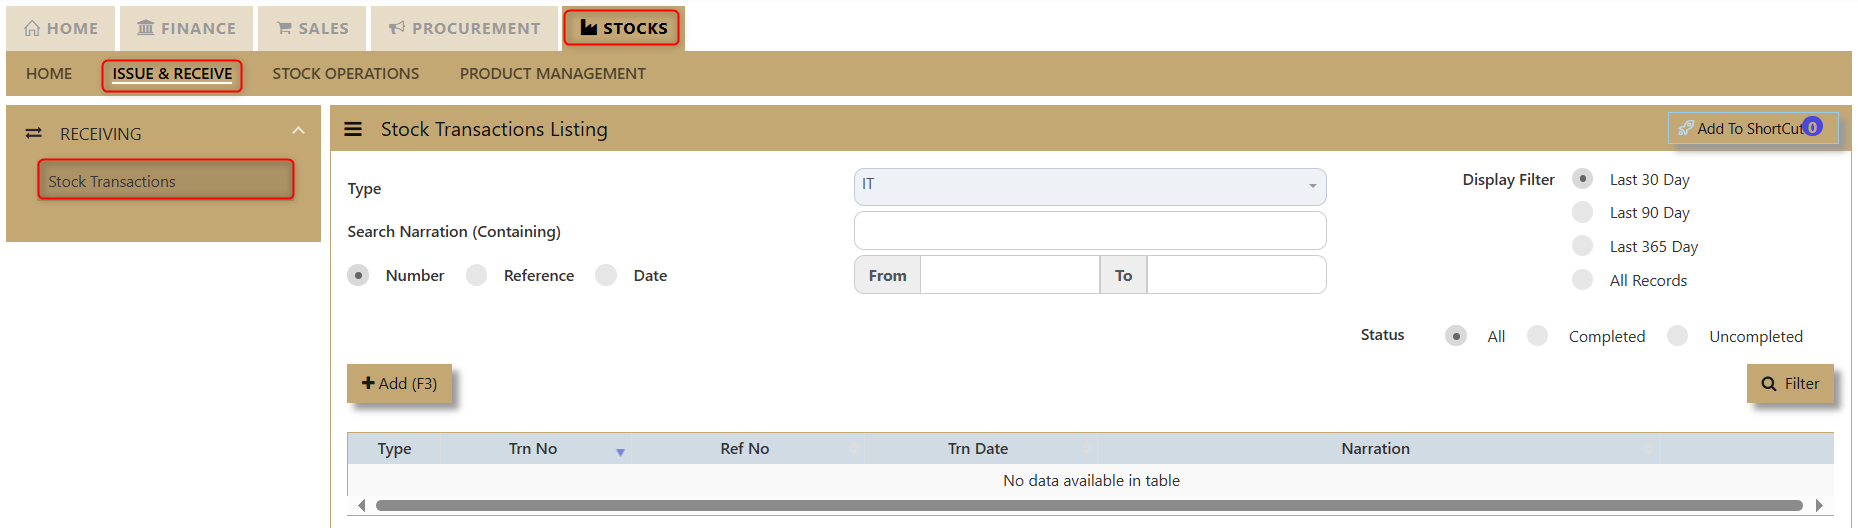
1. Click on Stocks – Issue & Receive – Stock Transactions icon for following screen.
2. Click Add (F3) to create new record.
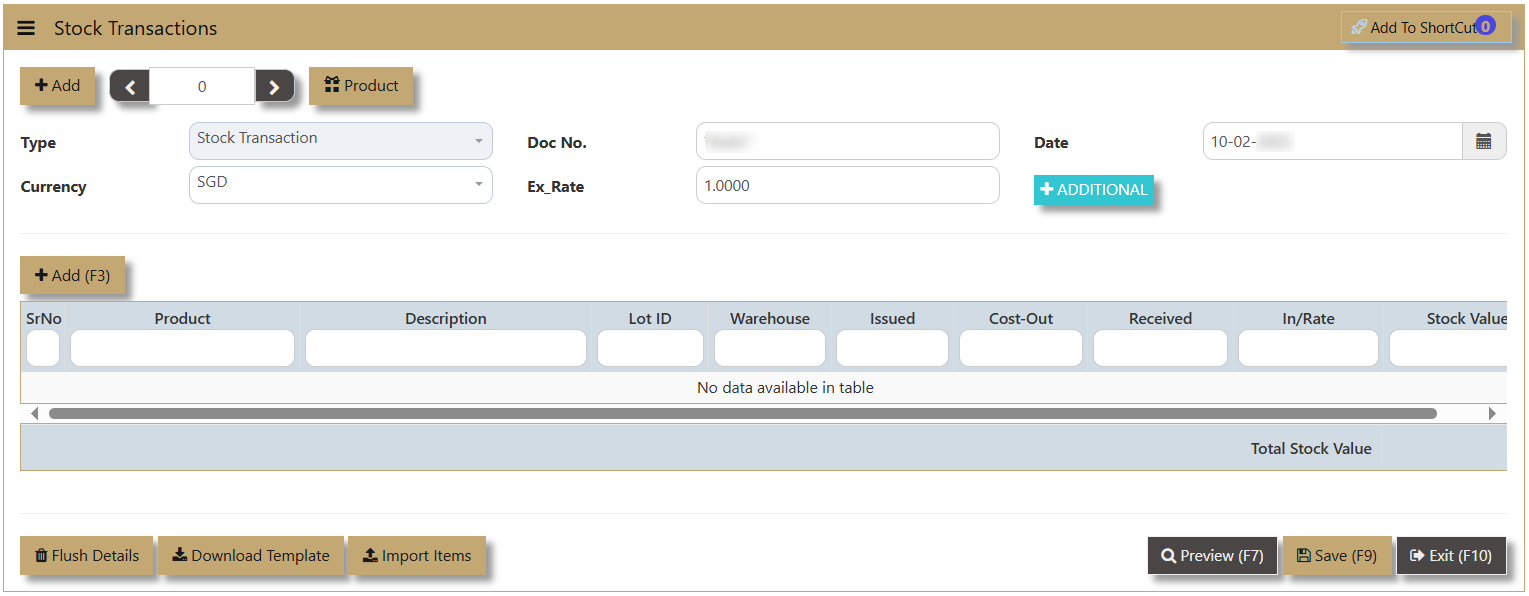
3. Type option is a autogenerated by the system which means user is under Stock Transaction type.
4. Select which Currency applies with the transaction (e.g., SGD, USD, EUR).
5. Doc No depends on the setting the user has set within their account books. It can be auto generated or manually encoded.
6. Ex_Rate is the exchange rate applicable to the certain stock transaction.
7. Date when the stock transaction was made..

The Product provides an overview of the maintained information that user made in the Product & Service Maintenance.

The Additional button is an additional header info for the transaction if the user wants to indicate PDSU (Project, Department, Section, Unit) and Narration for the transaction.
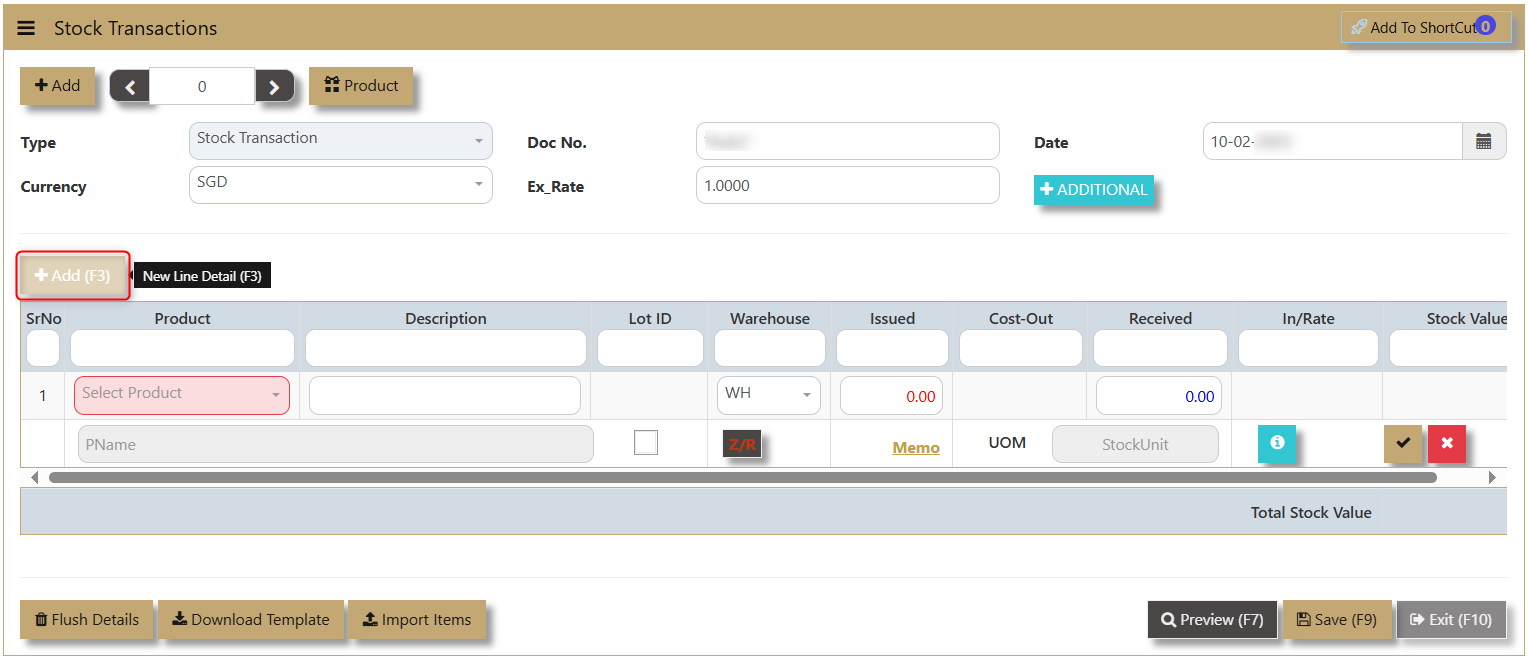
8. If user clicks the Add button, a new line detail will appear with a dropdown that includes fields for Product Code, Description, Lot ID, Warehouse, Issued, Cost Out, Received, In Rate, and Stock Value. These fields allow users to input or select the necessary details for managing the product efficiently.
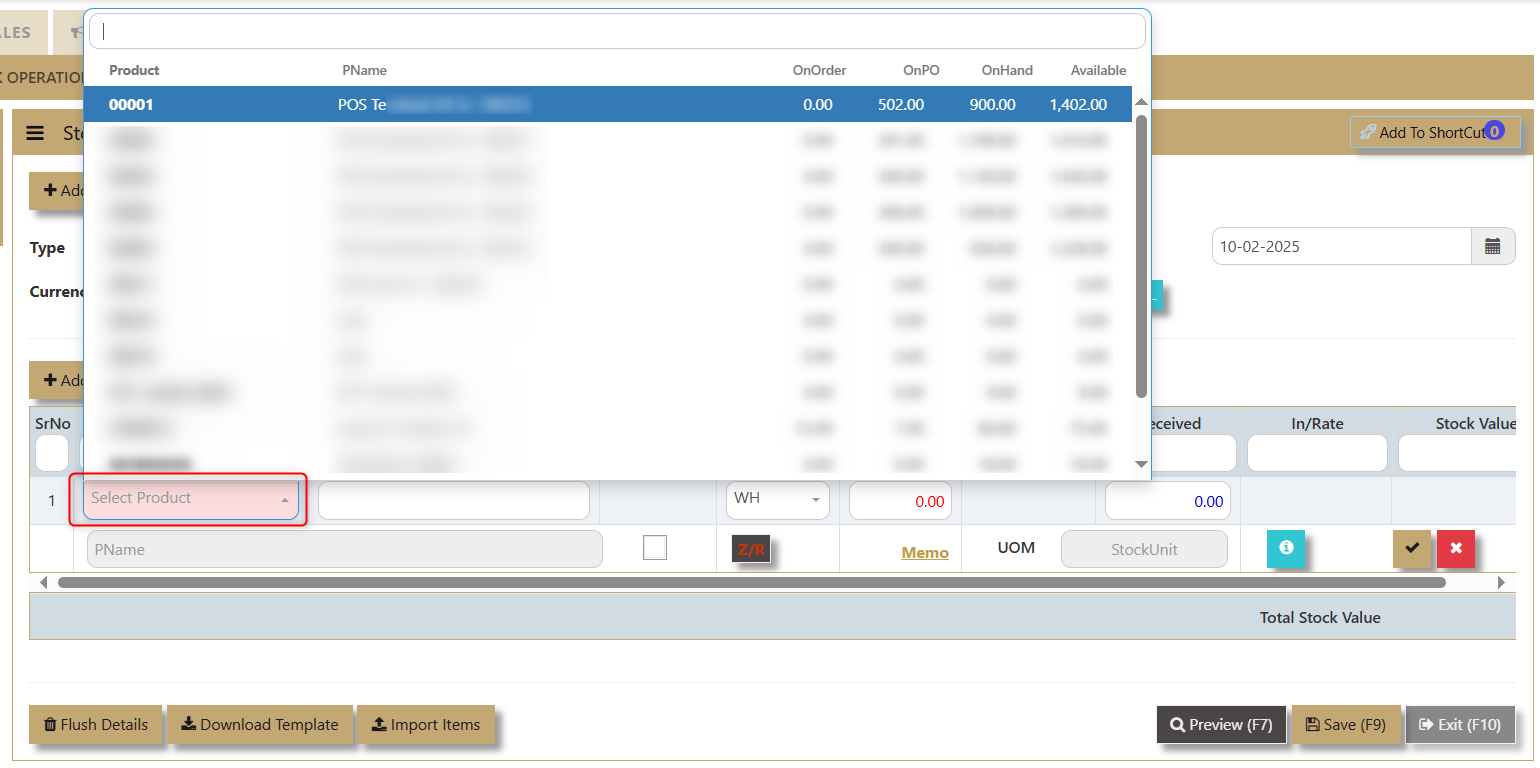
The Select Product dropdown, a list of products involved will appear. The list will display the Product Code, PName (Product Name), and details such as Number of Stock on Order, On Purchase, On Hand, and Available. This allows users to easily select the relevant product and view its current inventory status before proceeding with further actions.
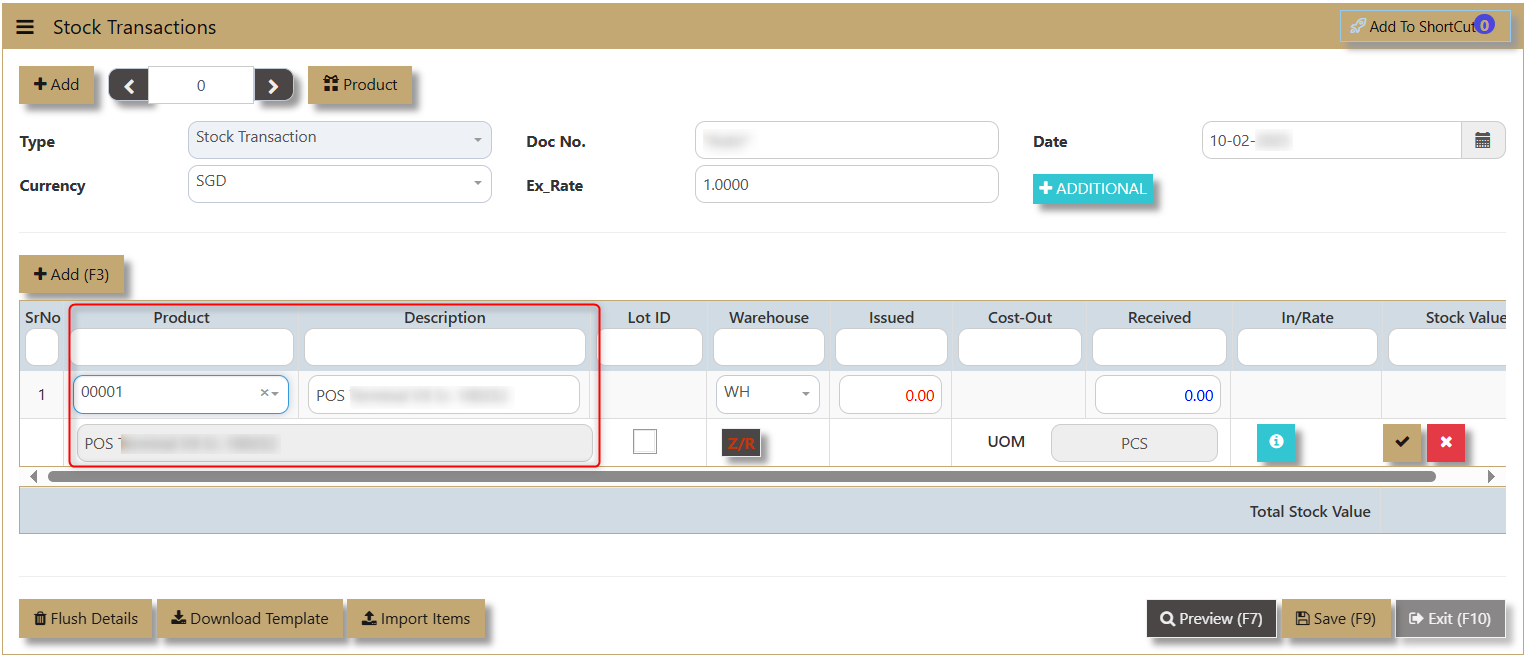
Uniq365 will automatically populate the Product and Description Field once the user choose the product to transact.

If the product has an attribute or categorize as Lot Item, a Lot ID will be reflected in this line detail.
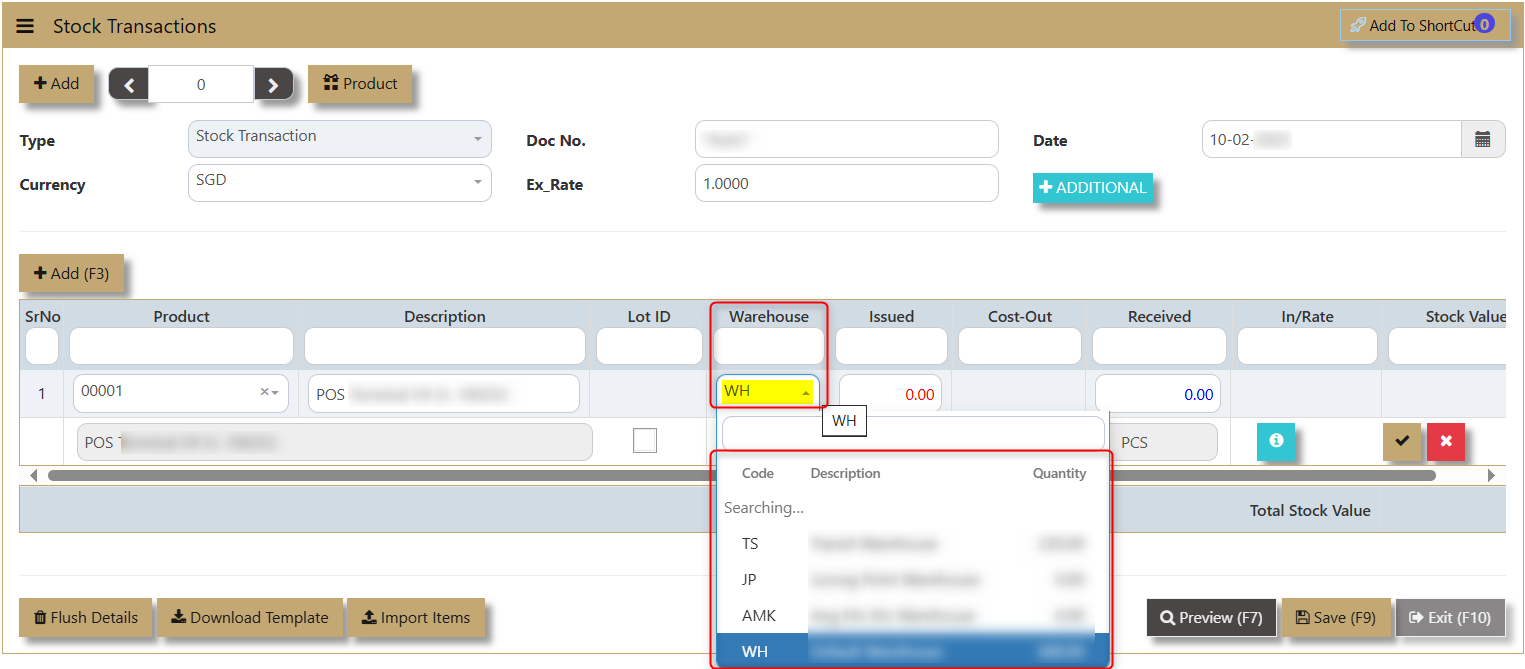
Warehouse (WH) dropdown shows available warehouses for issuing or receiving stocks, displaying the Warehouse Code, Description, and Quantity for each product.
Issued and Received Transaction and its Cost

1. If the user needs to issue out stock, the Issued-Out field must be filled in with the quantity the user intends to issue.
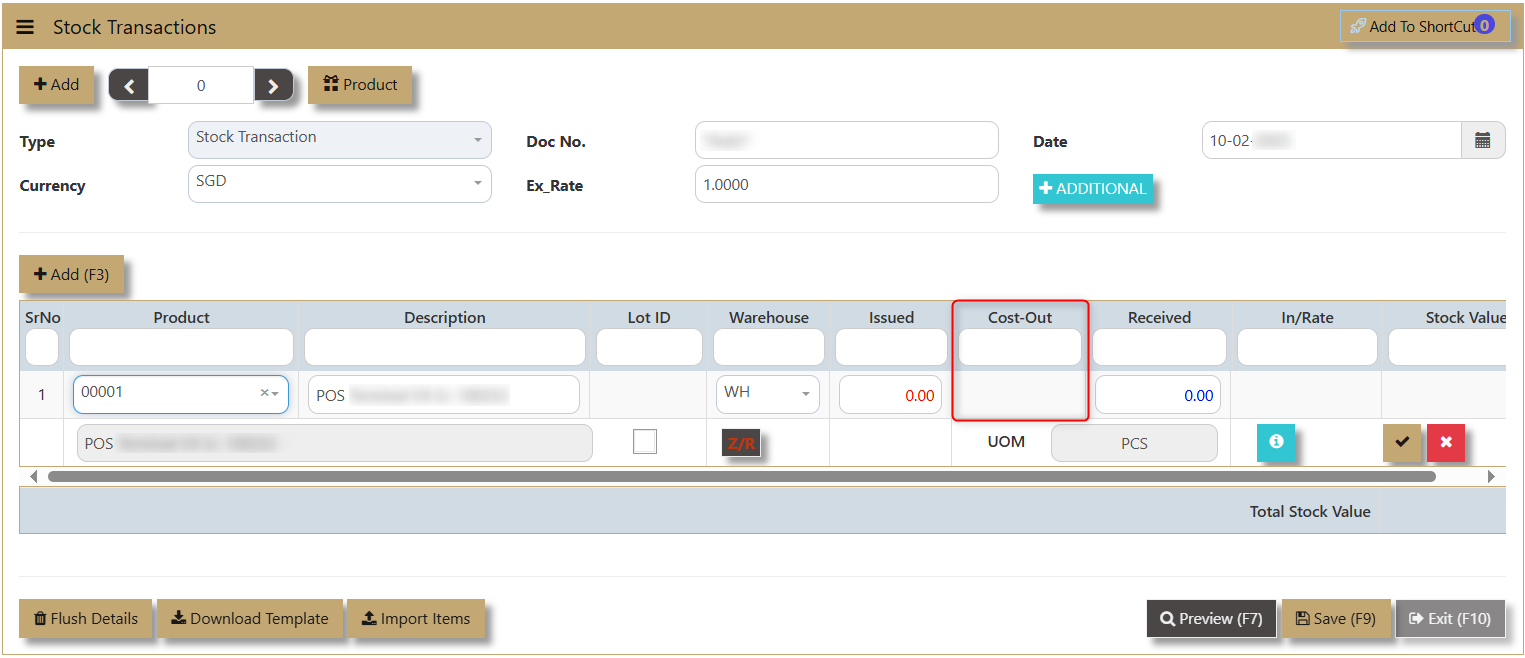
Cost-Out field is auto updated by the system. The user will not have control over what the value being costed out since it is controlled by the valuation technique set up on the product maintenance.
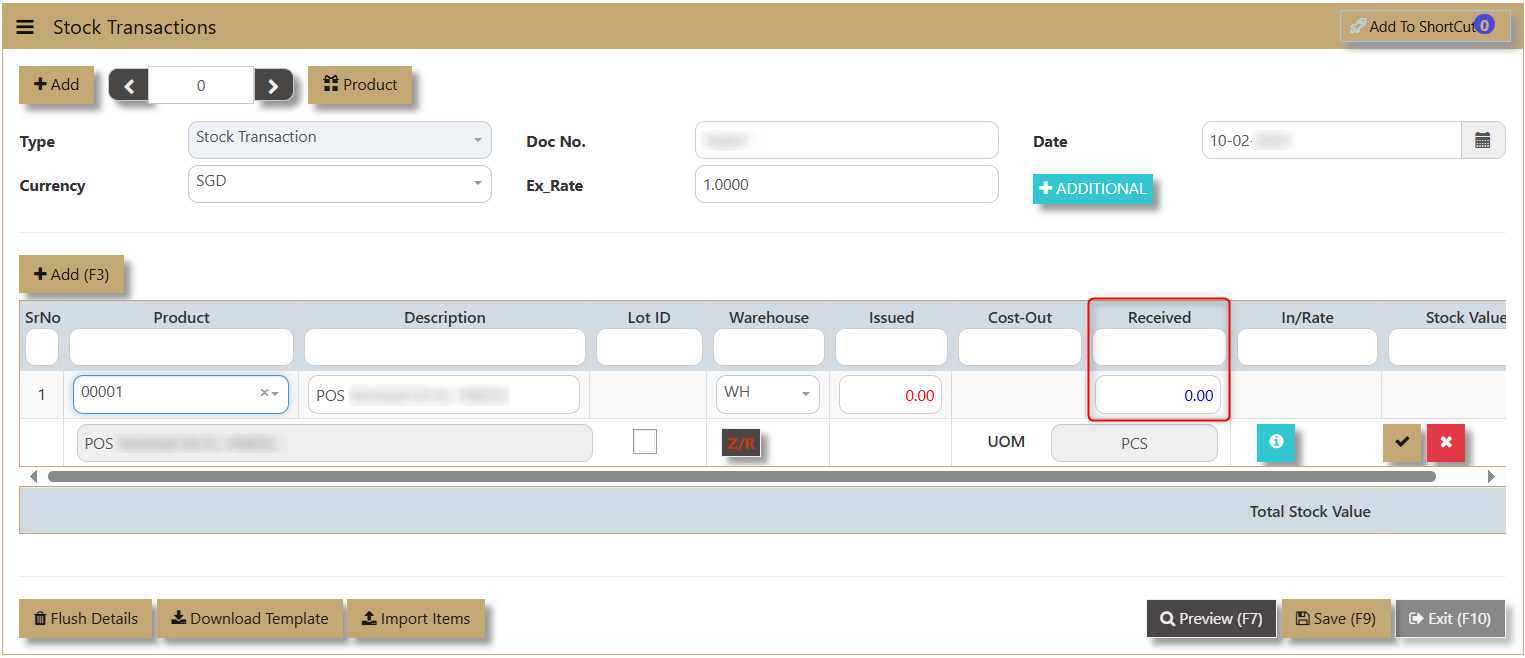
2. The Received field is filled with the corresponding quantity if the user is receiving or issuing in a product.
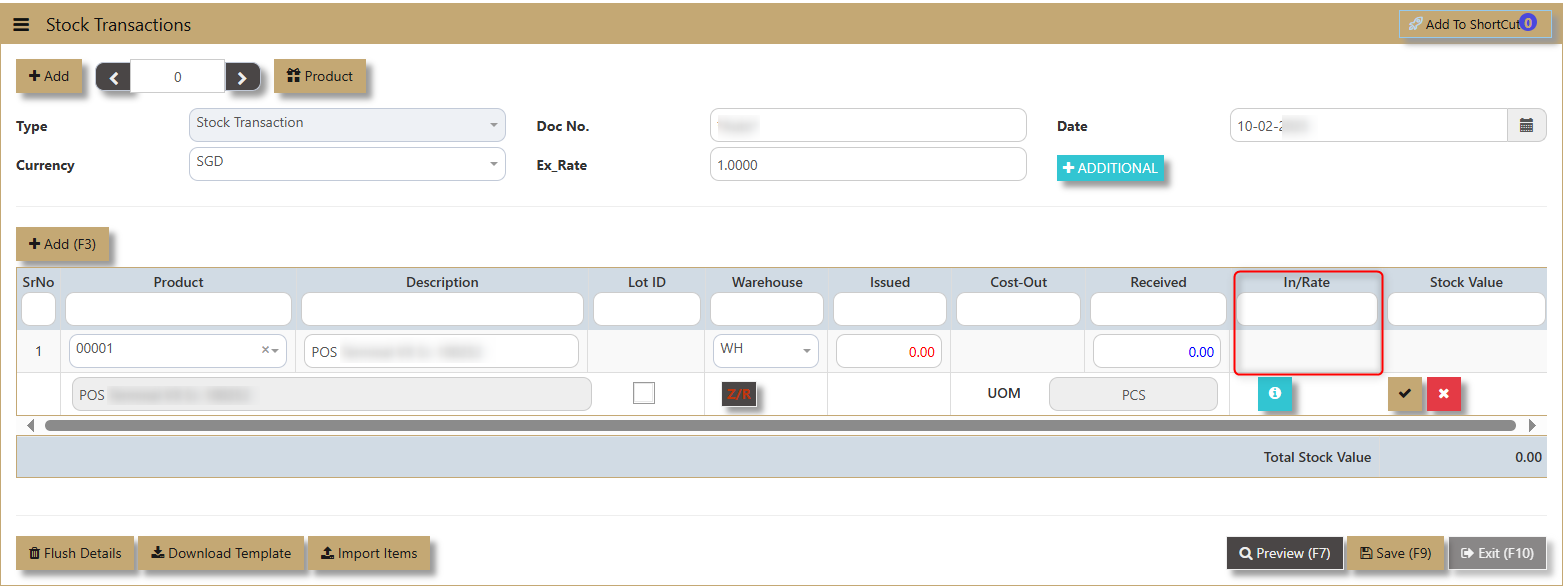
In-Rate field allows user to specify a cost to the item being taken in.
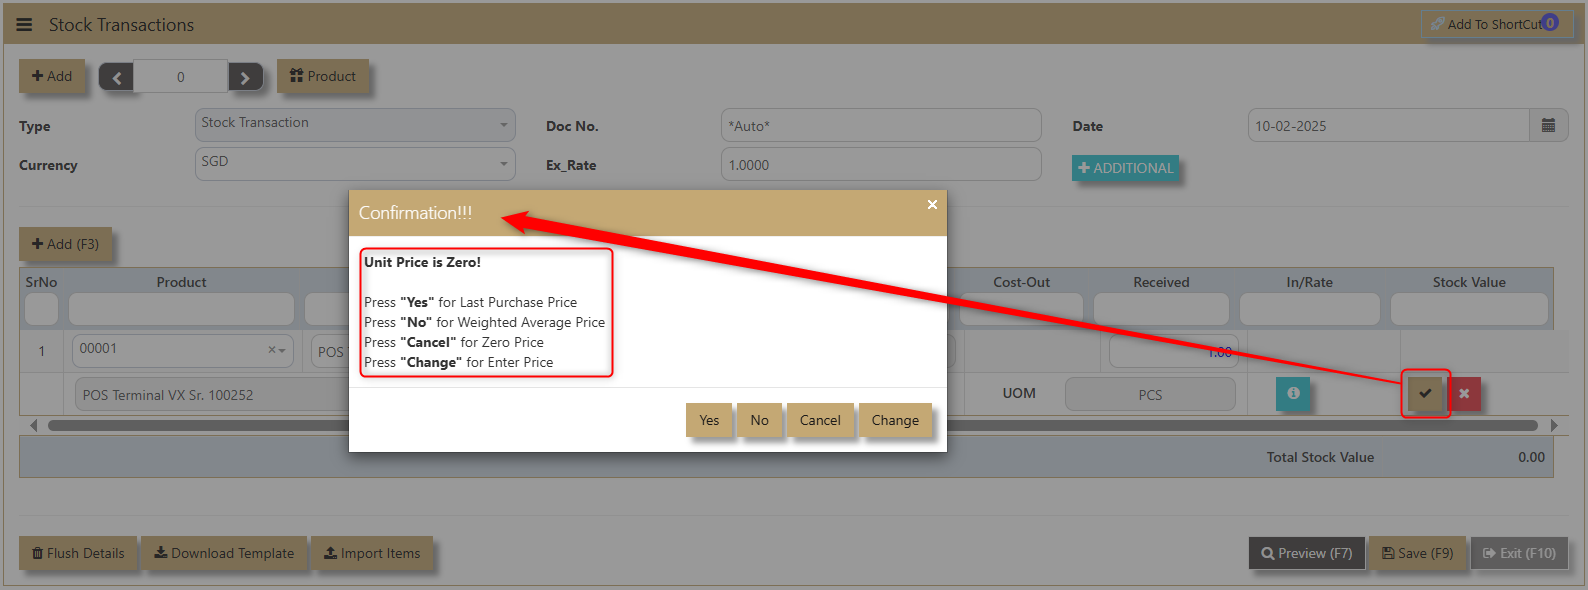
3. Once the user fills in the quantity for Issue or Received, a confirmation will appear asking which Unit Price to apply for the transaction. The options are:
- Yes for Last Purchase Price
- No for Weighted Average Price
- Cancel for Zero Price
- Change to Enter Price manually.
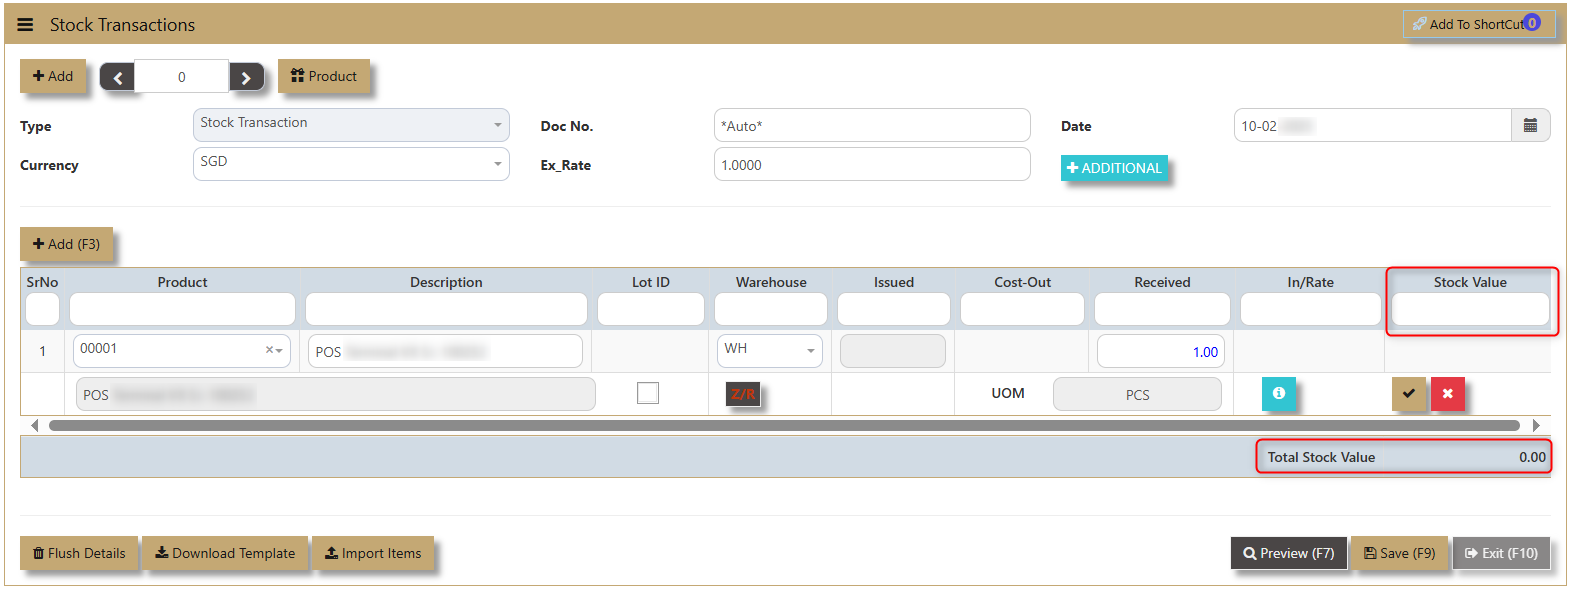
4. After the confirming the Price applicable to the transaction, the system will compute the Stock Value accordingly.
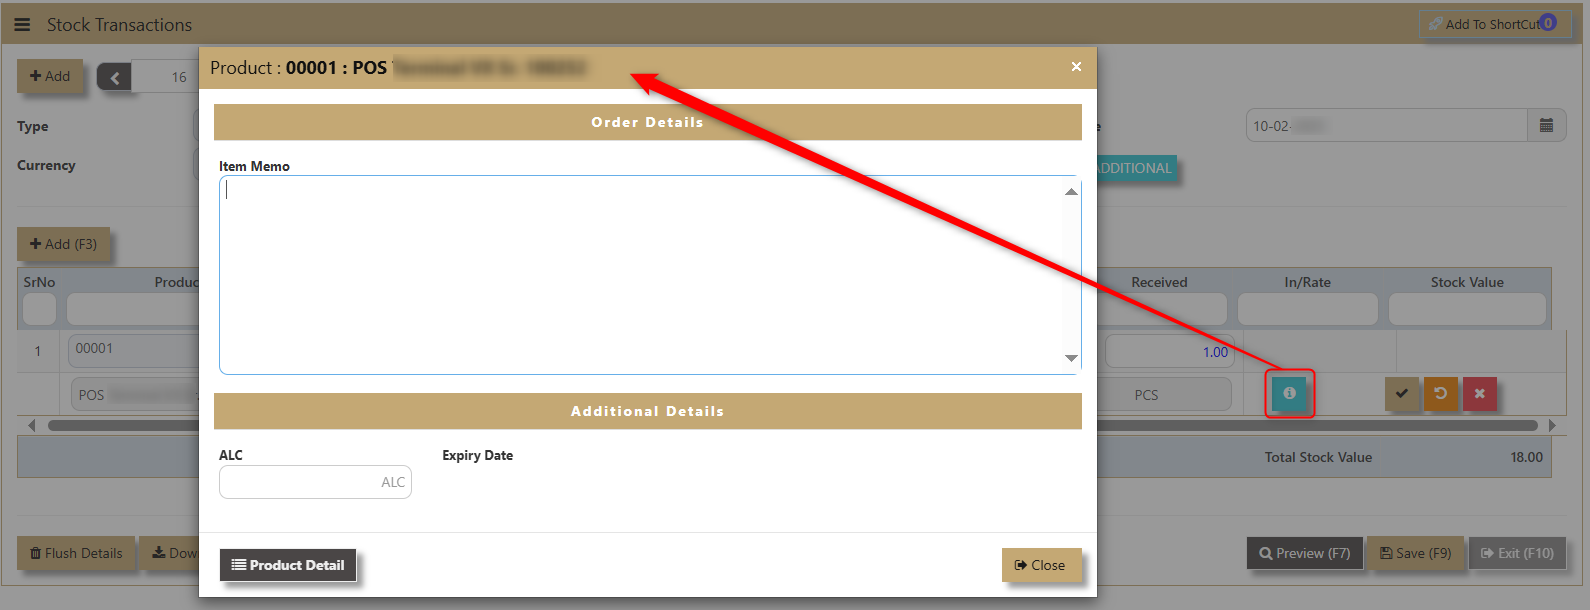
In the line details, user can click on 'i' icon to indicate information for the order detail such as Item Memo and additional details for ALC and its Expiry Date.
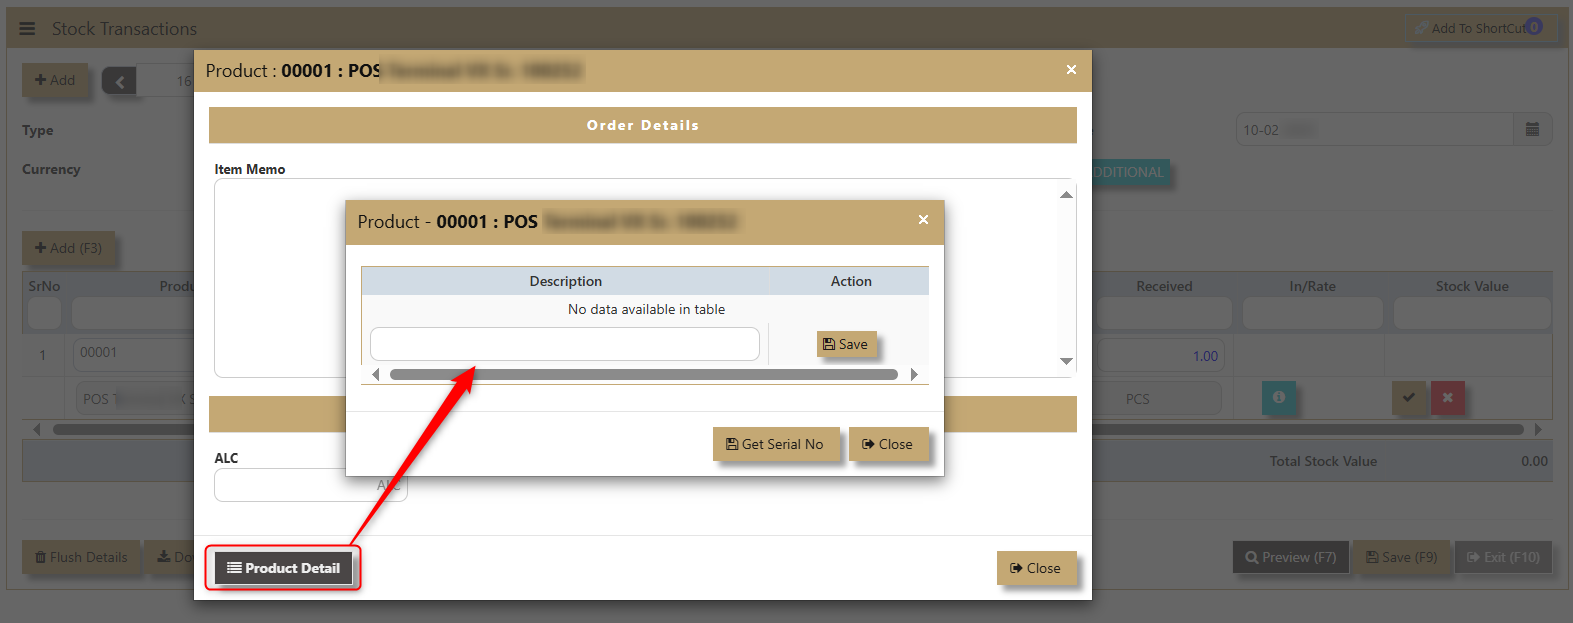
Product Detail button can be used to add any additional description and Get Serial No if the product is classified as Serialized Items in its attributes.
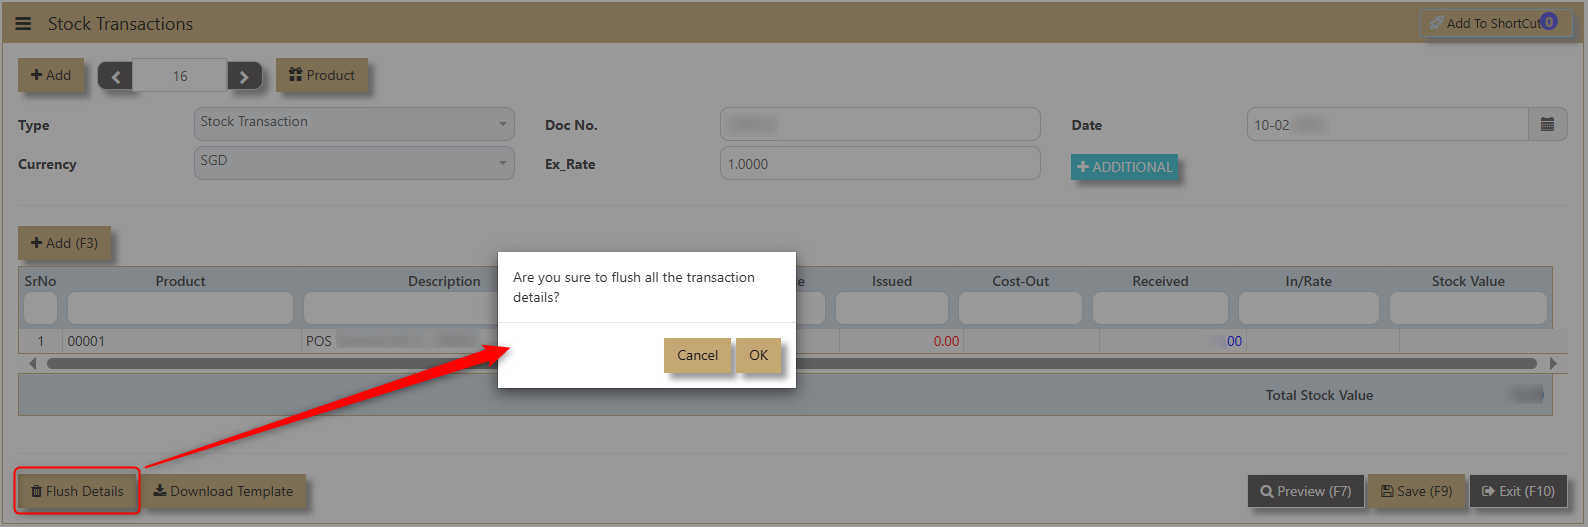
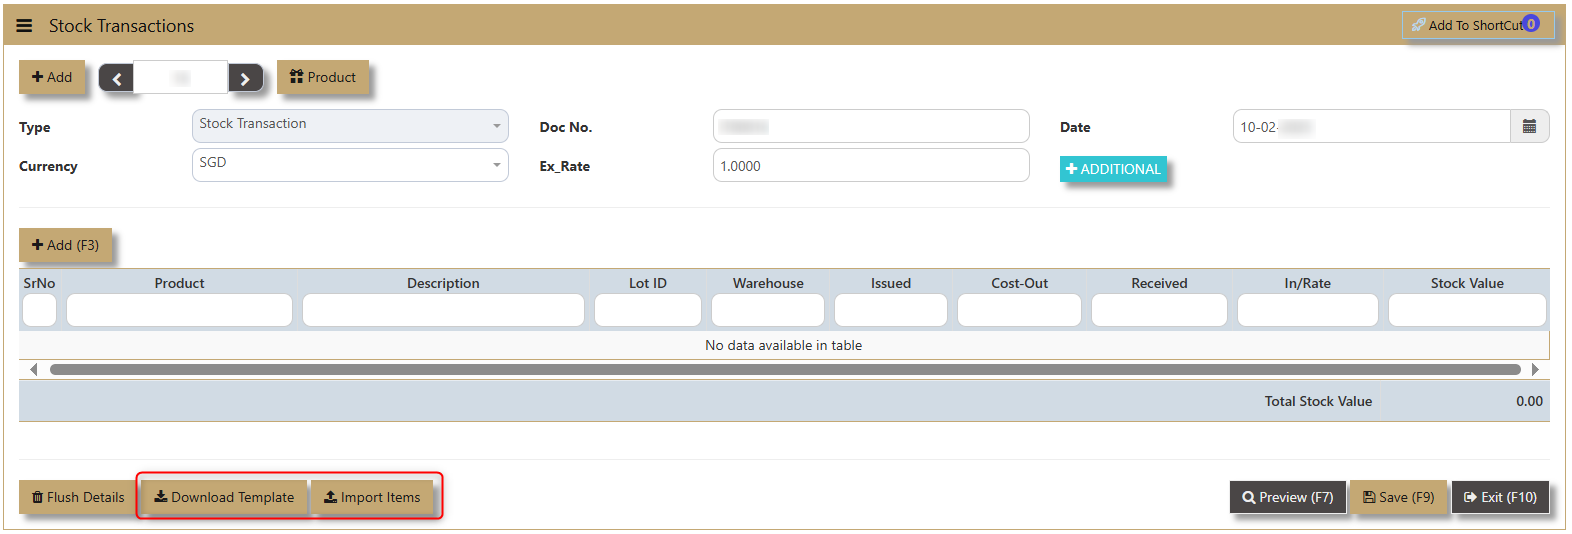
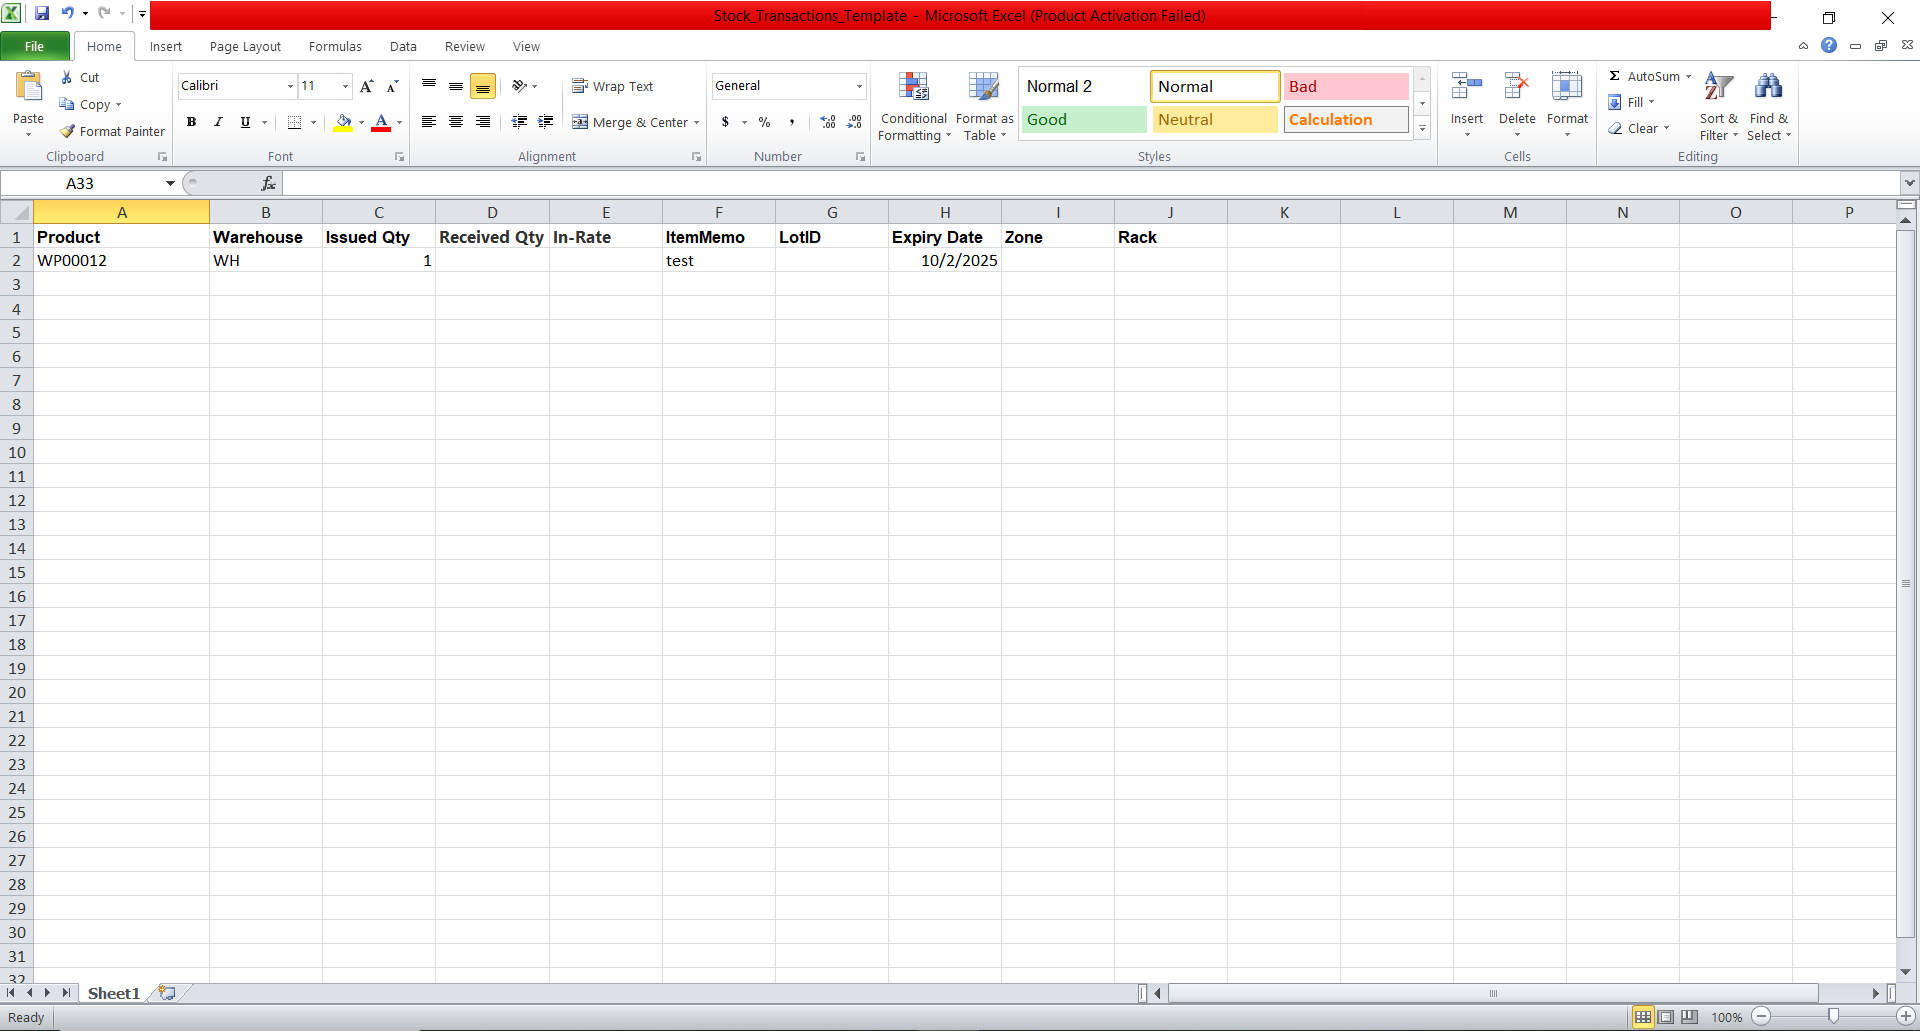
Download Template is the excel format that can be used to simplify the adding of transactions. Just fill out the necessary infomation and click on Import Items and the system will reflect the line details.
5. Make sure to click on 'Save' after the transaction is made.