
Stock Take
This is normally done after a physical stock take is done. After affirming the stock quantity, the user can key in the actual count quantity, after which the user can confirm the stock status by clicking on the “Confirm Now” button. Do note that once the confirm button is clicked, there is no way to reverse the action unless another Stock take is created.
This is because the action will update the stock status as well as creating a GL transaction to adjust the valuation accordingly.
What is Stock Take?
A stock take function in the system is used for inventory count every month or an annual inventory count based from the customer process. Normally a warehouse manager/encoder needed to facilitate inventory count per warehouse and generate the products that are reflected in the inventory.
How to Create Stock Take?
1. Click on Stocks – Stock Operations – Stock Take icon for following screen.
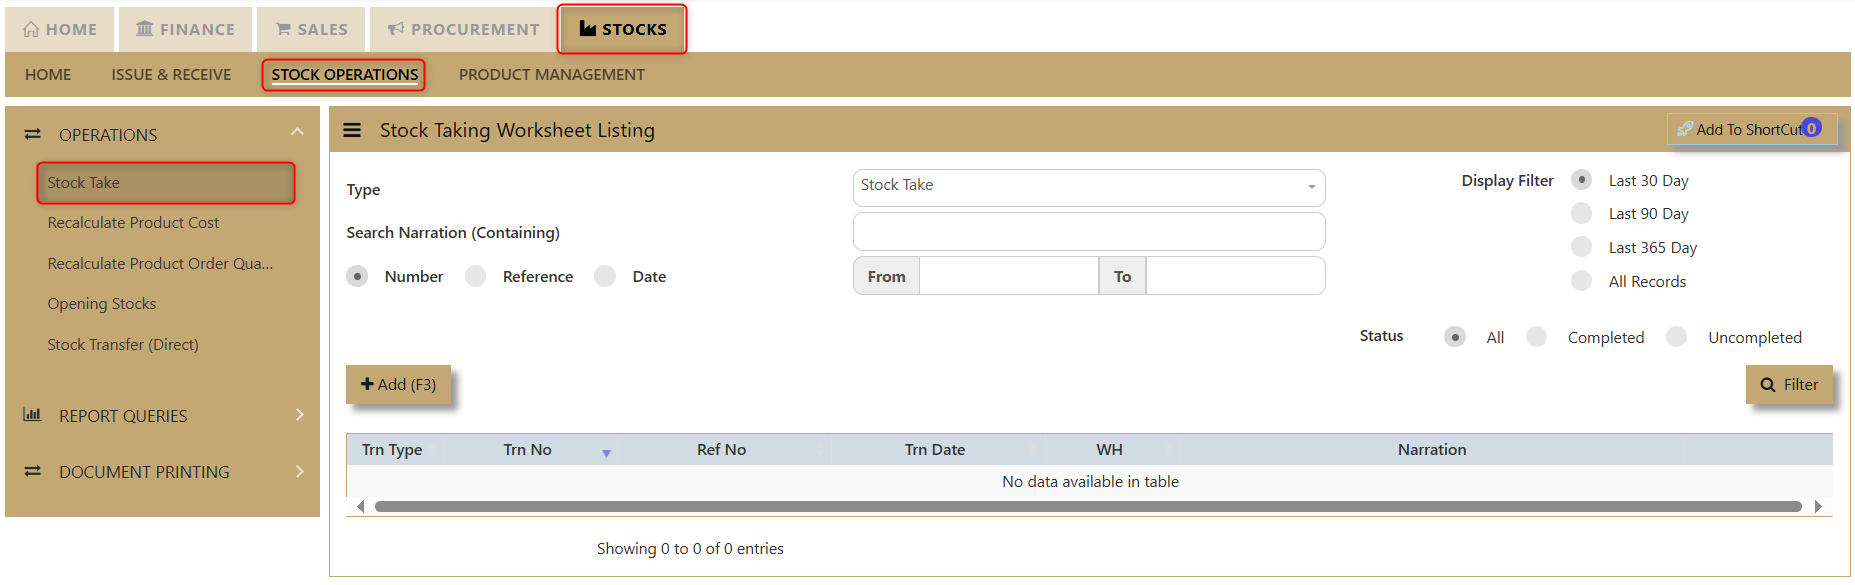
2. Click on Add (F3) to create new transaction.
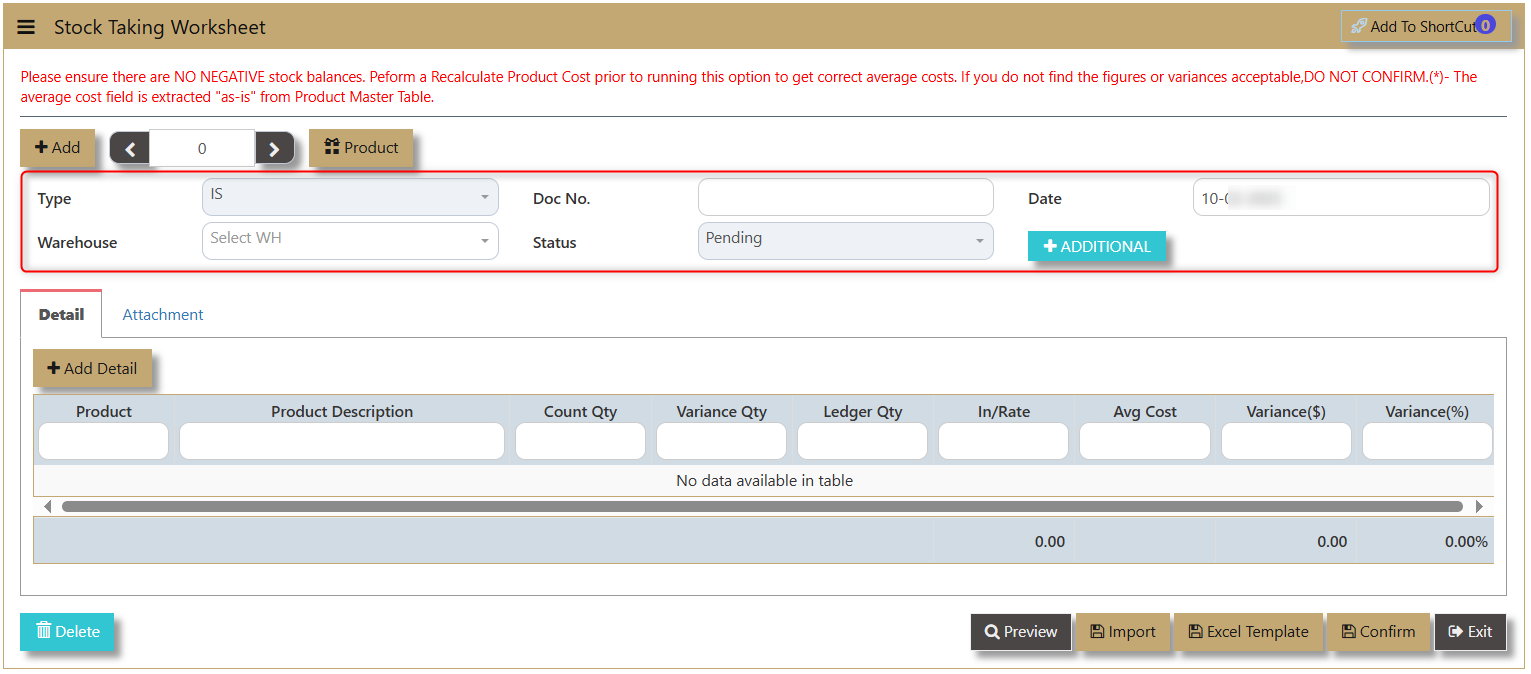
Type - IS is the code of Stock Take transaction and this will automatically appear one transaction is added.
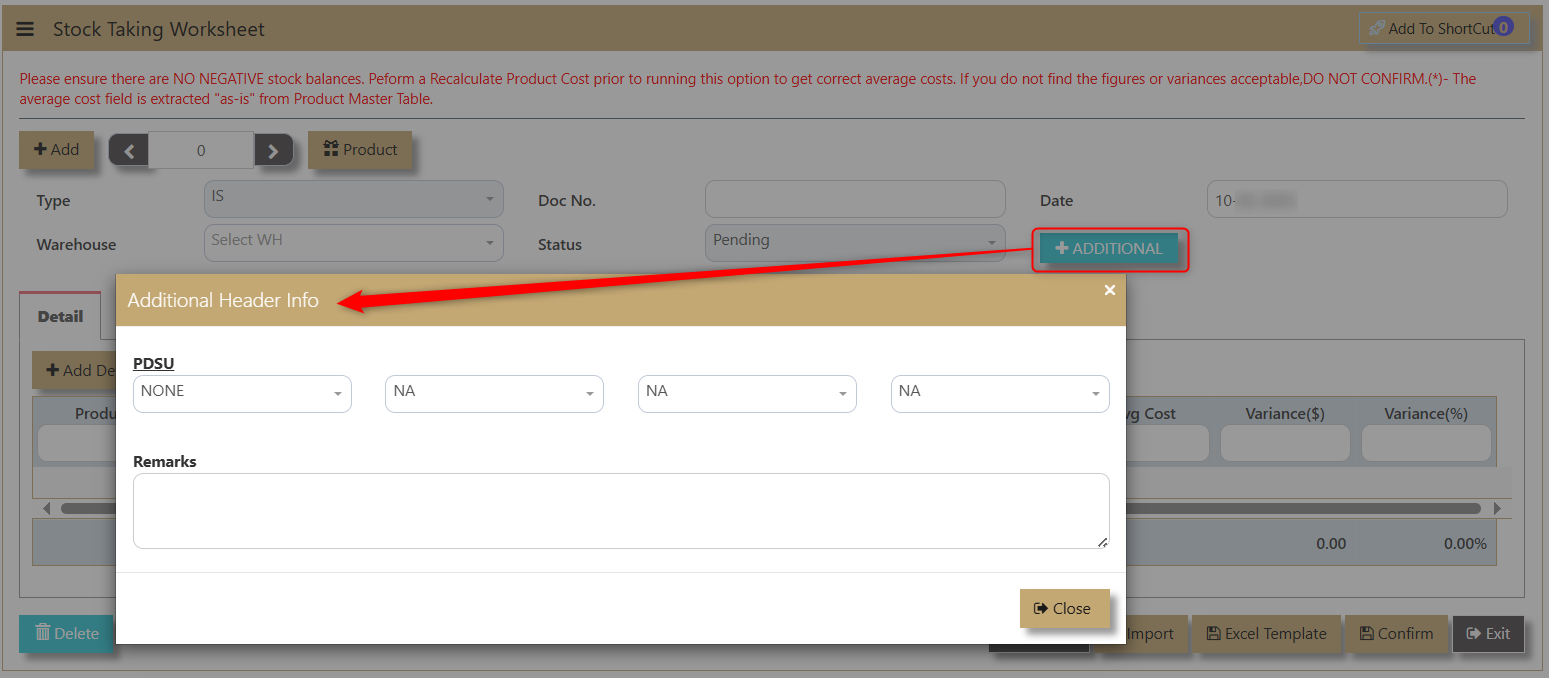
Warehouse - allows user to select on which Warehouse to record the stock take transaction.
Doc No. - enable the user to track the transaction. This can be autogenerated by the system.
Status - Determine if the transaction is Confirmed or Pending by the user.
Date - Shows when the transaction was made.
3. After adding the transaction, a line detail for Product will appear. The user must select which product to transact.
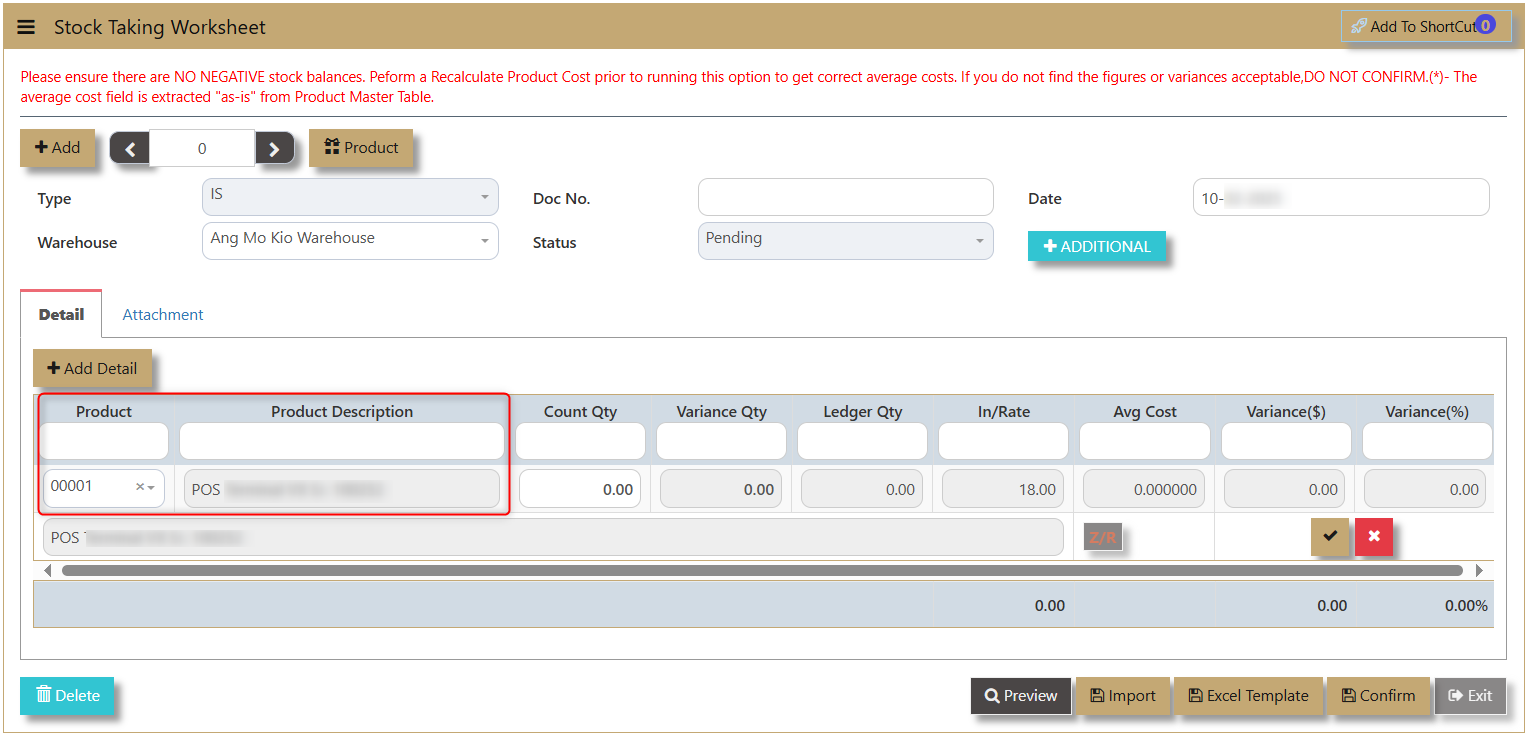
Product & Product Description - Once product code is selected the system will automatically populate the product description.
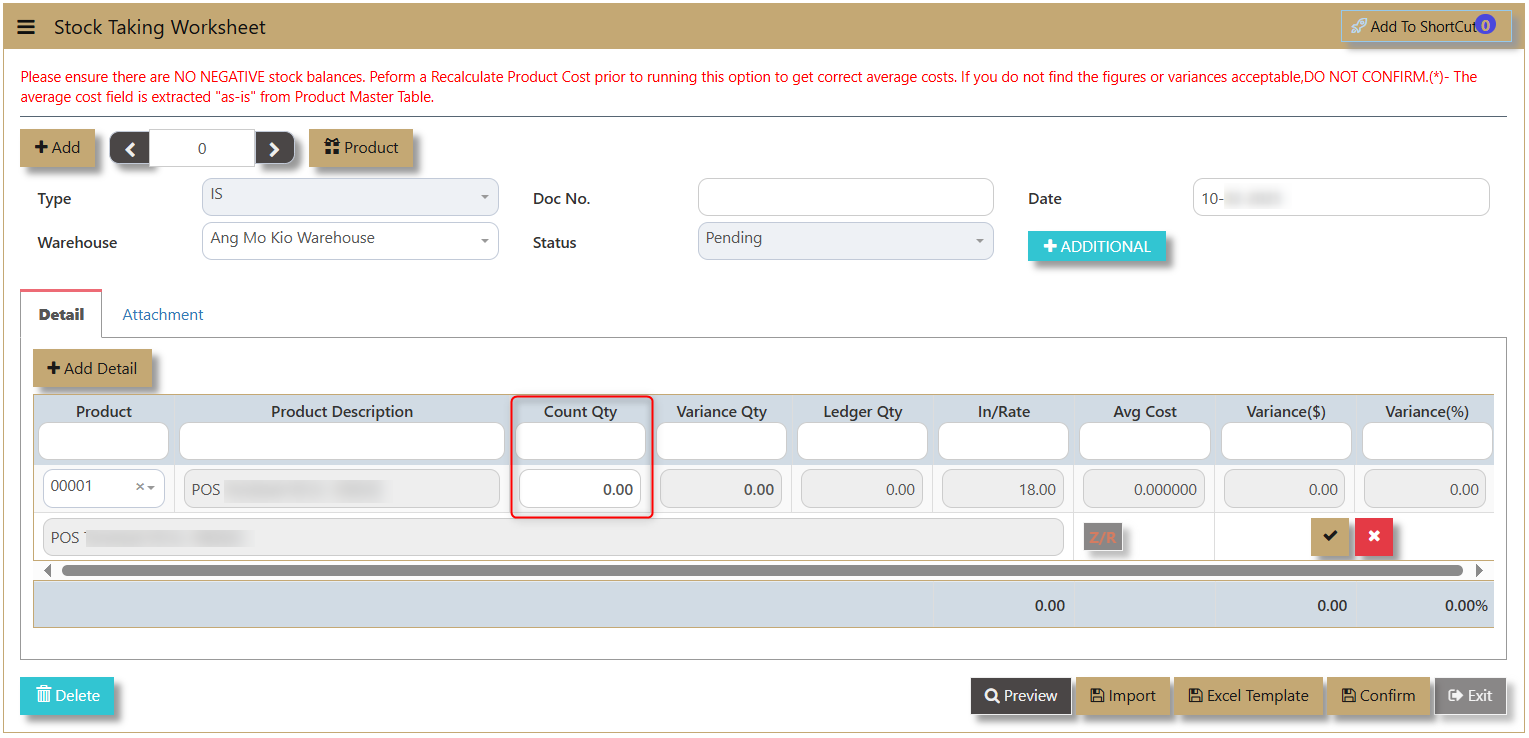
Count Qty - The field where the user will encode the actual count of the product.

Variance Qty - Difference between Count Qty and Ledger. This is the quantity used to adjust on the system.
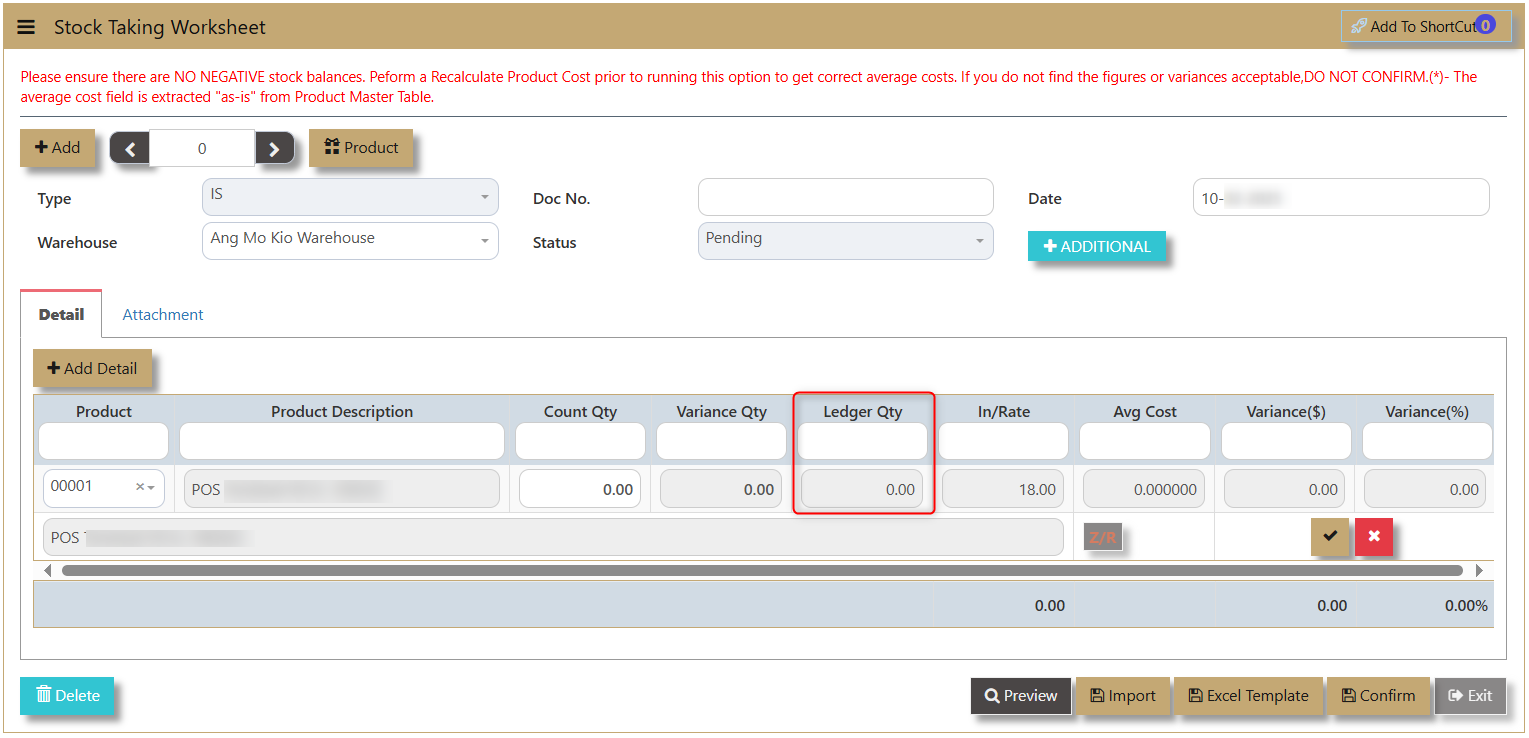
Ledger Qty - This is the on hand quantity of the product within the system.
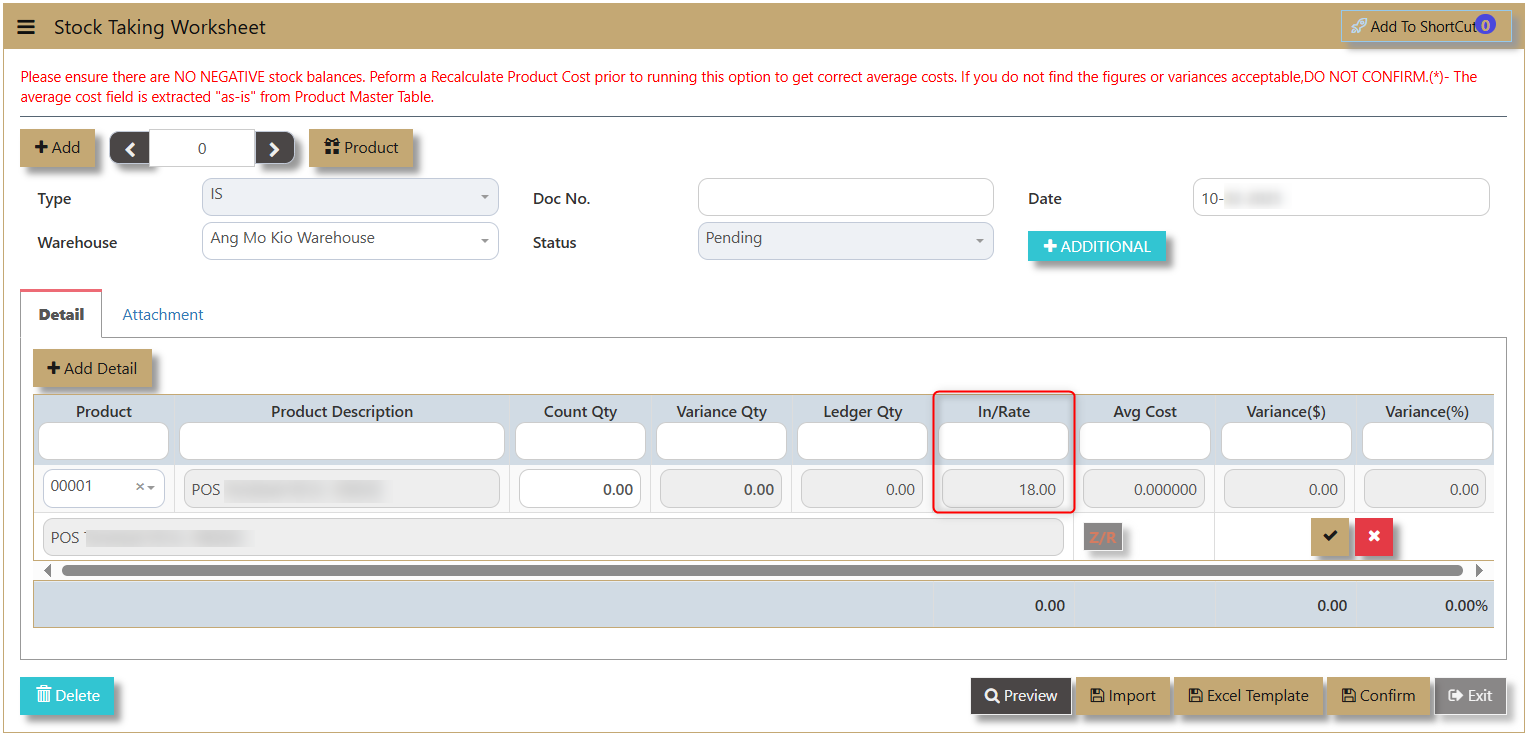
In/Rate - the incoming rate based on the last receipt transaction.
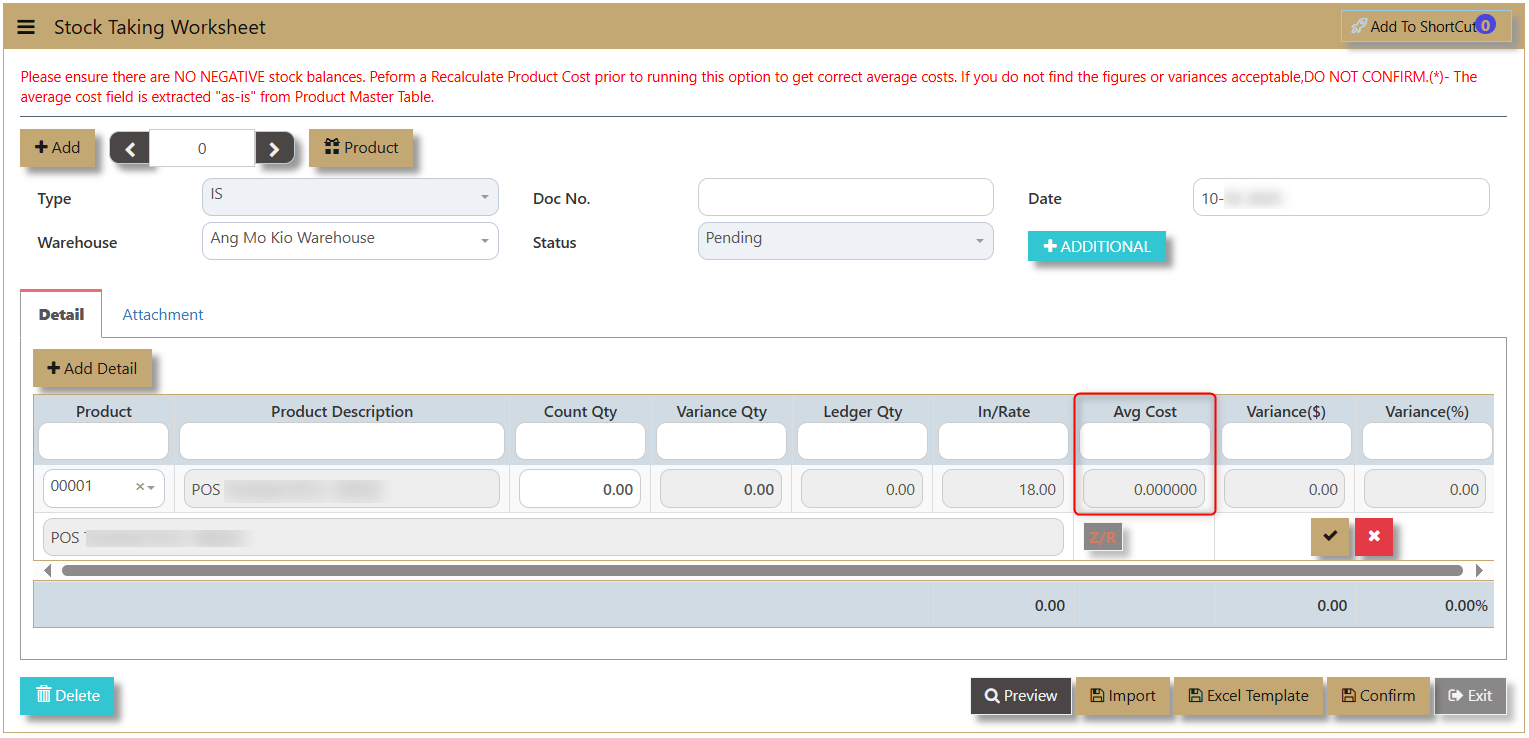
Avg Cost - or Average Cost which is usually generated by the system.

Variance ($) & Variance (%) - This is the amount of Variance in Currency and Percentage.
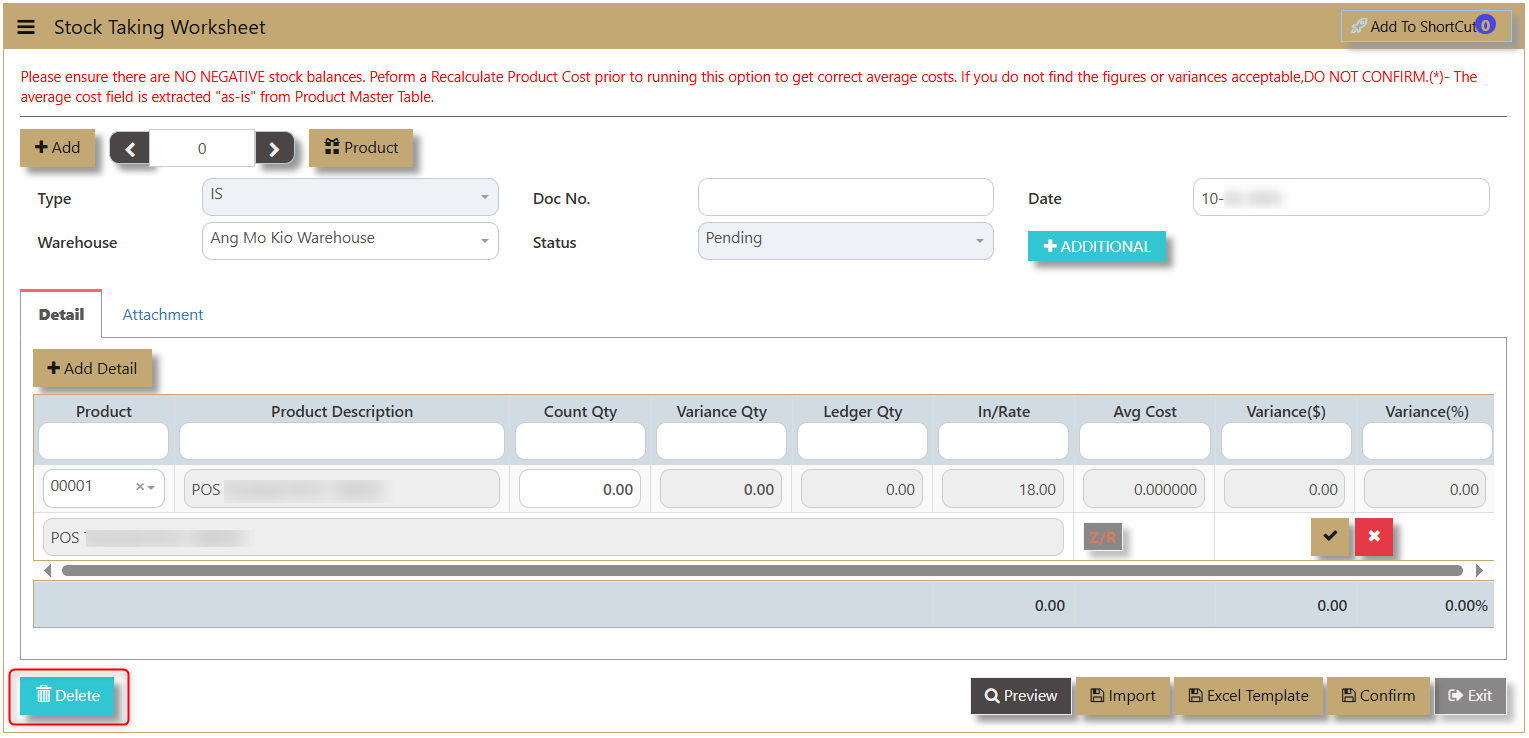
Delete - allows user to delete the line details transaction.

Preview - allows the user to view the transaction and print.

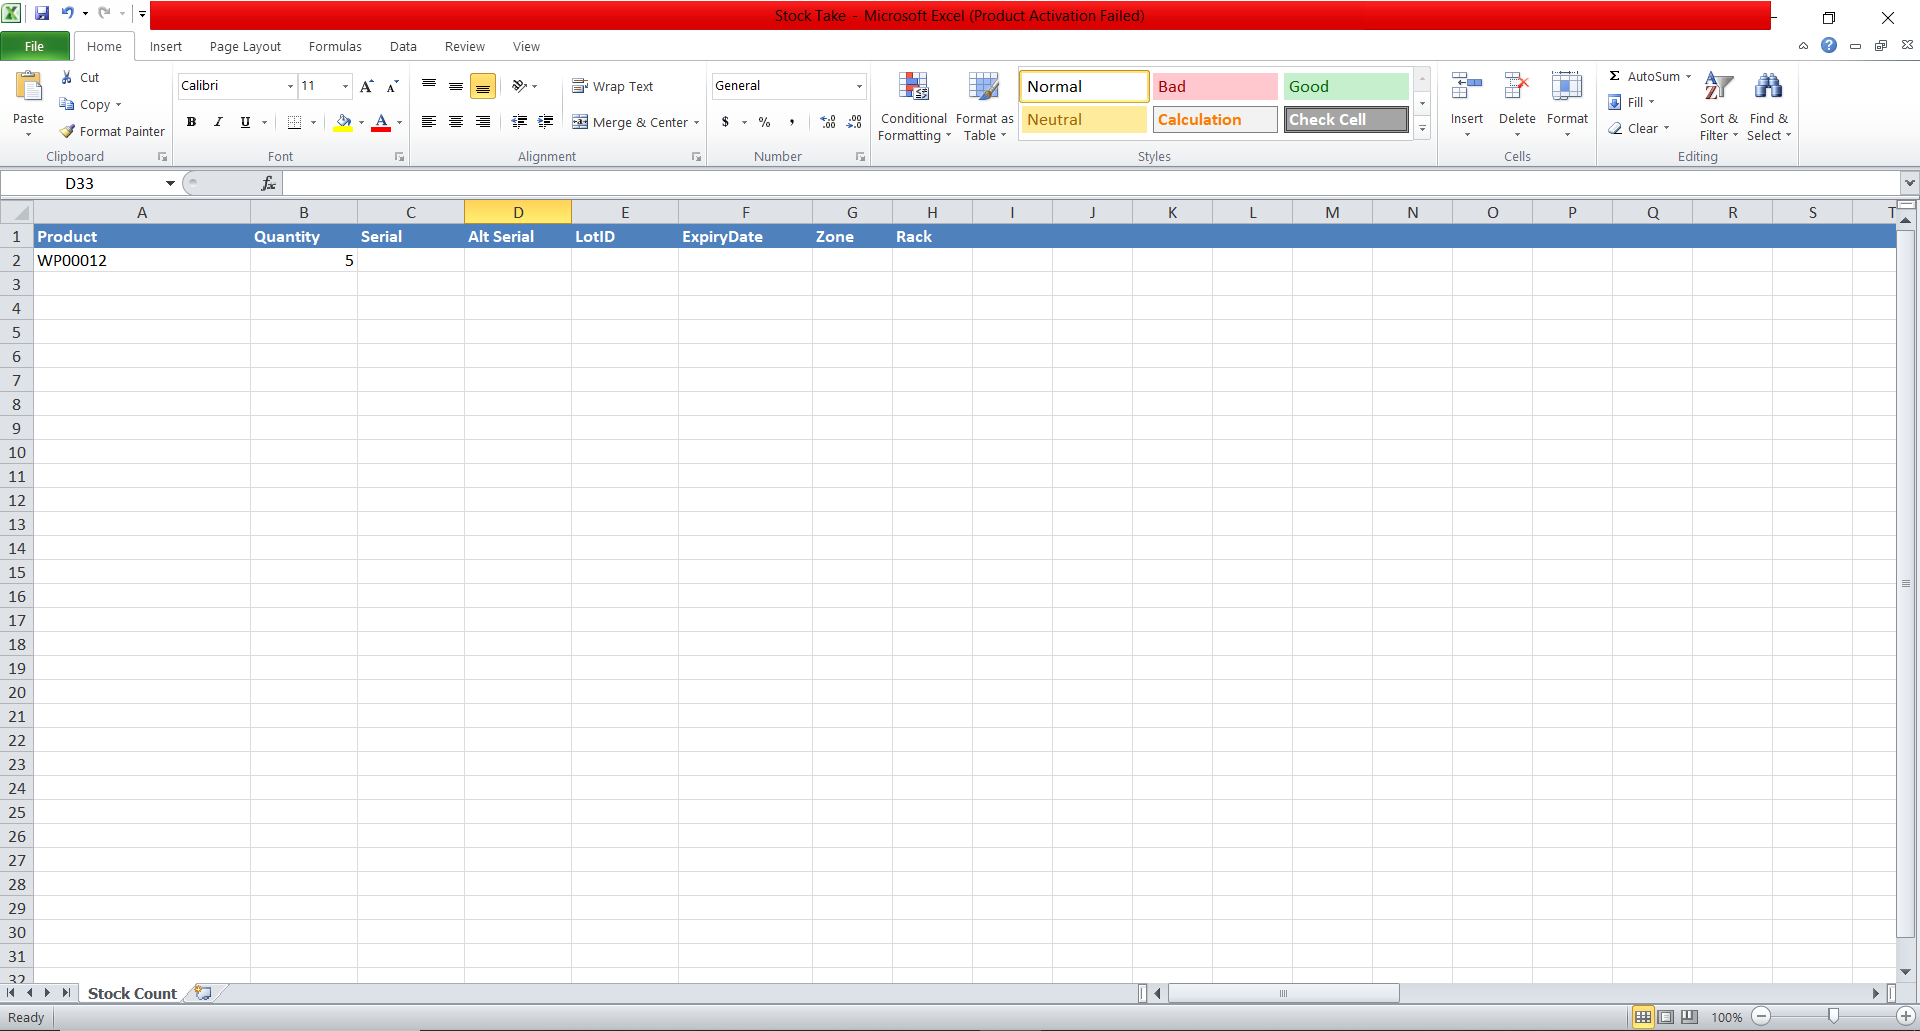
Excel Template & Import - allows user to download an excel format that can simultaneously be imported to the system to record the transactions.
Excel Format:
Import data:
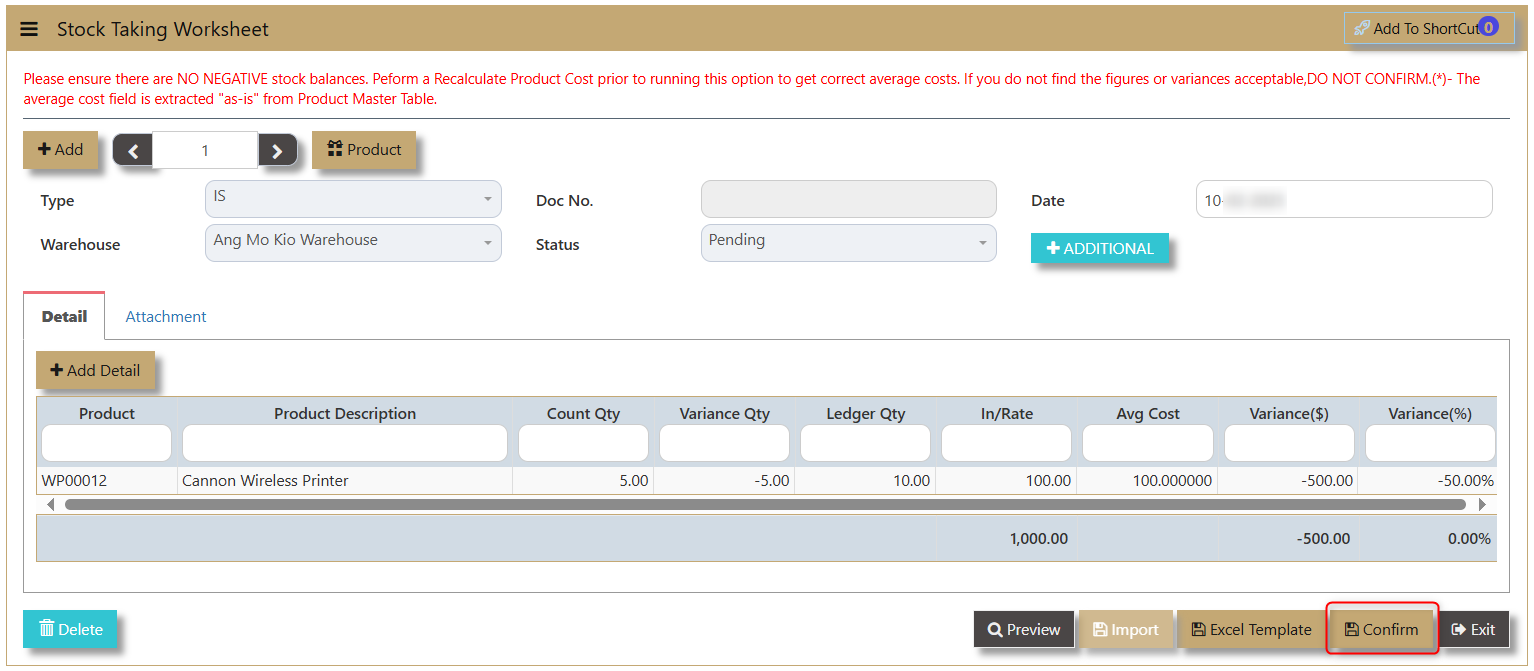
4. After all transaction is made, click on Confirm. Do note that once confirmed, it cannot be edited nor deleted.
Important: Before conducting this option, it is important to note the following pre-requisites to the stocktaking. .
- No negative stocks are allowed. To check that no negative is happening in between transactions, go and run Electronic Stock Card in the Inventory – Reports & Queries before proceeding.
- Correct warehouse quantities and costing. To achieve a more indicative warehouse balance and its costs, you should perform a Recalculate Product Cost before this module is activated.
- A GL transaction will be created when you click the Confirm NOW! Button.