
Settings
Supplier Maintenance
The Supplier Maintenance is used to enter master records of suppliers. The information regarding a supplier such as Supplier Code, Name, billing address, credit limit, pricing information, shipping addresses and the account posting details are entered here.
How to create Supplier records?
Details
Click on Finance - Payables – Settings – Supplier Maintenance for the following screen.
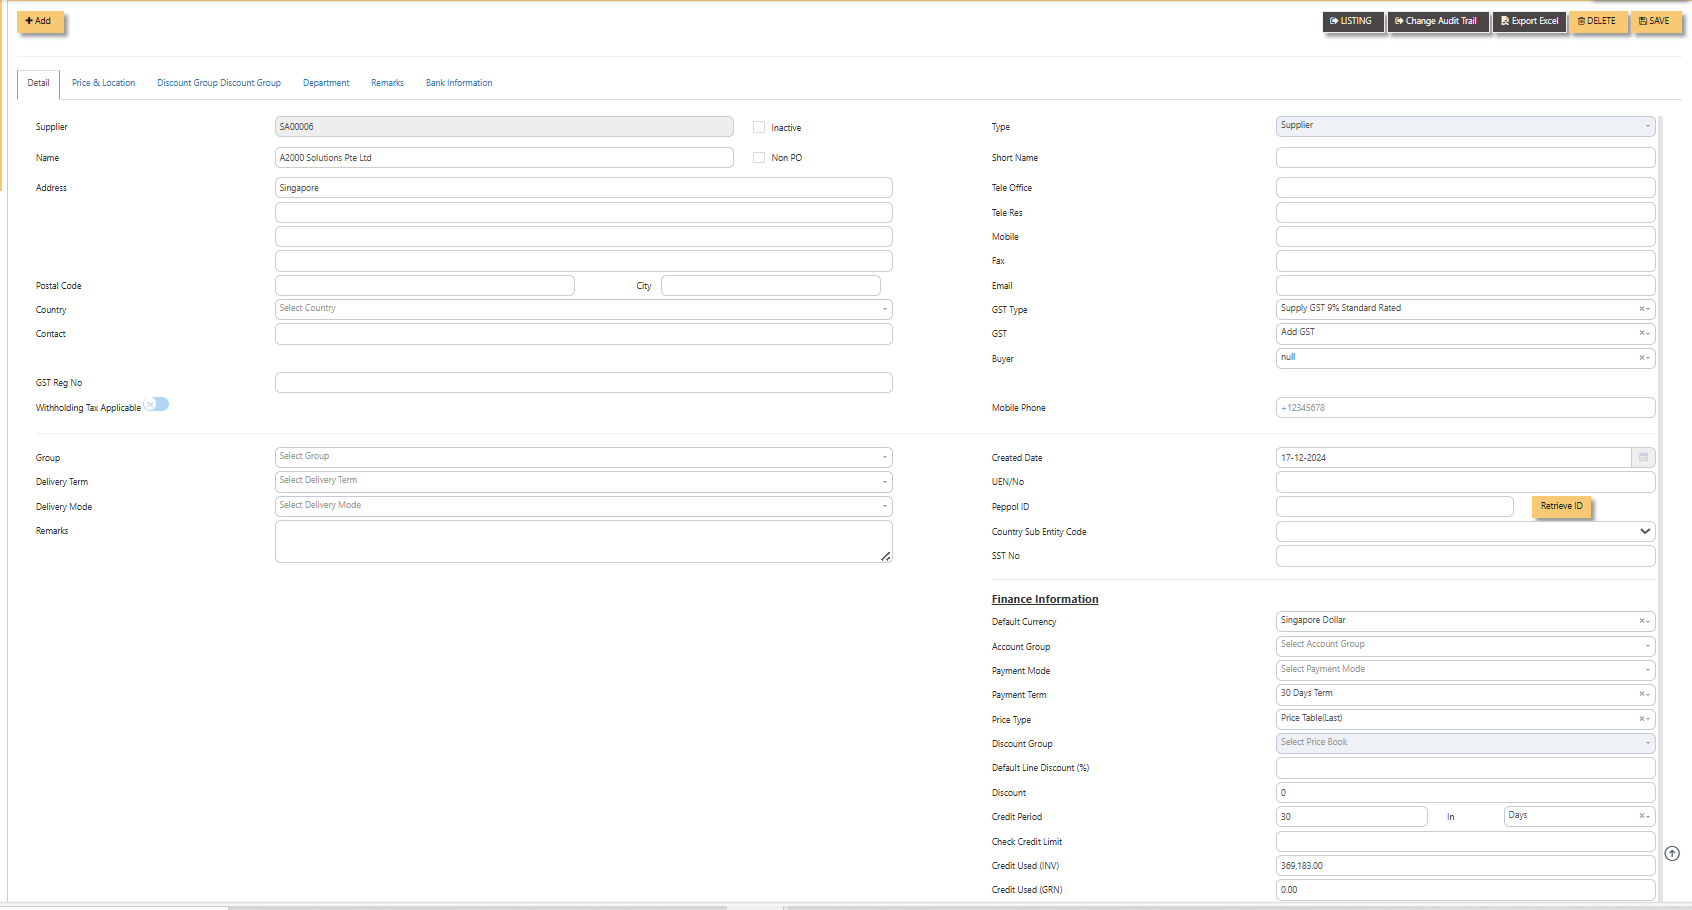
- Supplier (mandatory) Enter the code for new supplier. This is a 10-character alphanumeric field.
- Type Select S for Supplier or B for Both Customer & Supplier.
- Name (mandatory) Enter the name of the supplier.
- Address (mandatory) Enter the billing address of this supplier.
- Postal Code Enter the postal code of the supplier's address.
- Contact Enter the contact person's name.
- Account Group (mandatory) If the Account Posting Setting is set based on Supplier‟ Posting Type, then click to select the relevant Account Group that is defined under Payables - Maintenance.
- Group Click to select the reporting group.
- Delivery Term Click to select the Delivery Term.
- Delivery Mode Click to select the Delivery Mode.
- Payment Term Click to select the Payment Term.
- Payment Mode Click to select the Payment Mode.
- Sales Tax Type Select the Sales Tax type that will apply for this supplier. For example, if this is an Export supplier in USA, then the GST for this purchase will normally be zero-rated. Once Zero-GST is selected here, the next time this supplier's invoice is entered, the GST type will be captured automatically.
- Default Currency Select the currency that this supplier normally transacts in. For a USA based supplier, the default currency is in US Dollars. In the case of Japanese suppliers, it will be Yen.
- Price Type Please refer to procurement module for further information with Price Type
- Discount Enter the discount in percentage given by this supplier. For example, a particular supplier normally gives 10% off List Price for all the items supplied. User could then enter 10% in this field. The system will capture the discount
every time an invoice is raised for this supplier. Hence, you need not remember each and every of your supplier's discount rate. - Credit Period Enter the number of days, weeks or months that this supplier gives as credit period.
- Credit Limit Enter the Credit Limit of supplier. This is a numerical field that will enable the system to check and block
payable/purchase entries once the figure reaches the limit, provided the required setting is done in System Manager – System Utilities – System Settings. - Credit Used This is a non-editable field. It is updated automatically by the system every time the credit is used up.
- SP/Buyer Click to select the Buyer assigned to this supplier.
Note: Tab sheets for Prices & Location, Discount Group and Supplier Product Code are applicable for Purchase Module only
Supplier Account Group
If the Posting Type for Creditor Account is set to Supplier in Payable Control Accounts, the system will locate the creditor account code from Supplier Account Group maintenance screen as shown below:
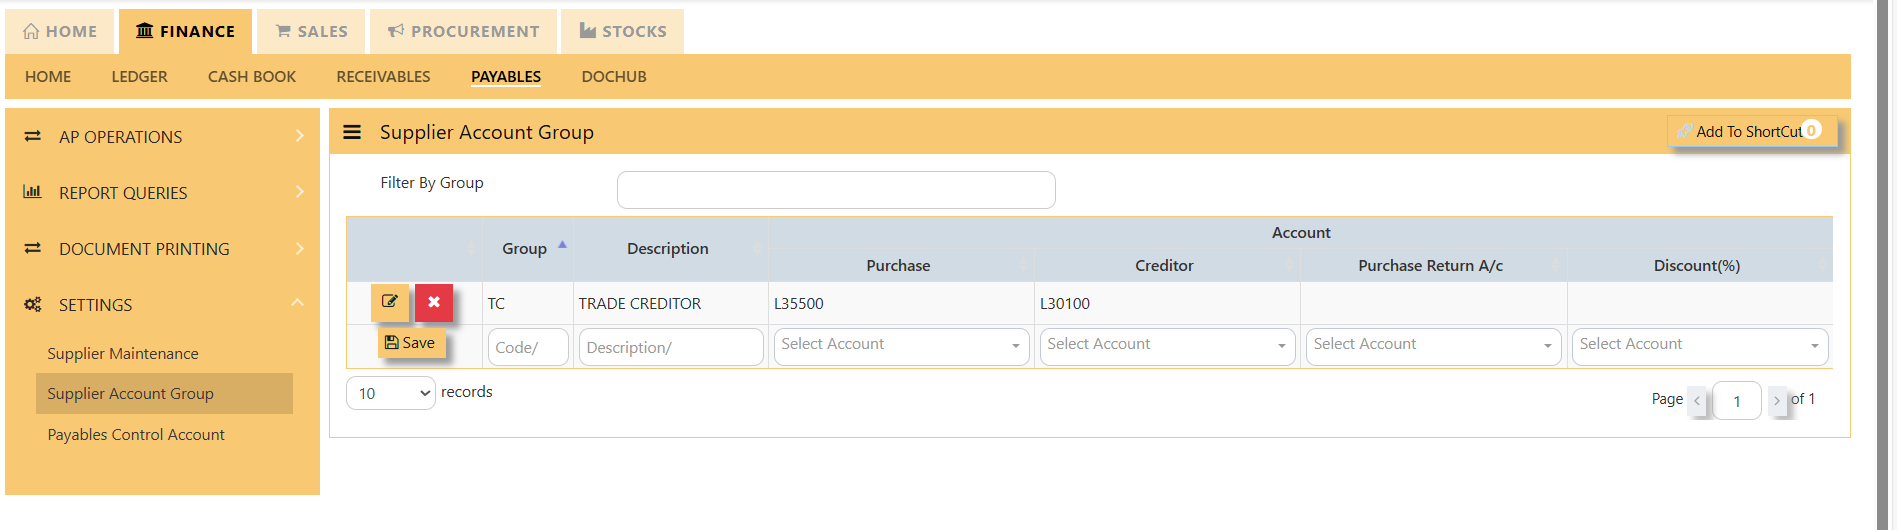 With reference to setting done as per screen above, if supplier TC is being mapped to TC Account Group in Supplier Maintenance, and user enter a Supplier Invoice (PI) transaction in AP module, the system will automatically credit the amount of transaction concerned to account name Other Creditors & Accrual.
Likewise, these creditor accounts will be automatically posted during creation of Invoices, Credit Notes and Debit Notes in Purchase Module and any AP Transaction in AP Module.
How to create Supplier Account Group?
- Click on Finance - Payables – Setting – Supplier Account icon for following screen.
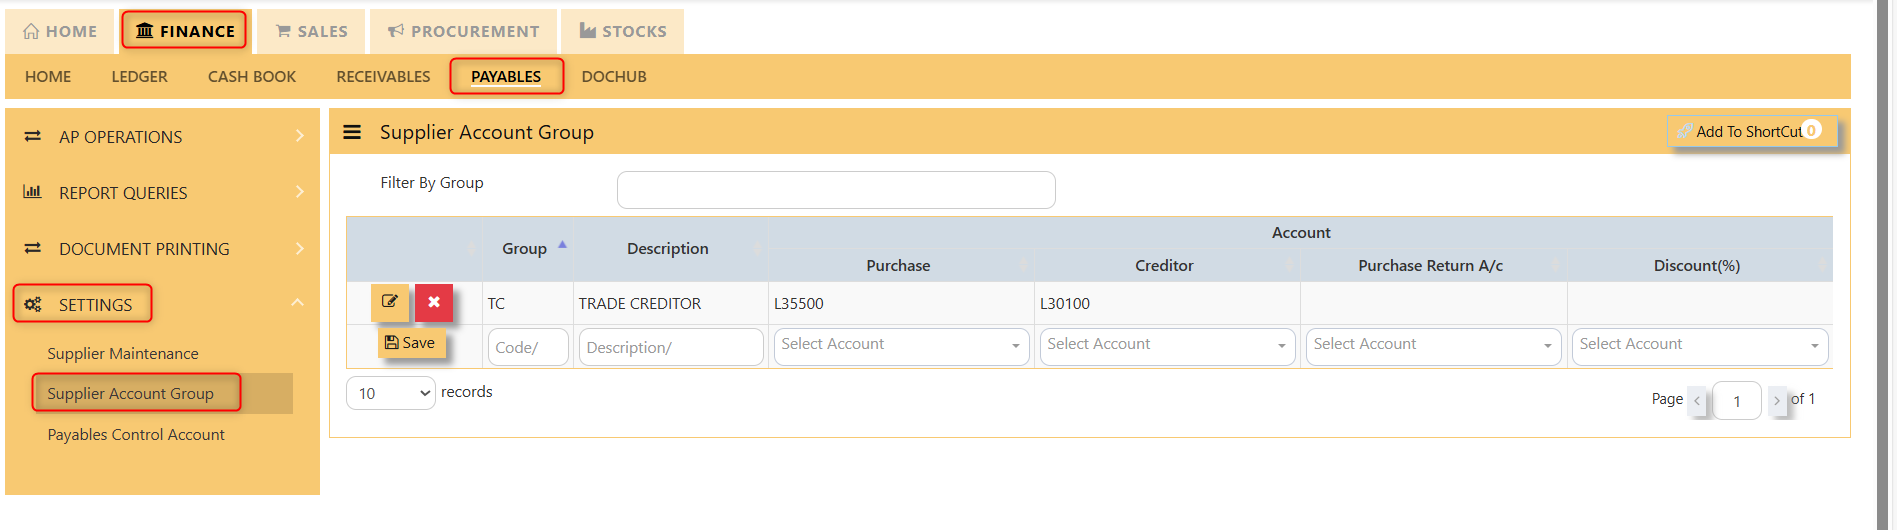
- At the new line, enter the Supplier Account Group code under the Group
column.column. This field can cater up to 4 alpha-numeric characters. - Key in the account code description at the Description field. This field can cater up to 50 alpha-numeric characters.
- Select the Creditor A/c via the drop-down list.

Payable Control Account
A2000ERP will automatically post Invoices, Credit Notes and Debit Notes in Purchase Module and AP Transactions in AP Module according to the setting done at Payable Control Accounts option.
Click on Payables – Settings – Payable Control Accounts icon for following screen.
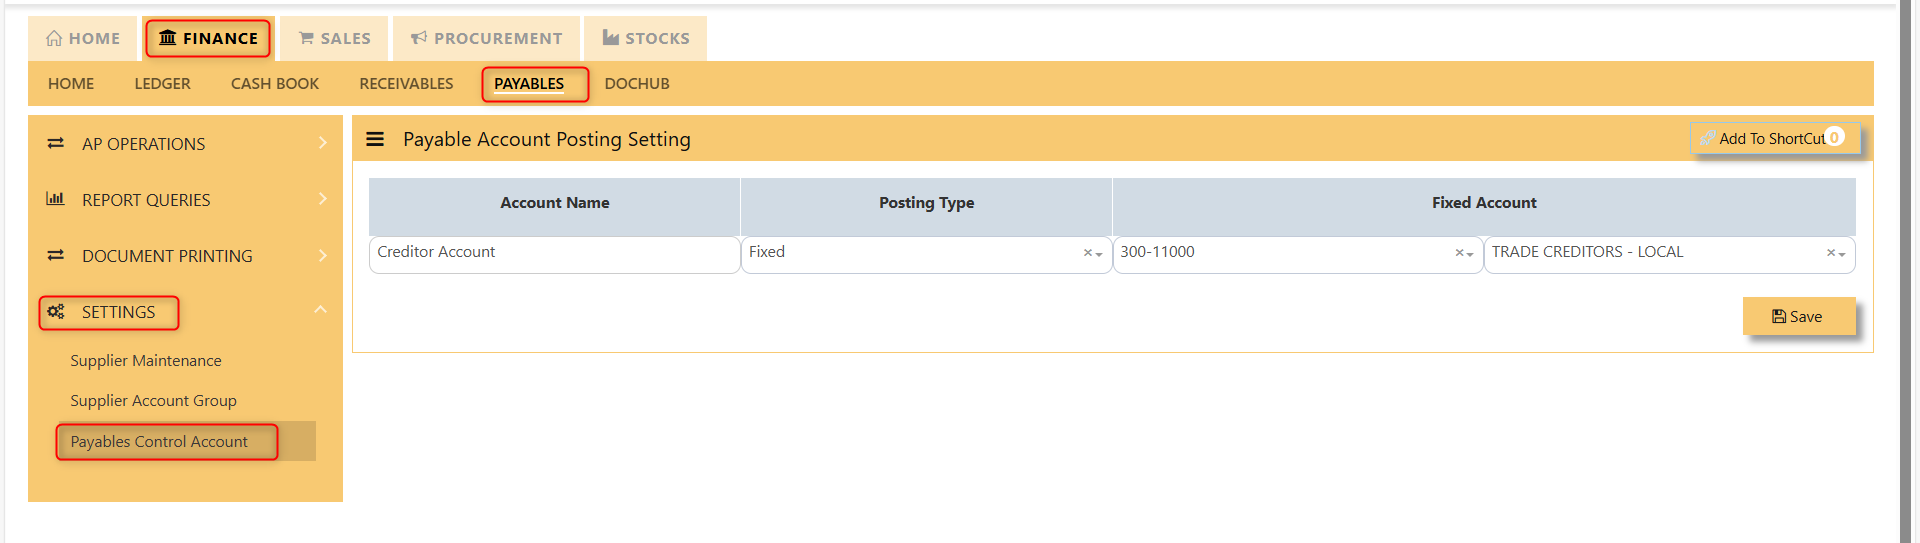
The Posting Types available are:
Fixed
If this option is selected, user must select the Creditor control account from the account code drop-down list at Fixed Account section.
For example, when a payment transaction is done at Payable module, assuming DBS Bank Account is used to make payment, the double entry under this setting will be as follow:
Dr Cr
Trade Creditor A/C XXX
DBS Bank A/C XXX
Supplier
User must ensure that the setting for Supplier Account Group is done. A2000ERP will post to the Creditor Control Accounts accordingly for transactions done in Purchase and Payables modules.