Sales Operations
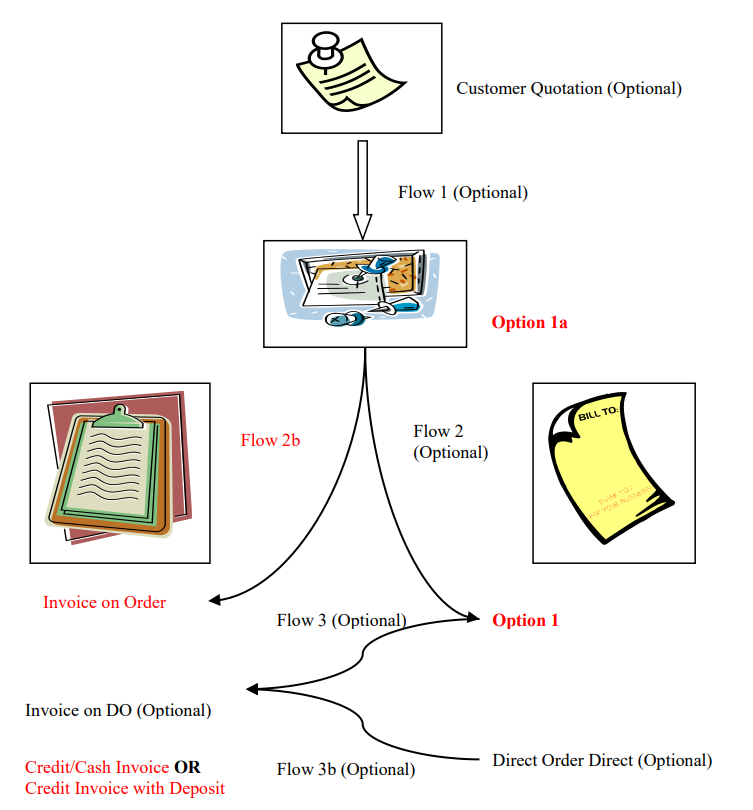
In a typical setup, the user may put up a Typical Sales Quotation (note the difference between a Sales quotation & a purchase requisition. A Sales quotation allows you to indicate which Customer you are sending the quotation to). Once the quotation is confirmed, a Sales Order can be created (Flow 1 - Optional). Upon confirmation of all the Sales orders, the goods will be sent out to the stated Customers. You may send out a Delivery Order (DO – Optional) to your Customers (Flow 2 - Optional) and at a later time, send the invoice to the Accounts Department (Flow 3 -Optional). Alternatively, you may just send an Invoice straight to the Customers (Flow 2b). Another scenario maybe where no Sales Orders were created only a verbal order was placed by the Customers in whom
you just sent the goods (Flow 3b – Optional) to the Customers and then sent the invoice later. The final scenario is where the Sales was done simply by placing an order and you just sent out the goods and invoice it to the Customers, in which case the Credit/Cash Invoice will be created directly. Some Sales transactions could be done by placing a deposit first.
How to locate Sales Operations?
- Click on Sales – Sales Operation for the screen below.
Sales Order
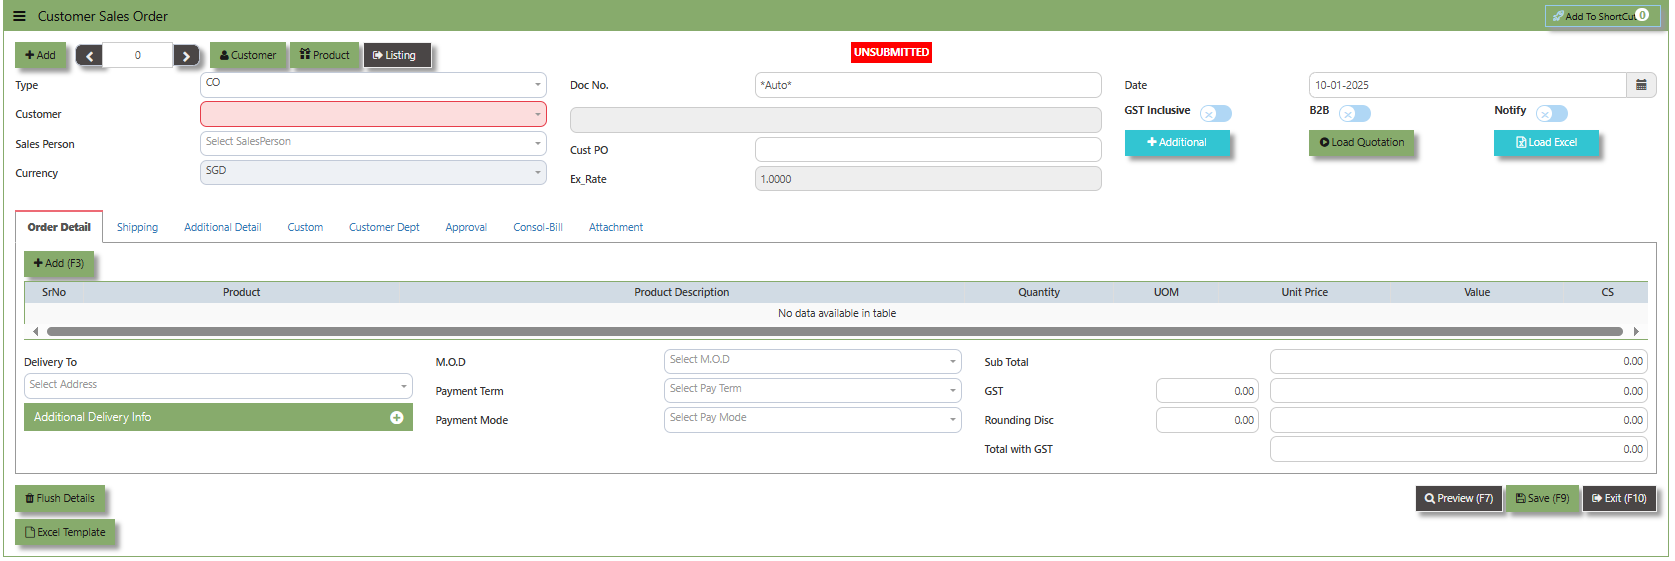
The Sales Order at the Sales Operation Module screen will open the Sales Order screen as seen below. The Sales Order main function is to prepare a document to update the system that goods are on placement. No ledger postings will be made at this moment. Sales Order is denoted by transaction type “CO”.
How to set Customer Sales Order?
- Click on Sales – Operations – Customer Sales Order icon for the following screen.
- Click Add (F3) to create new record.
- Click the Type - drop-down to select transaction type – CO (Sales Order).
- After the transaction type selection, you can use the tab button to go to the Ref No. column & Date fields.
- Click Customer - drop-down to select Customer Name ,followed by the Sales Person, PDS, Currency, Rate, Customer PO, Quotation, Delivery Date & Lead Time if applicable.
- After all the header information has been entered, the user can go to the Order Detail section and select the product items for that transaction. Save the Sales Order transaction after it is completed
- Additional details on the transaction work flow will be covered as part of the Advanced Training
Note: If you did not use the entire posting method, please ignore the options
Credit Invoice
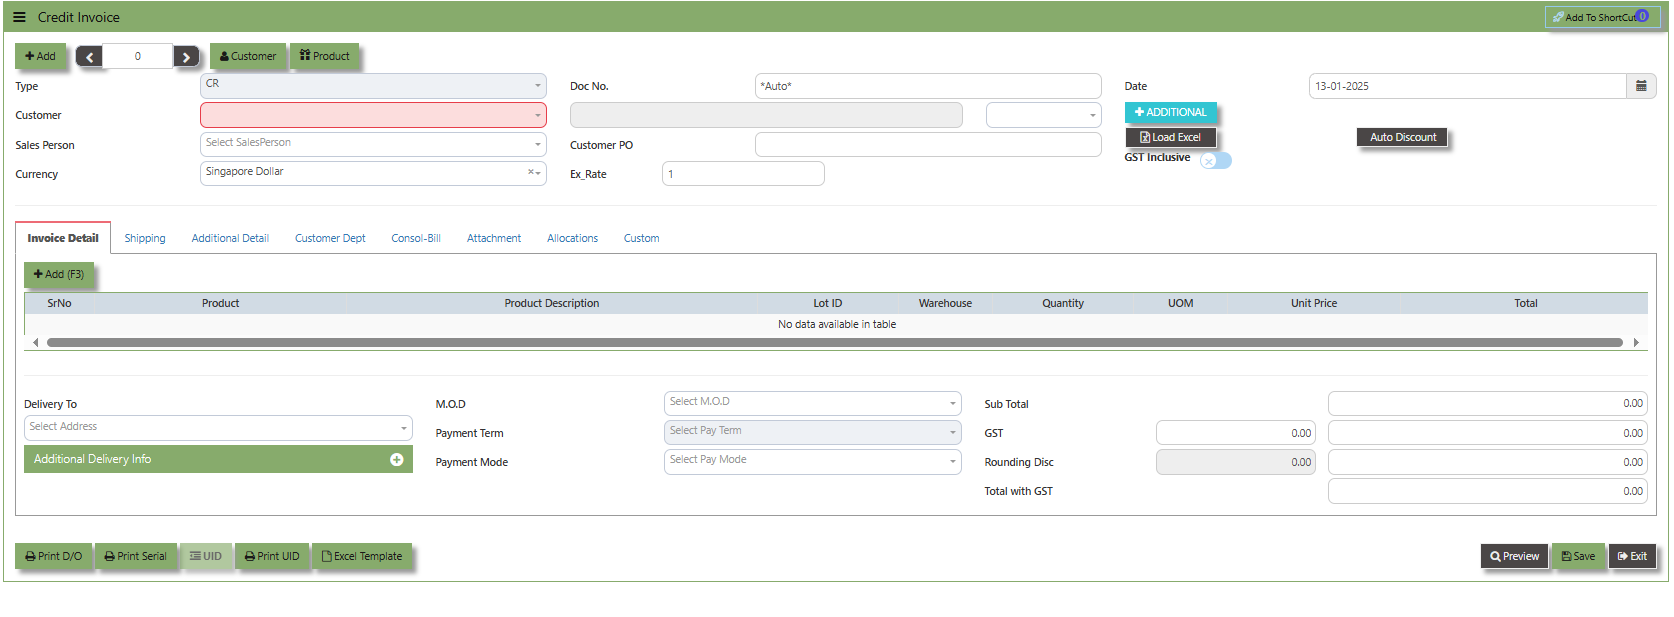
A Customer Credit Invoice directly updates the inventory status and represents a direct transaction for invoicing. It will also update the Accounts Receivables at the same time.
How to Create Credit Invoice?
- Click on Sales – Operations – Credit Invoice icon for the following screen.
- Click Add (F3) to create new record.
- Click the Type - drop-down to select transaction type – CR (Credit Invoice).
- After selecting the transaction type, you can use the tab button go to the Ref No. and Date fields to fill up the information.
- Click the Customer - drop-down list to select the Customer for this invoice, followed by the Salesperson, PDS, Currency, Rate, Our D/O, Order Ref No. and Order Ref. Date if applicable.
- After completing the above steps, you can go to the Details section to select the product items from the product drop
down list, as well as to specify the quantity and unit price. Save the transaction after this is done. - Additional details on the transaction work flow will be covered as part of the Advanced Training.
Invoice on Order
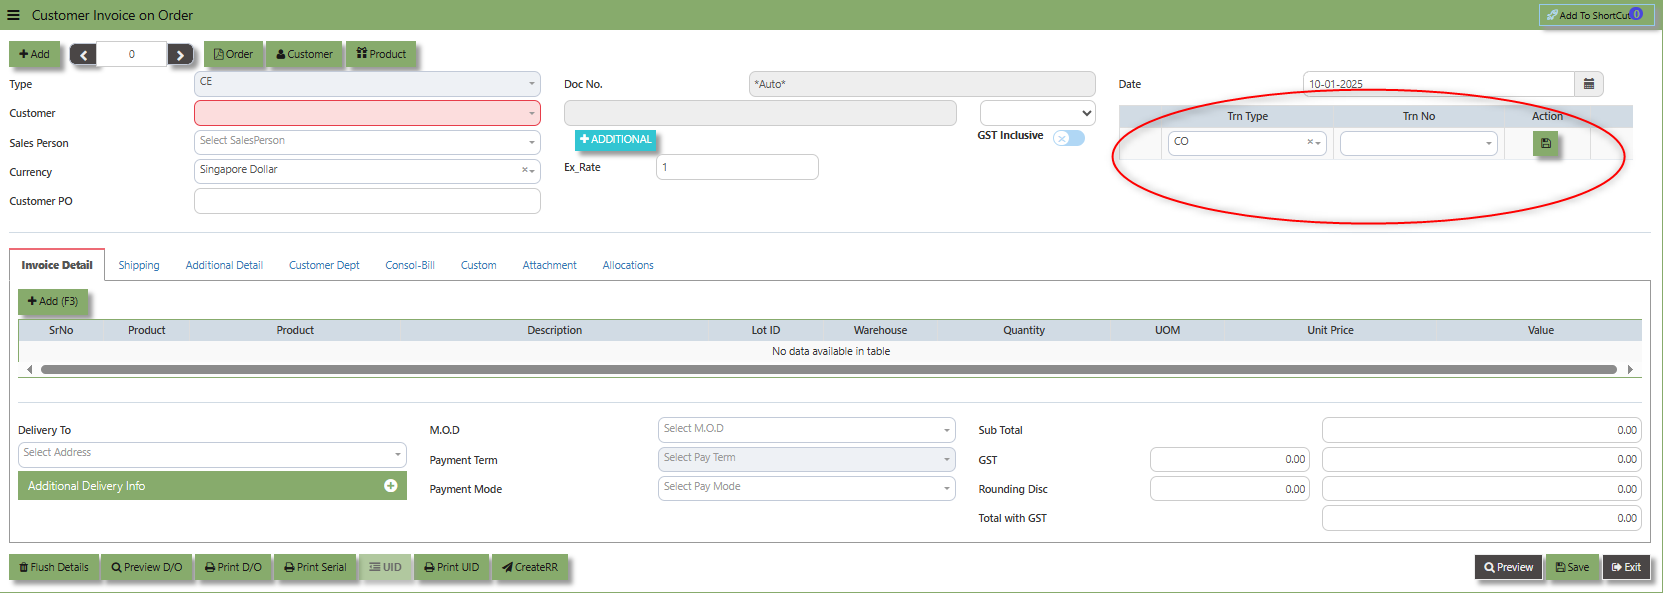
After the Sales Order (Flow 2b), you will create Customer Invoice on Order. Enter the required fields such as the transaction type and customer for that invoice, before specifying the CO number at the top right hand corner of the screen. The line items from the sales order have to be verified and added in accordingly at the line detail level into the CE. After verifying all the details, click on the Save button to save the transaction. Postings are automatically carried out and the GL and Inventory status will be updated.
How to Create Invoice on Order?
- Click on Sales – Operations – Customer Invoice on Order icon for the following screen
- Click Add (F3) to create new record.
- After the transaction type selection, you can use the tab button to go to the Ref No. and Date fields to fill up the information.
- Click the Customer - drop-down to select Customer Name, followed by the Sales Person, PDS, Currency, Rate, Our DO and Order Ref No. if applicable.
- After completing the above steps, click the Order No. drop down list to select the Sales Order to be invoiced (refer to the highlighted screen).
- After selecting the Sales Order transaction from the Order No. column, user can use the “L” button to load all the product items. Alternatively, you can use the Ref column in the detail section to call out the product items one by one. Save the CE transaction after this is done.
- Additional details on the transaction work flow will be covered as part of the Advanced Training.
Note: If you did not use the entire work flow for Sales Operations, please ignore the options.
Cash Invoice
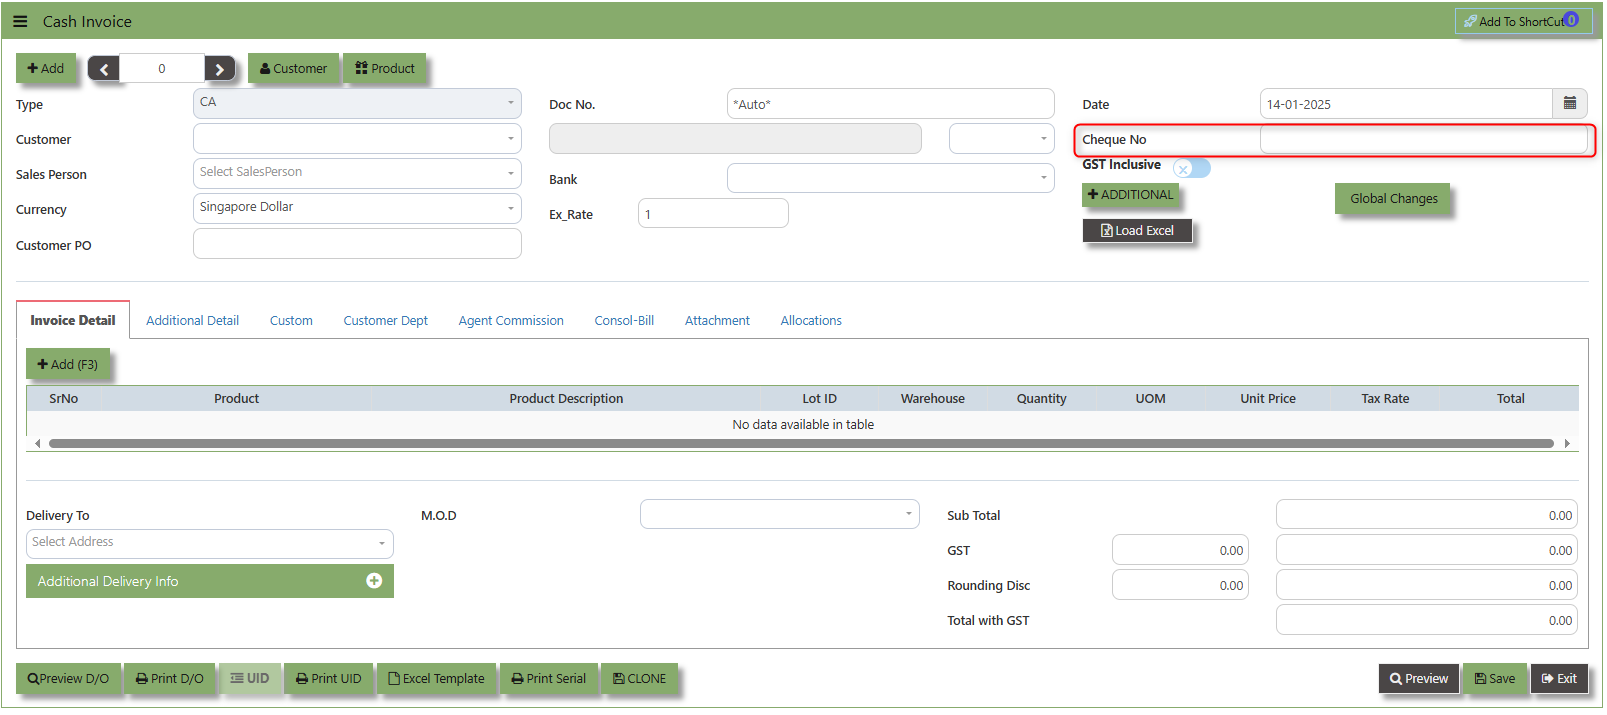
Unlike the Credit Sales Invoice, the Customer Invoice – Cash directly debits the bank as it is a direct cash transaction. This transaction updates the inventory as well as the GL. The Bank code has to be selected when saving the transaction.
How to Create Cash Invoice?
- Click on Sales – Operations – Cash Invoice icon for the following screen.
- Click Add (F3) to create new record.
- Click the Type - drop-down to select transaction type – CA(Cash Invoice).
- After selecting the transaction type, you can use the tab button to go to the Ref No. and Date fields to enter the information.
- Click the Customer - drop-down list to select the Customer, followed by the Sales Person, PDS, Currency and Rate.
- The “Cheque Number” is an important field which must be specified (refer to the highlighted screen)
- After the Bank code is selected, user can enter the information for Our D/O, Order Ref. No and Order Ref Date if applicable.
- Once all the header information has been entered, the user can proceed to the Details section to select the product items from the product drop down list, before specifying the warehouse, quantity and unit price. Save the transaction after this is done.
- Additional details on the transaction work flow will be covered as part of the Advanced Training.
Note: If you did not use the entire work flow for Sales Operations, please ignore the options.
Goods Returned Return (Credit Note)
This is used to create a Credit Note to Customers when goods are returned. This will update the GL and the stock status. If you have noticed, the credit note can also be used to knock off previous invoices. (By clicking on the batch allocation button)
How to Create Goods Returned – Credit Note?
- Click on Sales – Operations – Goods Returned – Credit Note icon for the following screen.
- Click Add (F3) to create new record.
- Click the Type - drop-down to select transaction type – CC (Goods Returned – Credit Note).
- After the transaction type selection, use the tab button to go to the Doc No. and Date fields.
- Click the Customer - drop-down list to select Customer Name, followed by the Sales Person, PDS, Currency, Rate, RMA Ref and Narration if applicable.
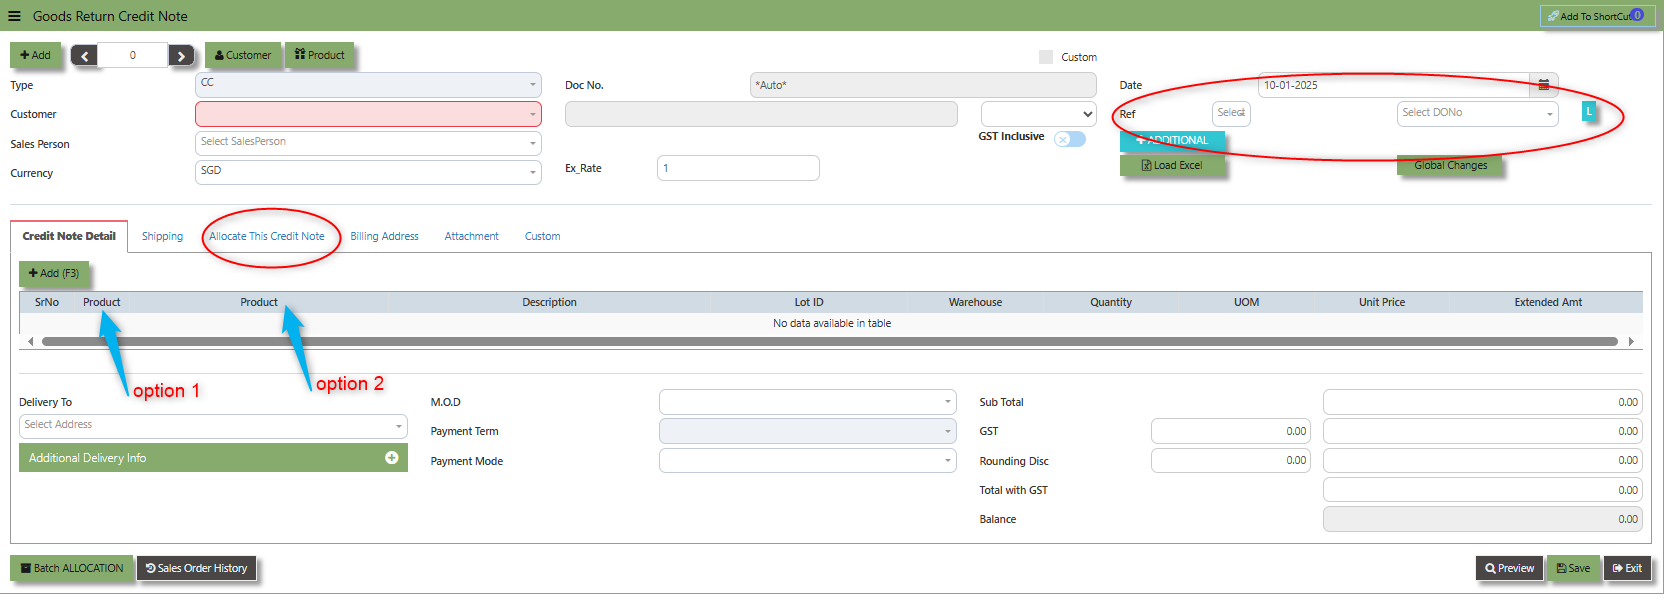
- For this transaction type, the system has two options with regard to selecting the line items in the Details section (refer to highlighting Option 1,1a & Option 2 on print screen)
- Option 1: Select the Transaction Code & Number from the Delivery Ref column, before going to the “Option 1a” drop-down to select the items which will come from the transaction in the Delivery Ref.
- Option 2: Ignore the Option 1 function and use the Product drop-down list to select the items to be
returned. For this option, user should take note of the return cost calculated by the system and where necessary, you can amend the value of the return cost for the individual item.
- After completing the above steps for sales return, user can use the “Batch Allocation” button to allocate the outstanding invoice amount.
- Additional details on the transaction work flow will be covered as part of the Advanced Training.
Debit Note
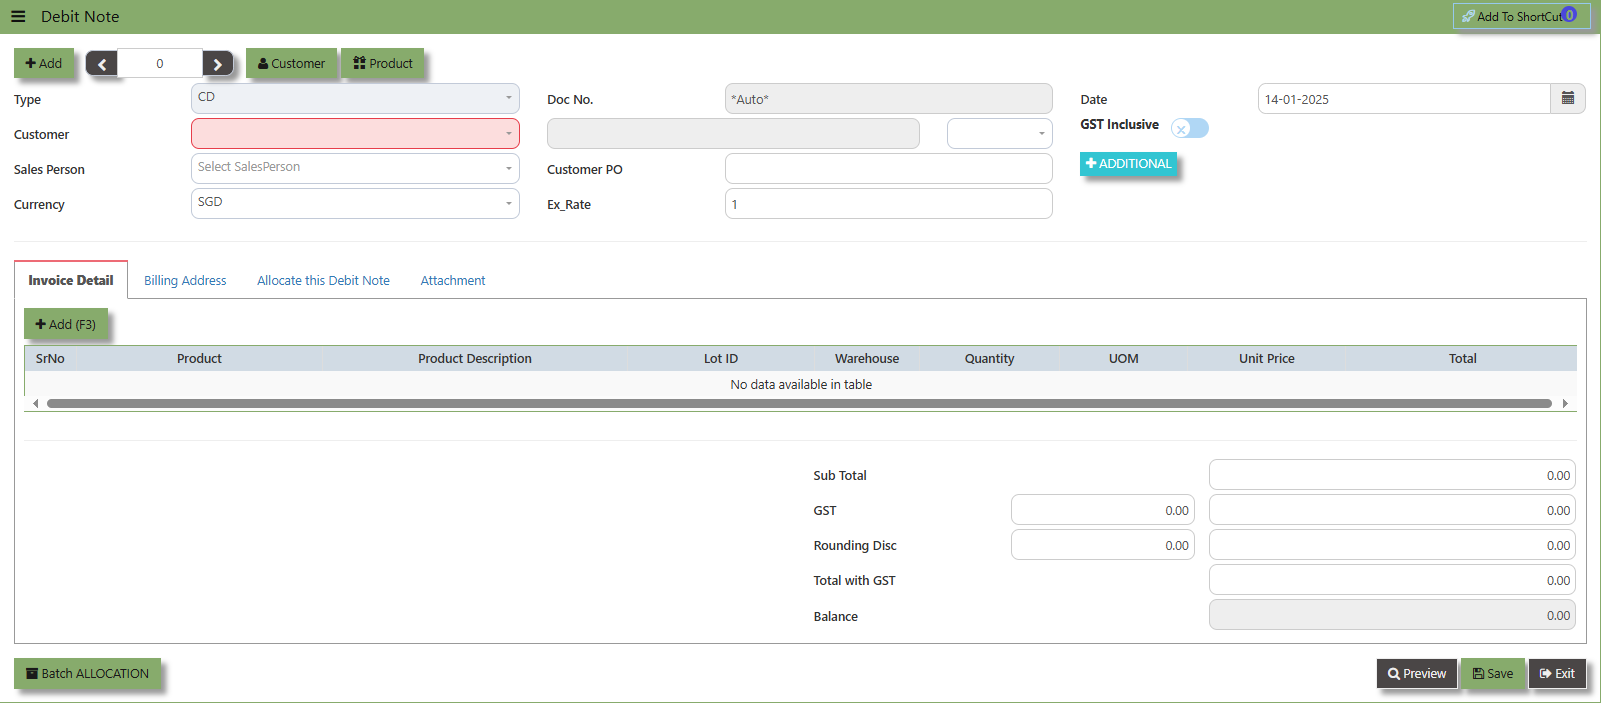
This is a direct Debit Note and involves selling product directly to Customers. It updates the GL and Inventory status. Please note that you can also use this debit note to knock off any credit notes raised.
How to Create Debit Note?
- Click on Sales – Sales Operations – Debit Note icon for the following screen.
- Click Add (F3) to create new record.
- Use the tab button to go to the Ref No. and Date fields.
- Click the Customer - drop-down list to select Customer Name, followed by the Sales Person, PDS, Currency, Rate, Location and Narration if applicable.
- After updating the header information, go to the Details section to select the items from the Product drop-down list.
Save the transaction after this is done. - The Debit Note also has allocation function. Click on the “Batch Allocation” button for allocation.
- Additional details on the transaction work flow will be covered as part of the Advanced Training
Free Text Invoice
The Free Text Invoice is an invoice that is not attached to a sales order and does not require a sales order or packing slip.
How to create Free text invoice?
- Click on Sales – Sales Operations – Debit Note icon for the following screen.
- Click Add (F3) to create new record.
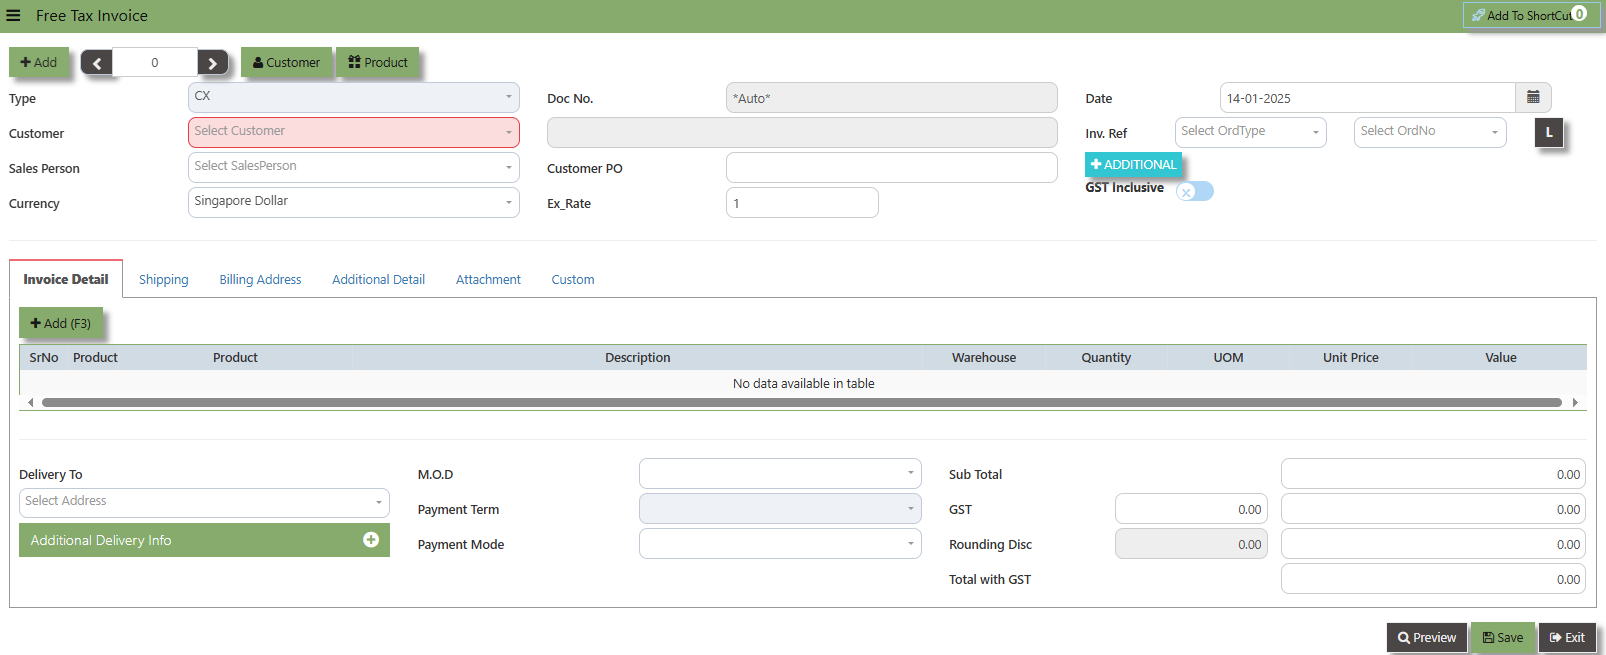
- Click the Type - drop-down to select transaction type – CX (Free text Invoice).
- After the transaction type selection, use the tab button to go to the Doc No. and Date fields
- Click the Customer - drop-down list to select Customer Name, followed by the Sales Person, PDS, Currency, Rate, RMA Ref and Narration if applicable.
- After completing the above steps, you can go to the Details section to select the product items from the product drop
down list, as well as to specify the quantity and unit price. Save the transaction after this is done.
Sales Quotation
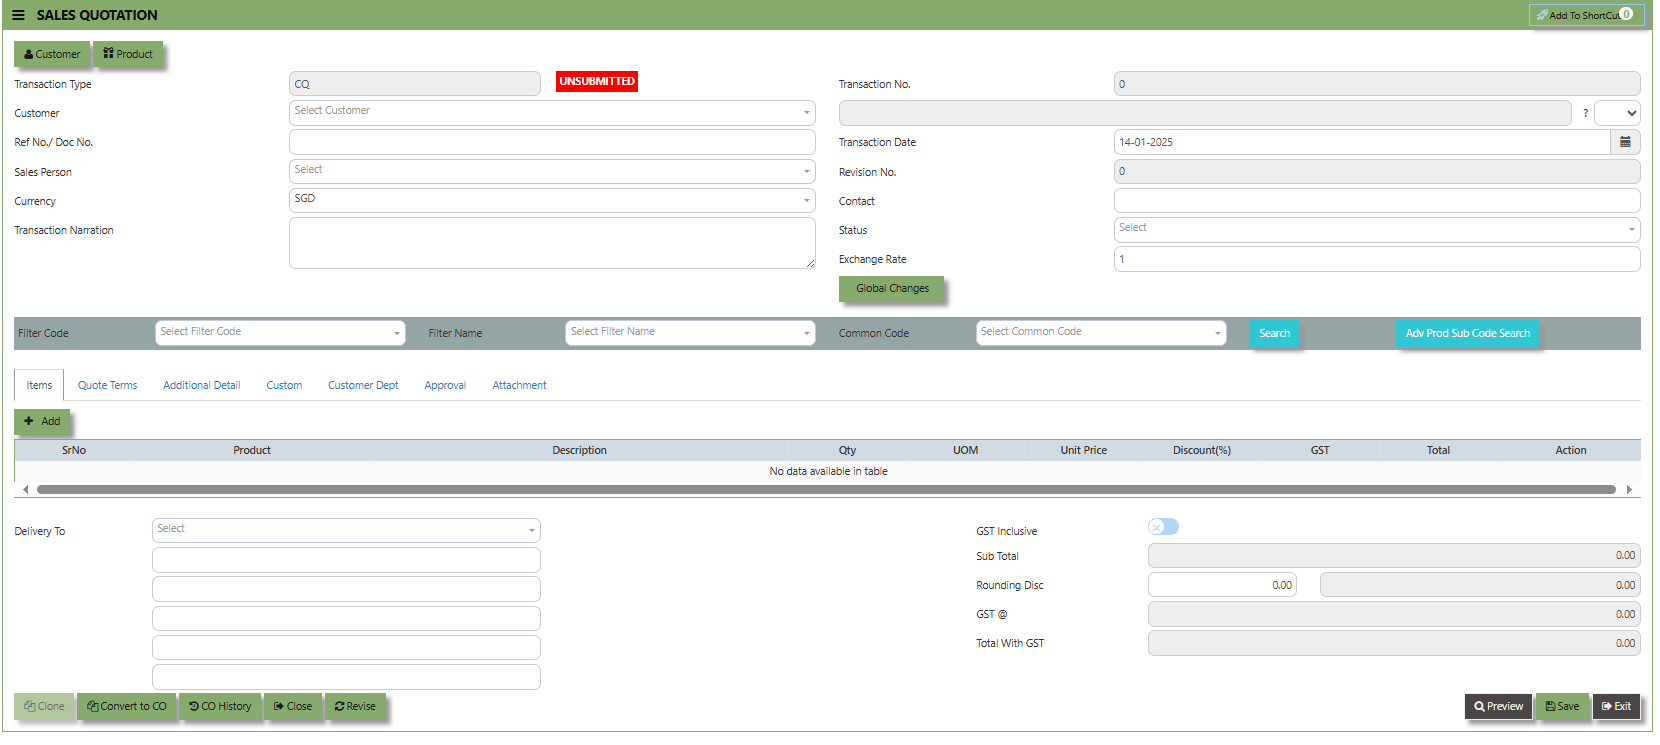
The Sales Quotation form is essentially an administrative document to confirm the approval of a stock request before an order is made. Creation of a Customer Quotation does not perform any accounts posting & is used only as an administrative document to send to the Customer as quotation. Creation of a Customer Quotation will generate a “CQ” number.
How to set Customer Quotation?
- Click on Sales – Sales Operations – Customer Quotation icon for the following screen.
- Click the Type - drop-down to select transaction type – CQ (Customer Quotation).
- After transaction type selection, use the tab button to go to the Ref No. and Date fields to enter the information.
- Click the Customer - drop-down list to select Customer Name, followed by the Sales Person, PDS, Currency, Rate,
Validity Period, Validity Date, Payment Term, Status, Deliver Term & Lead Time if applicable. - After all the header information has been entered, go to the Quotation Details section to select the product from the
Product Code and Name drop-down list. User can also enter information into the Additional Details and Customer Department. Save the transaction after this is done. - More details on the transaction work flow are included as part of the Advanced Training
Note: If you did not purchase this feature for the entire work flow, please ignore the options.

