Reports & Queries
For report and queries under receivable module, there are three sub menus. First is the report and queries where you can find the reports related to receivables, second is the GL and AR diagnostics wherein if the general ledger and receivable report is not tie up, this report may help to identify which transaction causing of unbalance, and lastly, is the send statement of account wherein this can be used to send a statement of account in your specific customers.
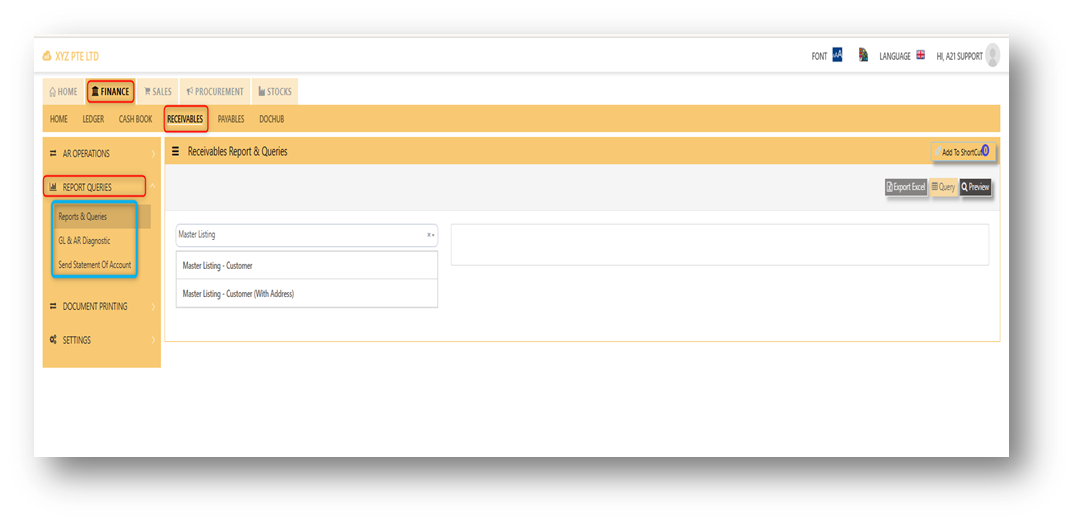
REPORT QUERIES
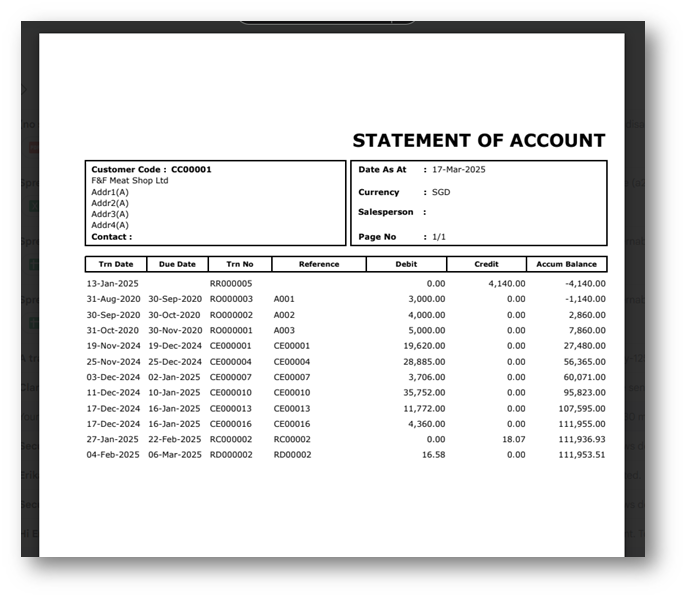
In report and queries menu you can generate a reports related to receivable transactions. Mainly use reports are AR transaction Listing, AR statement of account, AR aging analysis, customer ledger, AR outstanding and many more. The report and queries menu can be found in receivables > report and queries > report and queries.
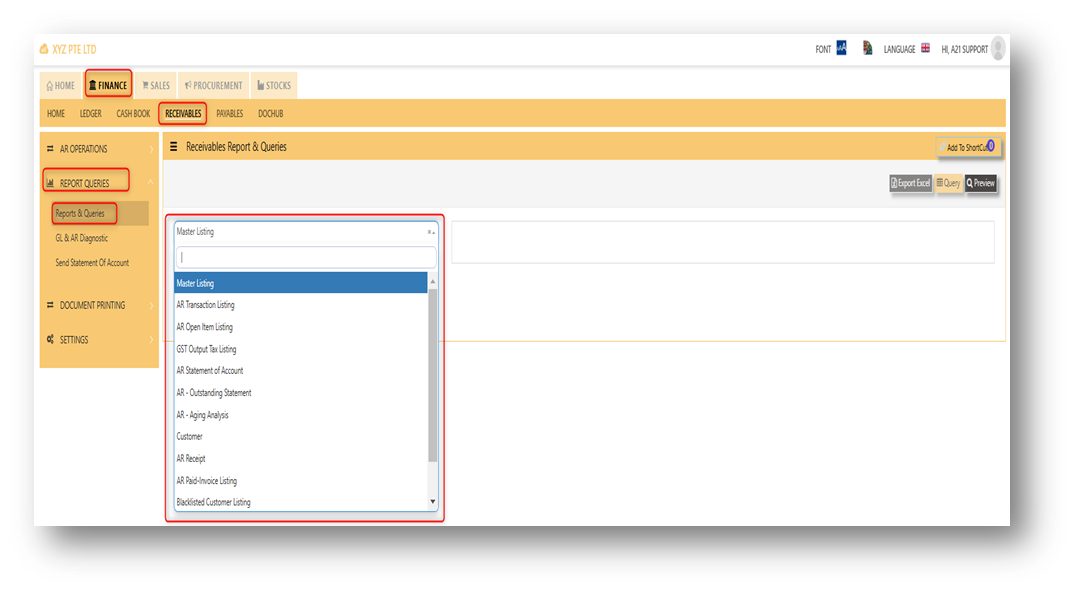
Example on how to generate a report.
1. Select a report you wanted to generate.
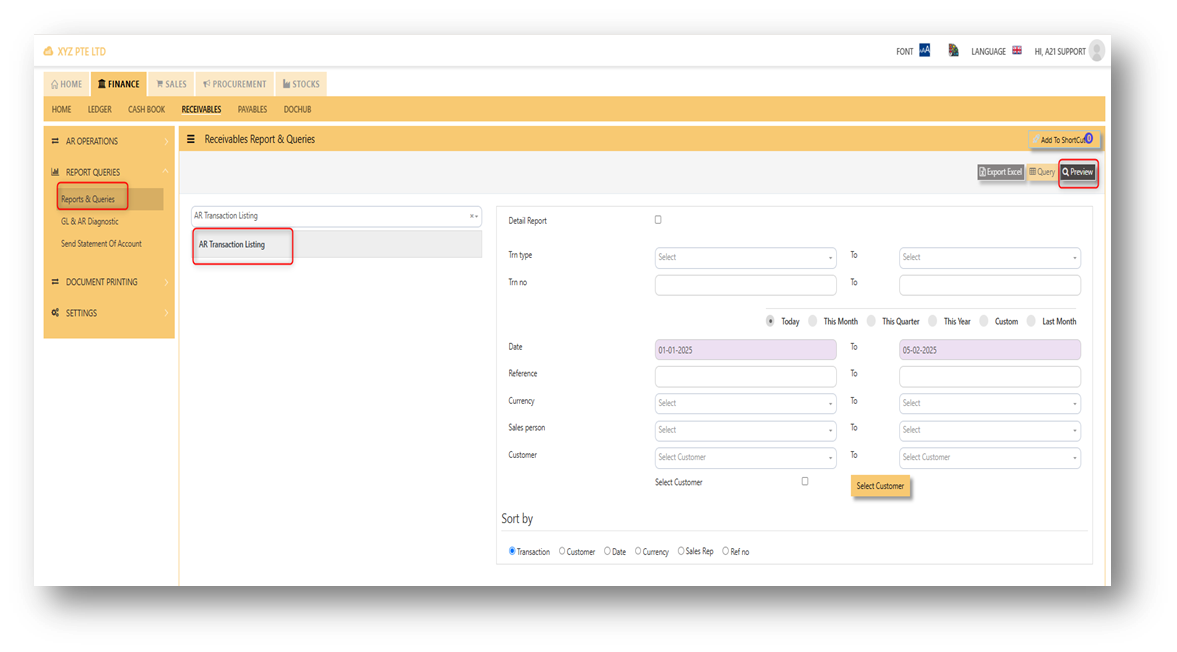
2. Fill up necessary field, in order to capture the filtering of report correctly.
3. Click ''preview'' button to generate the report.
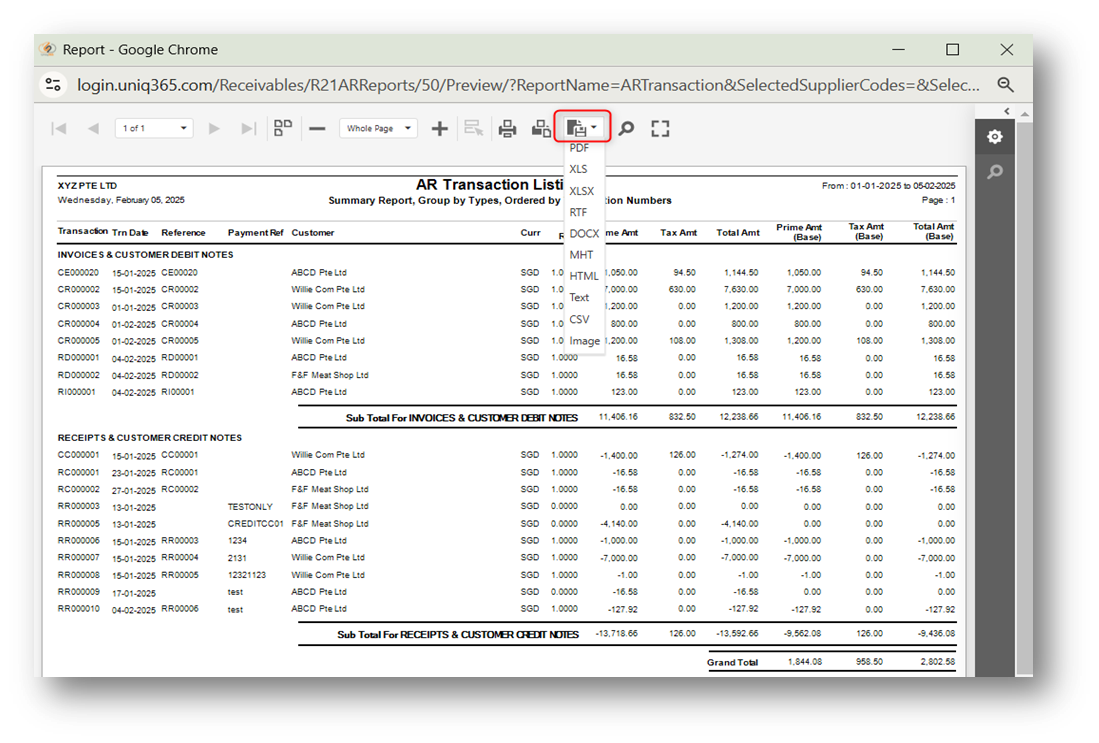
4. Also, there is an option to download the report in pdf, xlsx, csv, and etc. Please refer to attached photo on how to download on it.
GL AND AR DIAGNOSTICS
The GL and AR Diagnostic menu can be used to find transactions that are causing of unbalance from AR vs. GL. This menu can be found in receivables > report and queries > GL and AR diagnostics.
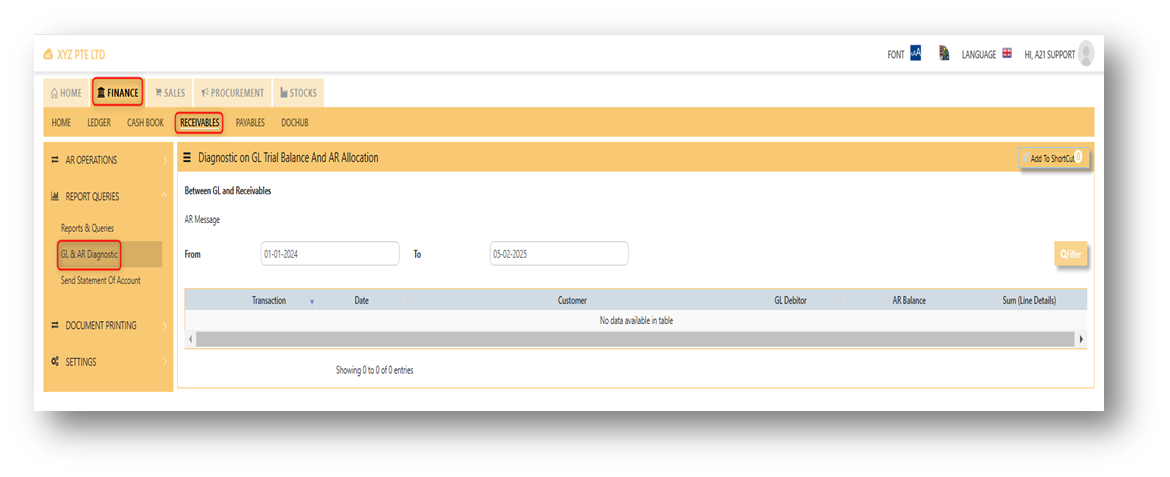
In order to generate if there is any transactions in the diagnostics, user must fill up the fields of from date and to date correctly, and after filling it up, need to click the filter button.
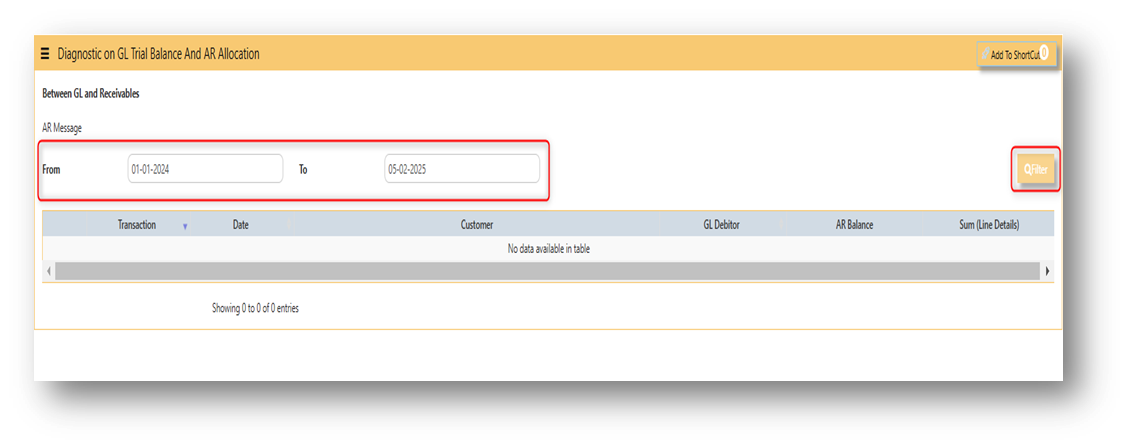
NOTE: If in case the transactions were not able to clear automatically, Please contact customer care support.
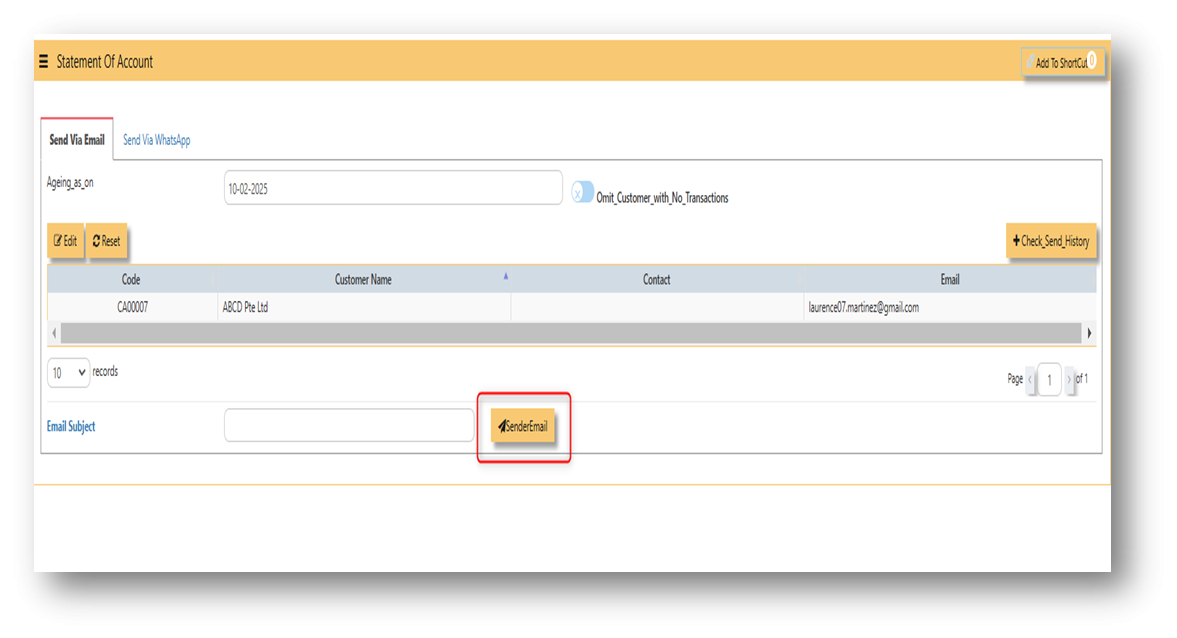
SEND STATEMENT OF ACCOUNT
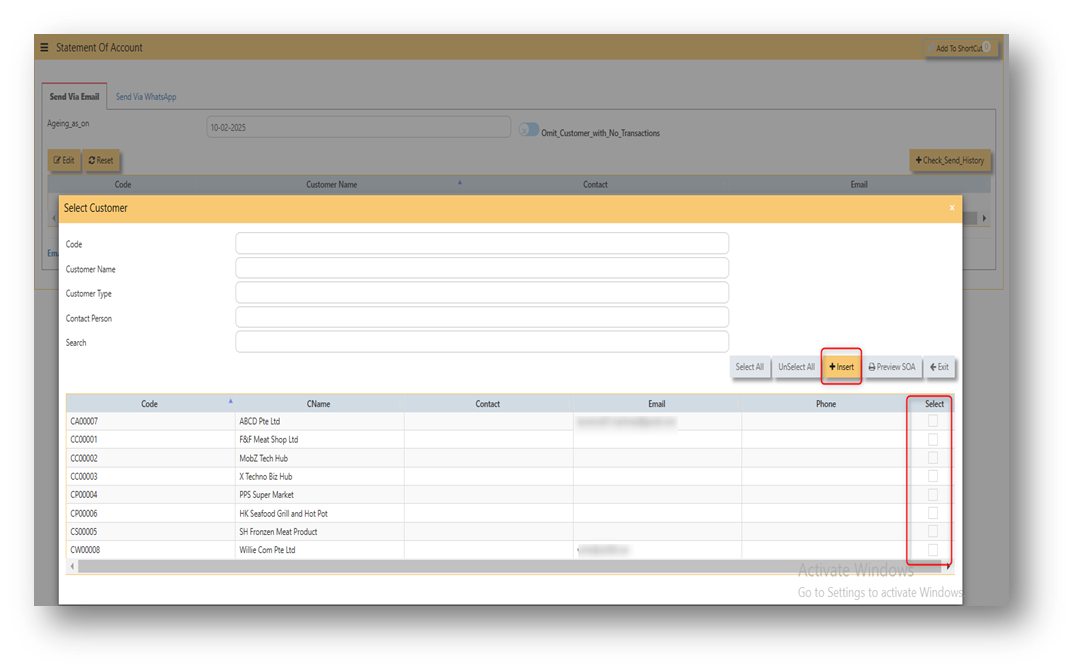
In UNIQ365,Uniq365, The ''send statement of account'' menu is used to send statement of account in your specific customers. This menu can be found in receivables > report and queries > send statement of account. 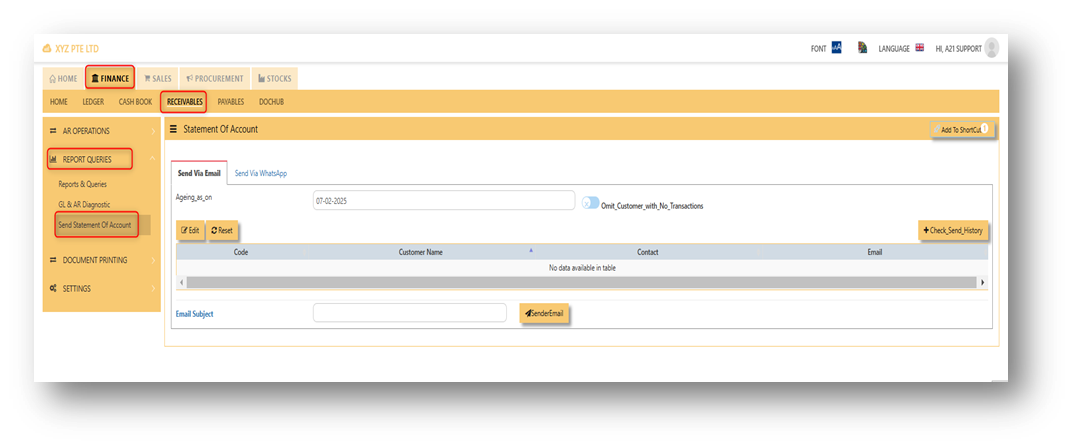
STEPS ON HOW TO SEND A STATEMENT OF ACCOUNT:
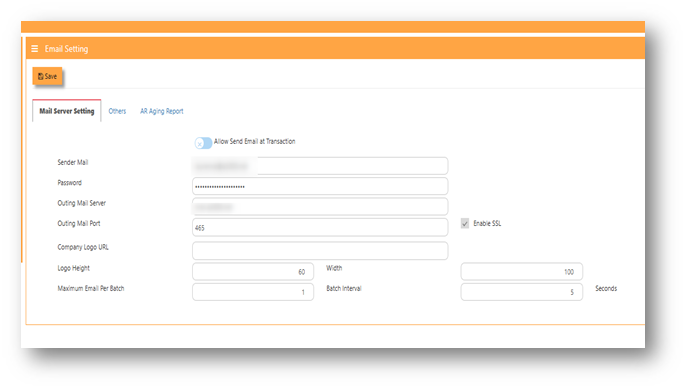
Note: Before you can able to send a SOA to a customer, the user must set up first email setting. Email setting can be found in system admin - company - email setting. The email set up usually done during implementation.
- Filter first the date you wanted to generate first.
- Click ''edit'' to select customer, after that, tick which customer you will send the SOA and clicked for the ''insert button''

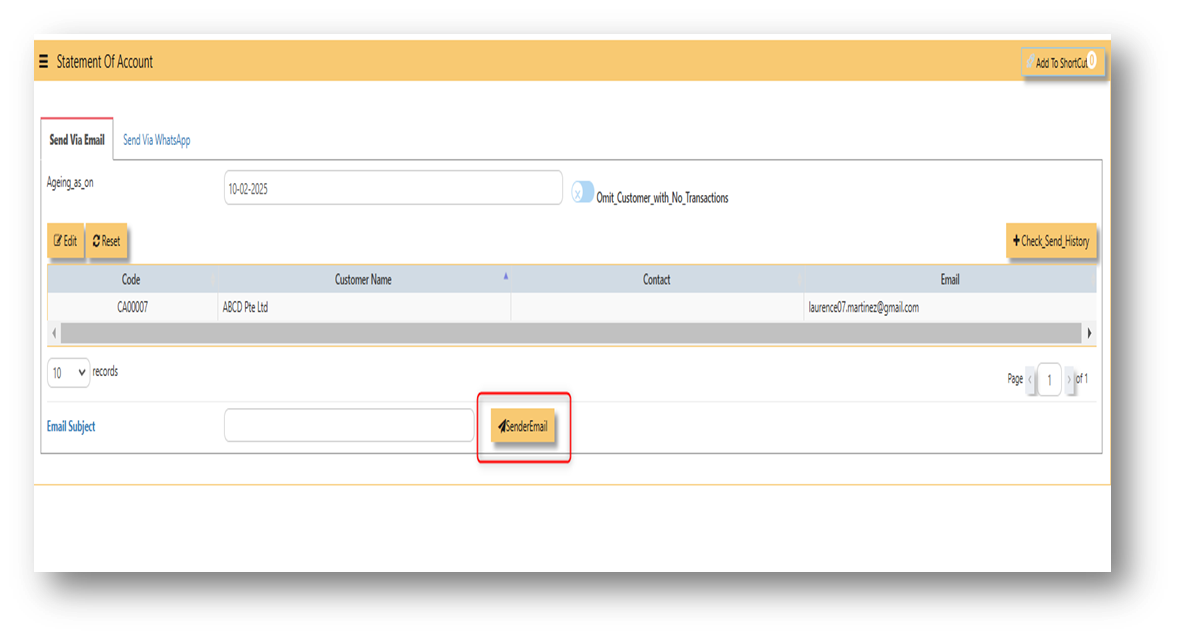
- After clicked ''insert'' button, all the customers you have ticked will show in the list, if already confirmed. User may clicked the ''sendemail'' to send the SOA into the following customers.
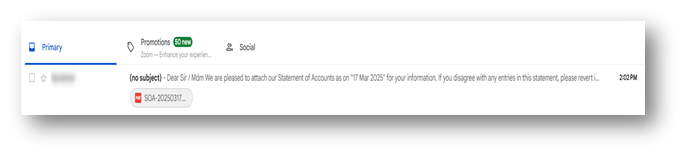
Attached photo is an example of E-SOA.