
Purchasing
In a typical setup, the user may put up a Typical Purchase Requisition (note the difference between a Purchase Requisition & a Sales Quotation. A Purchase Requisition allows you to indicate which supplier you are sending the order to). Once the requisition is confirmed, a Purchase Order can be created. Upon confirmation of all the Purchase Orders, the goods will then be delivered by the stated suppliers. You may record a Goods Received Note (GRN – Optional) for your reference and then send the supplier’s invoice to the Accounts Department. Alternatively, you can just record the Invoice straight upon receiving it from supplier.
Another scenario is that no Purchase Order is created, only a verbal order is placed to the suppliers. You received goods from suppliers and the invoice is sent to you later. The final scenario is where the Purchase is done simply by placing an order and you just receive the goods and invoice from suppliers, in which case the Credit/Cash Invoice will be created directly. Some Purchase transactions can be done by placing a deposit first.
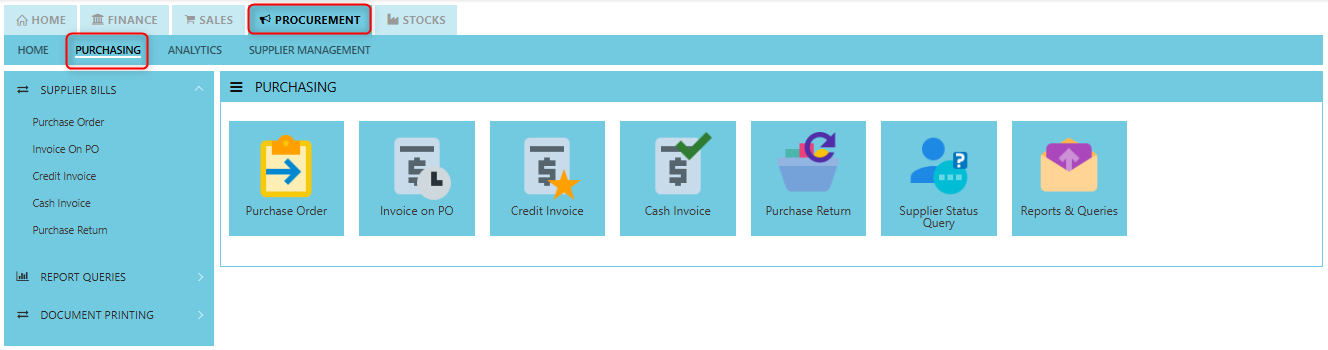
How to locate Purchasing?
- Click on PROCUREMENT – PURCHASING for the screen below.
Supplier Purchase Order (SO)
In Uniq365, you can indicate the Supplier Delivery Mode in the Supplier Maintenance or Transactions. You can also sort or filter reports by Delivery Mode. The Purchase Order in the Purchase Module serves as a document to update the system that goods are on order. No ledger postings take place at this point. Purchase Order is denoted by the transaction type “SO”.
How to set Supplier Purchase Order?
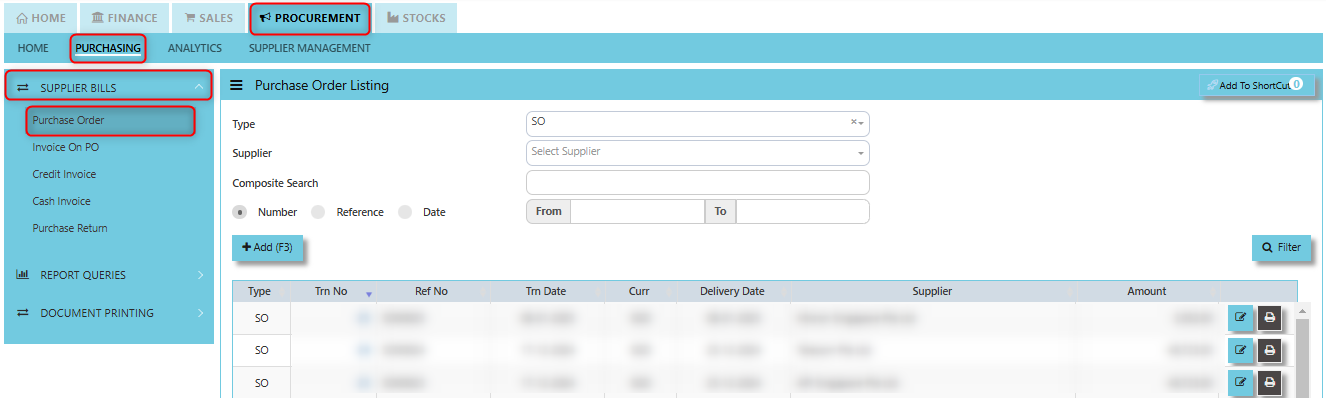
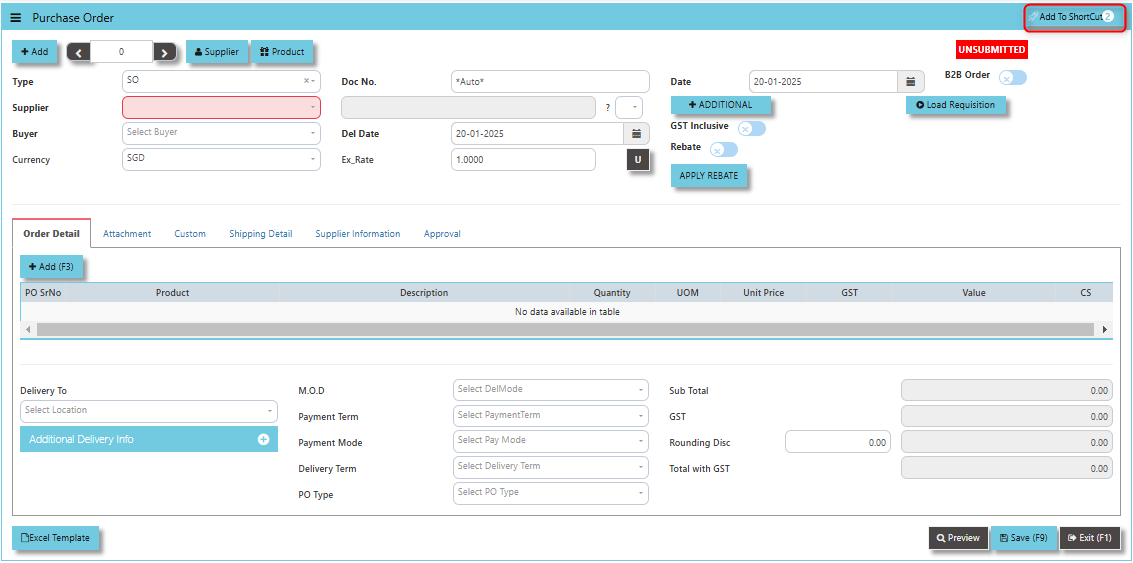
1. Click on PROCUREMENT – PURCHASING – SUPPLIER BILLS - PURCHASE ORDER for the screen below.
2. Click Add (F3) to create new record.
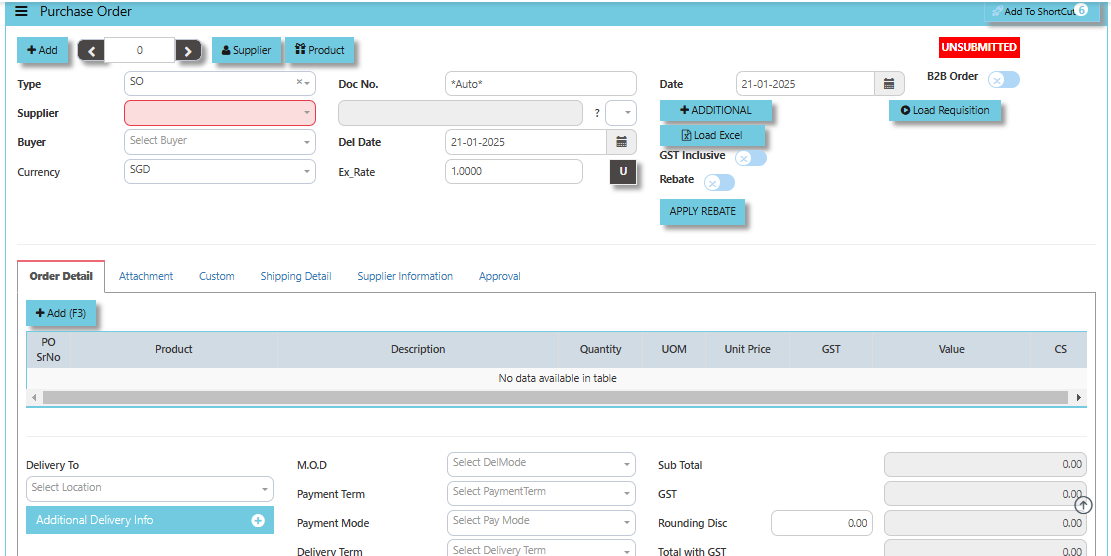
3. Click Type - drop-down to select transaction type – SO (Purchases Order).
4. After transaction type selection, use the tab button to go to the Ref No., Date, and other fields.
5. Click the Supplier - drop-down list to select Supplier Name, followed by the Buyer, PDS, Currency, Rate, Narration, Delivery Date & Lead Time if applicable.
6. After all the header information has been entered, go to the Details section to select the Product Code and Name for that Purchase Order. Save the transaction after this is done.
Excel Template - The button allows users to download a pre-configured Excel template for entering or importing data related to the purchase order. The template is usually formatted to match the system's required structure for purchase orders, ensuring consistency and data accuracy.
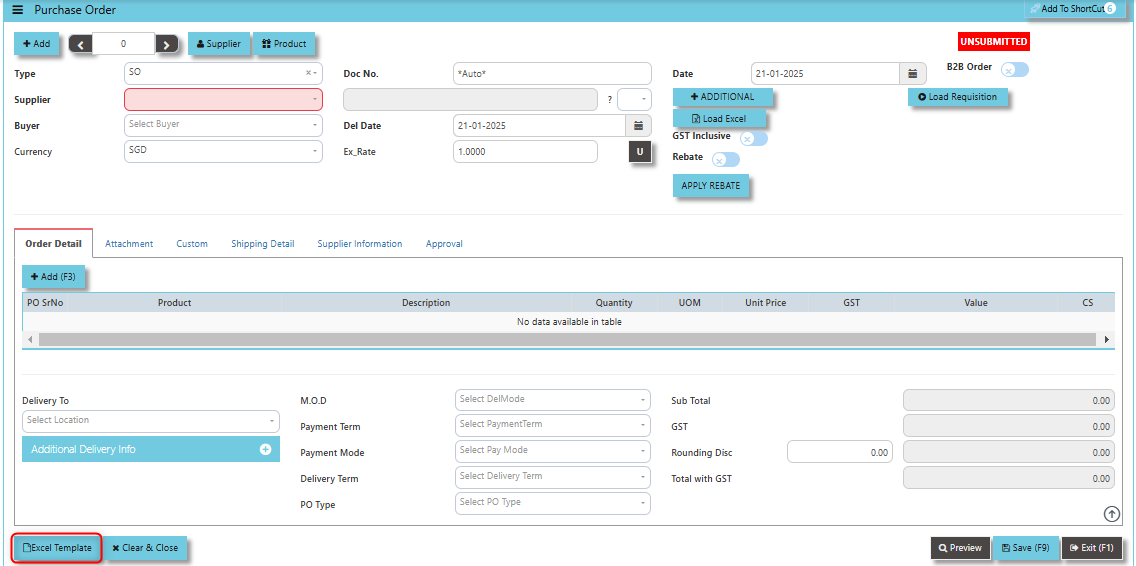
Load Excel - When users have an Excel file with purchase order information (such as item names, quantities, prices, supplier details, etc.), the "Load Excel" button allows them to upload and import this data directly into the system. This eliminates the need for manual entry of the data into the system's purchase order fields.
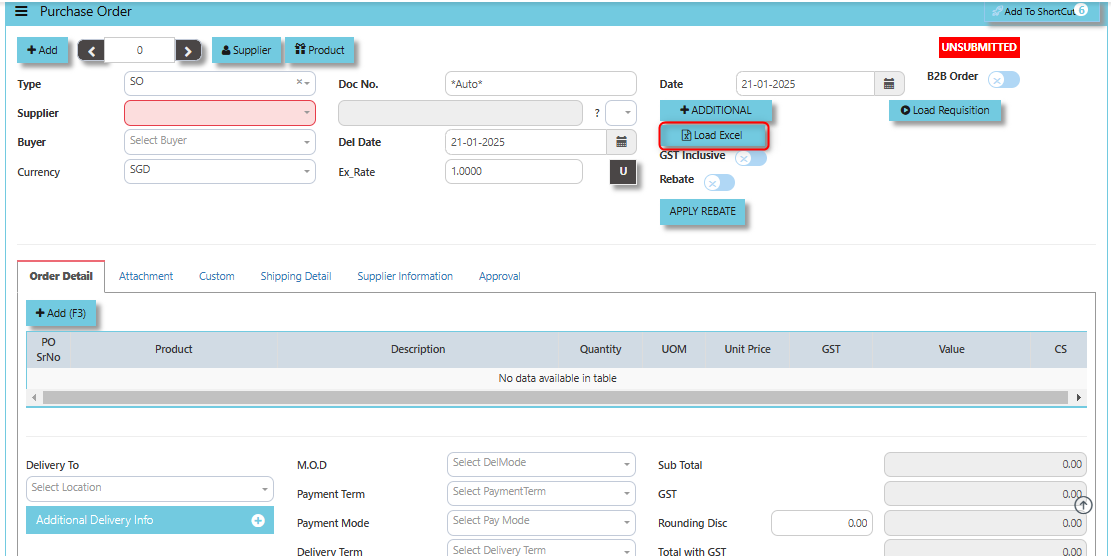
How to use Load Excel?
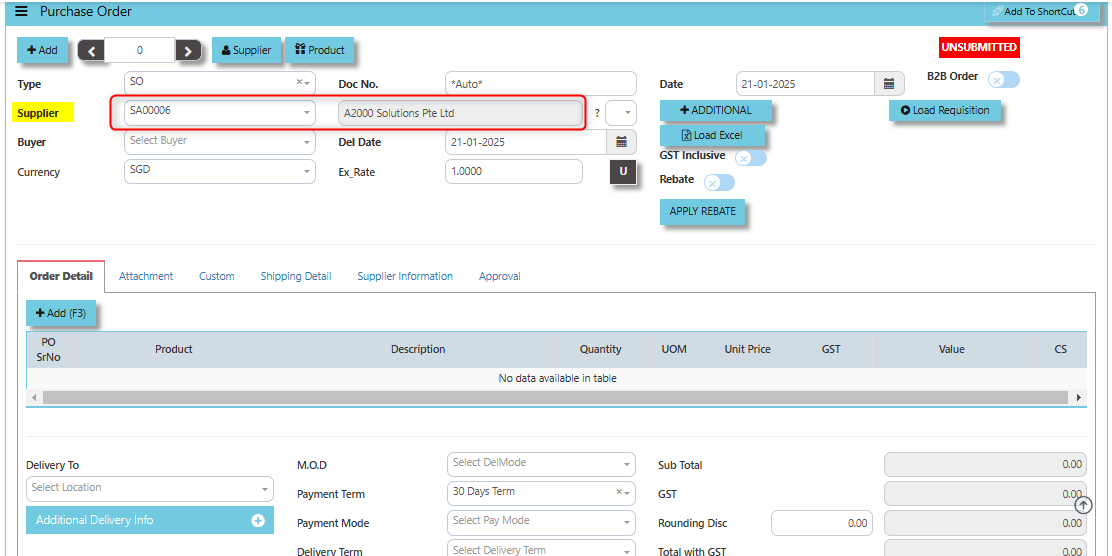
- Click the Supplier - drop-down list to select Supplier Name.
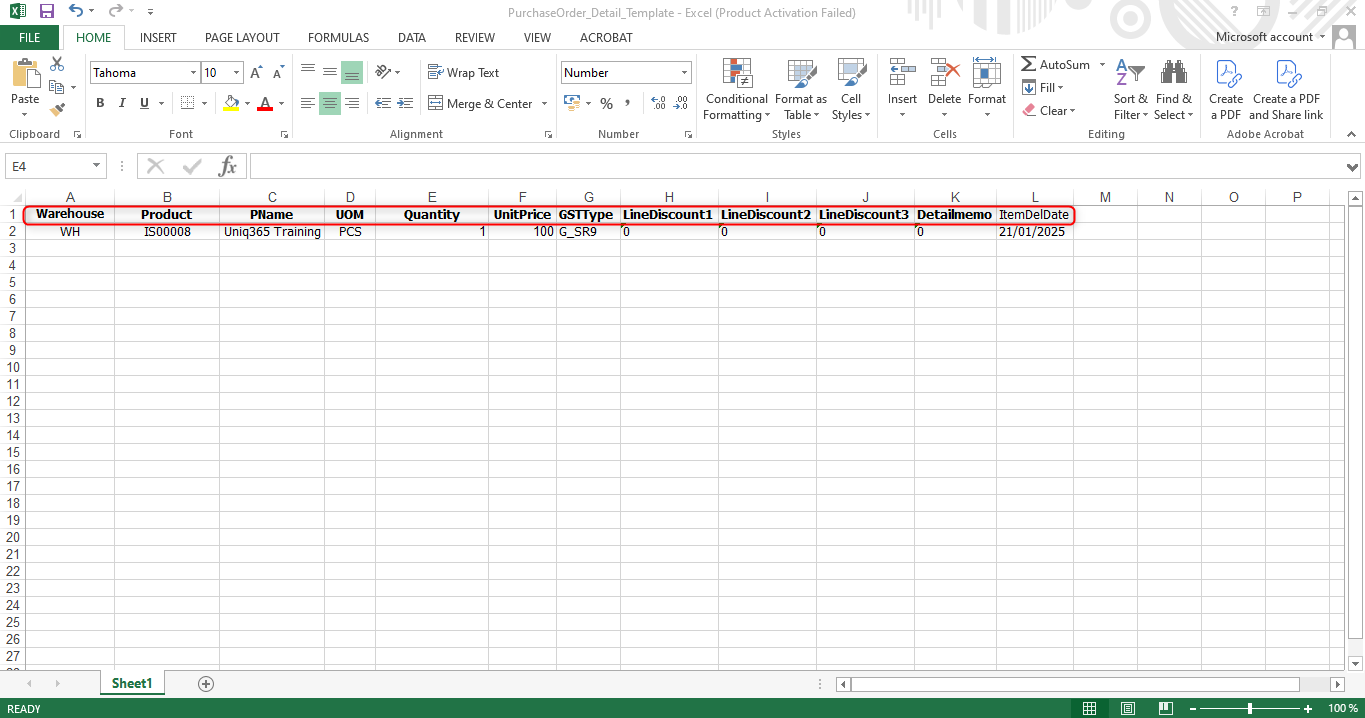
2. Download the Excel Template and ensure the Excel file you plan to upload is formatted correctly. It should contain all the necessary fields required for a purchase order, such as:
- Warehouse
- Product Code
- Product Name
- UOM
- Quantity
- Unit Price
- GST Type
- Line Discount 1, 2 & 3
- Detail Memo
- Item Delivery Date
3. Click the "Load Excel" button to open the file upload interface. This may open a file browser or prompt you to select the Excel file you want to upload.
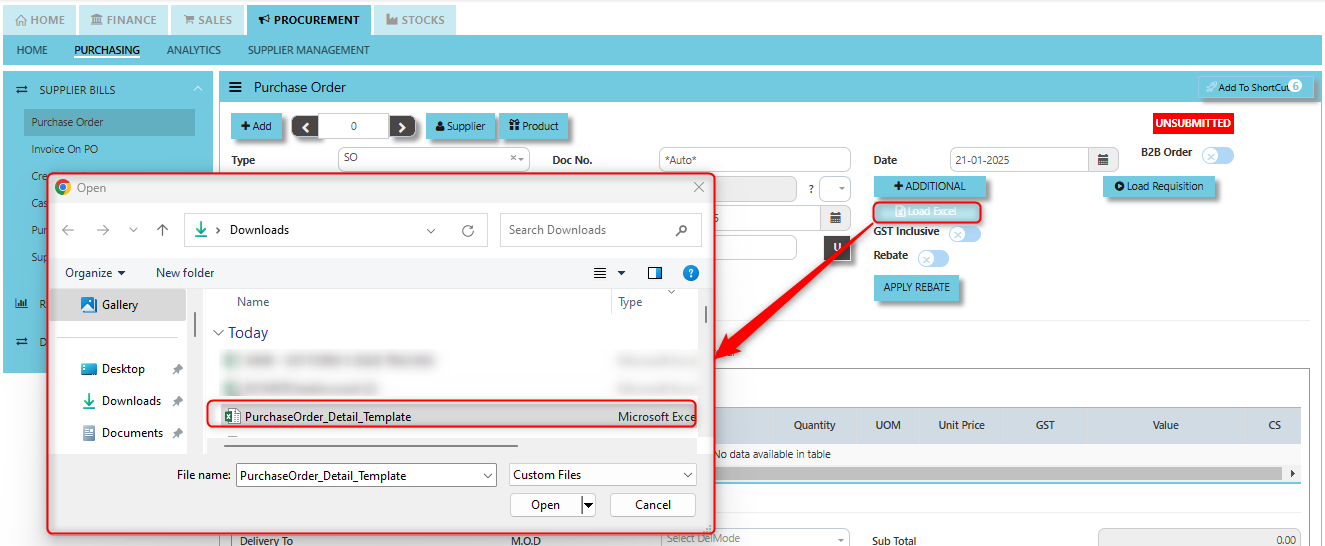
4.
5. After the import is complete, review the imported purchase orders in the system to ensure everything has been transferred correctly. This might include checking that the order details, such as item descriptions, quantities, prices, and suppliers, are accurate.
5. Once the data is imported successfully, you can proceed to save the purchase order as required by your workflow. This may involve further approvals or other processes depending on the organization's procedures.
Add to ShortCut - Used to create a shortcut for quick access to a specific purchase order or purchase-related functionality within the ERP system. When you click this button, the selected purchase order or screen can be added to a personalized list of shortcuts, which allows users to quickly navigate to that specific purchase order or function without having to search for it every time.
How to use Add to ShortCut?
1. Click "Add to ShortCut" and system will open below windows:
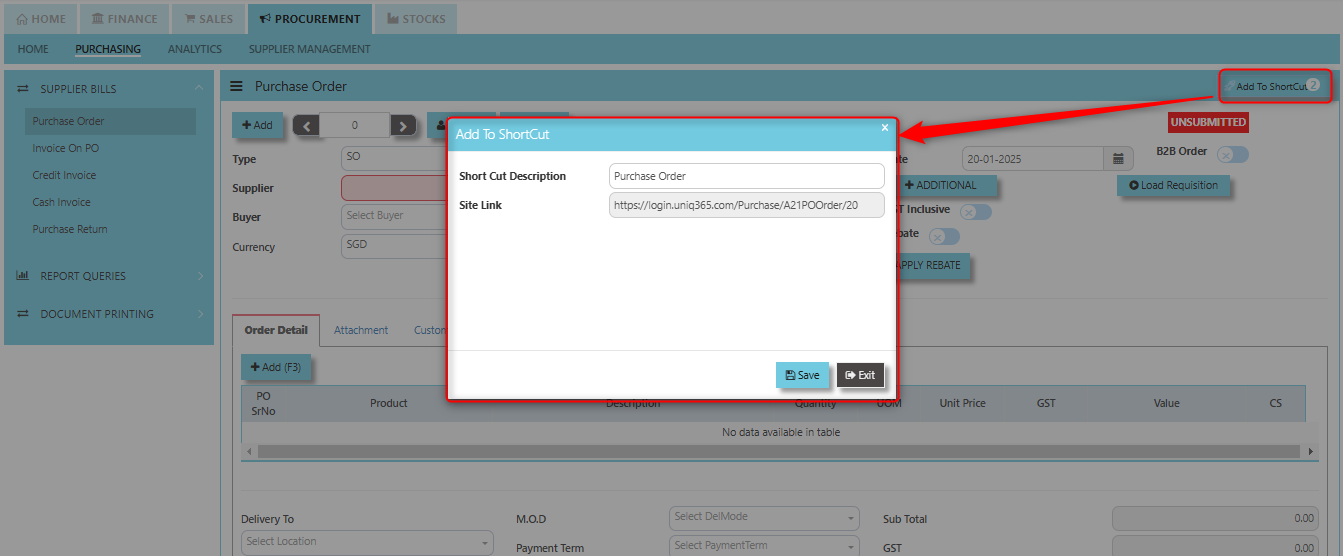
2. Enter Short Cut Description
3. Click SAVE then click OK.
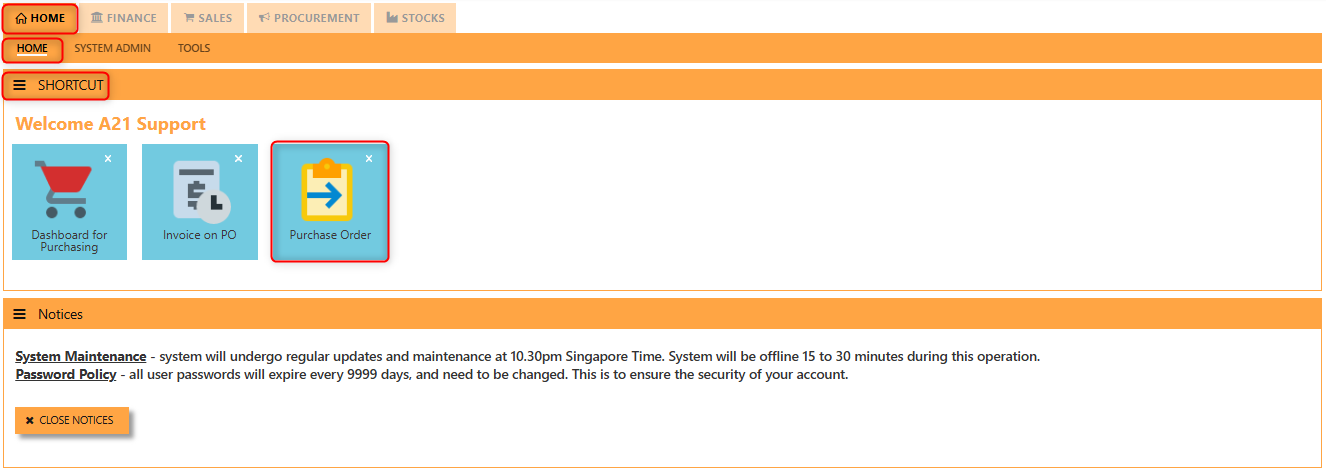
4. User may look to the Homepage for the added function or page. Click on HOME - HOME - SHORTCUT for the screen below.
Invoice on PO (SE)
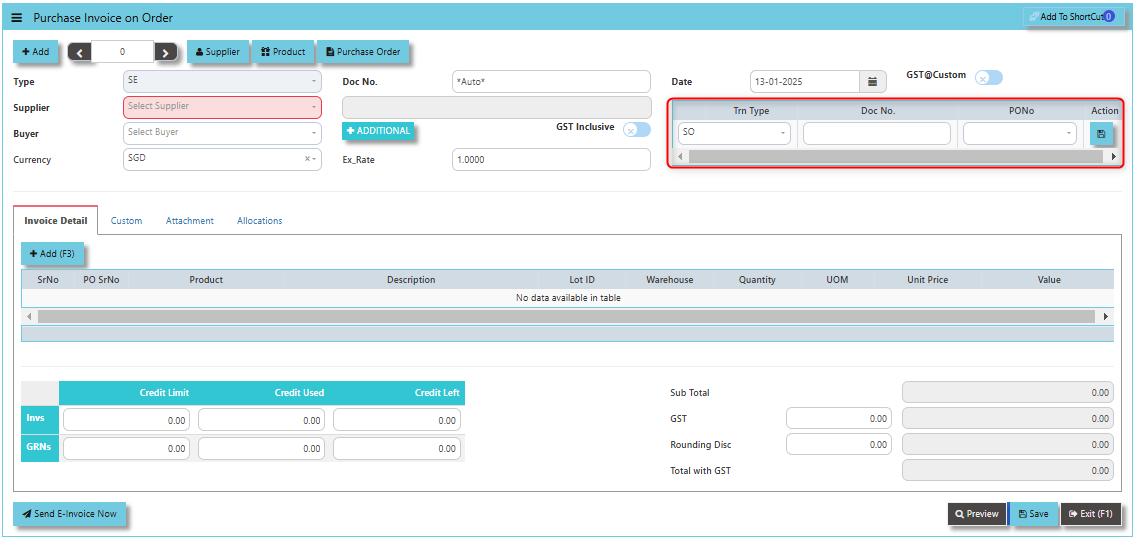
Following the Purchase Operation, you will create the Supplier Invoice on Order. Enter the required fields before selecting the Purchase Order at the top right hand corner of the screen. The product line items must be verified and entered one by one. After entering all the item details, click on the Save button. The GL and Inventory will be updated.
How to create Invoice on Order?
1. Click on PROCUREMENT – PURCHASING – SUPPLIER BILLS - INVOICE ON PO for the screen below.
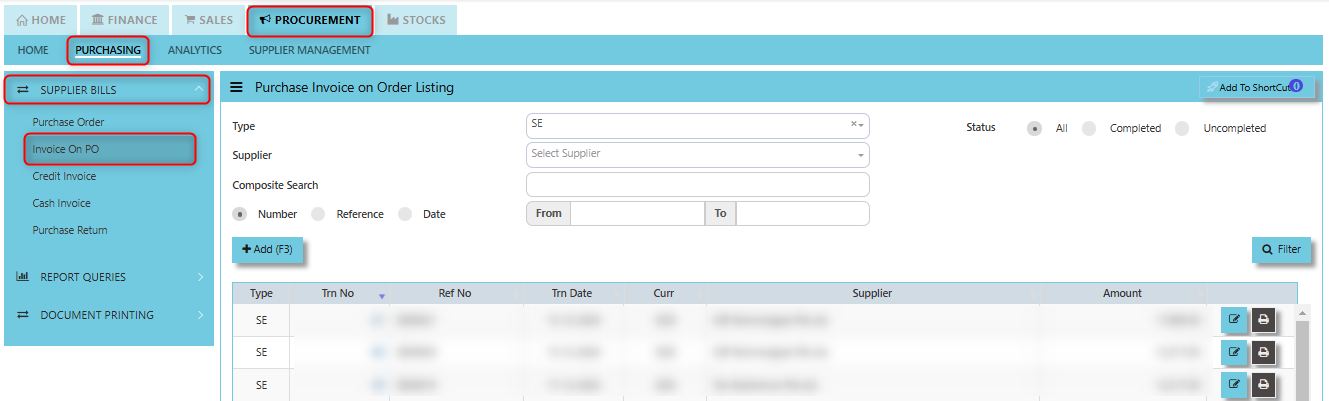
2. Click Add (F3) to create new record.
3. Click Type - drop-down to select transaction type – SE (Invoice on Order).
4. After transaction type selection, use the tab button to go to the Ref No., Date and other fields.
5. Click the Supplier - drop-down list to select Supplier Name, followed by the Buyer, PDS, Currency and Exchange Rate.
6. After the above steps are done, click on the Order No. drop- down list to select a Purchase Order (SO) (refer to the highlighted screen).
7. After selecting the SO transaction from the Order No. column, user can use the “L” button beside the Order No. to load all the product items at one go. Alternatively, you can use the Ref column which appears at product line details, to enter the items from the Purchase Order one by one. After all the items are called out, save the transaction.
Add to ShortCut - Used to create a shortcut for quick access to a specific purchase invoice or purchase invoice-related functionality. By clicking this button, users can add the current purchase invoice to a list of shortcuts, allowing them to access the invoice or related functionality quickly and efficiently, without needing to search for it each time.

How to use Add to ShortCut?
1. Click "Add to ShortCut" and system will open below windows:
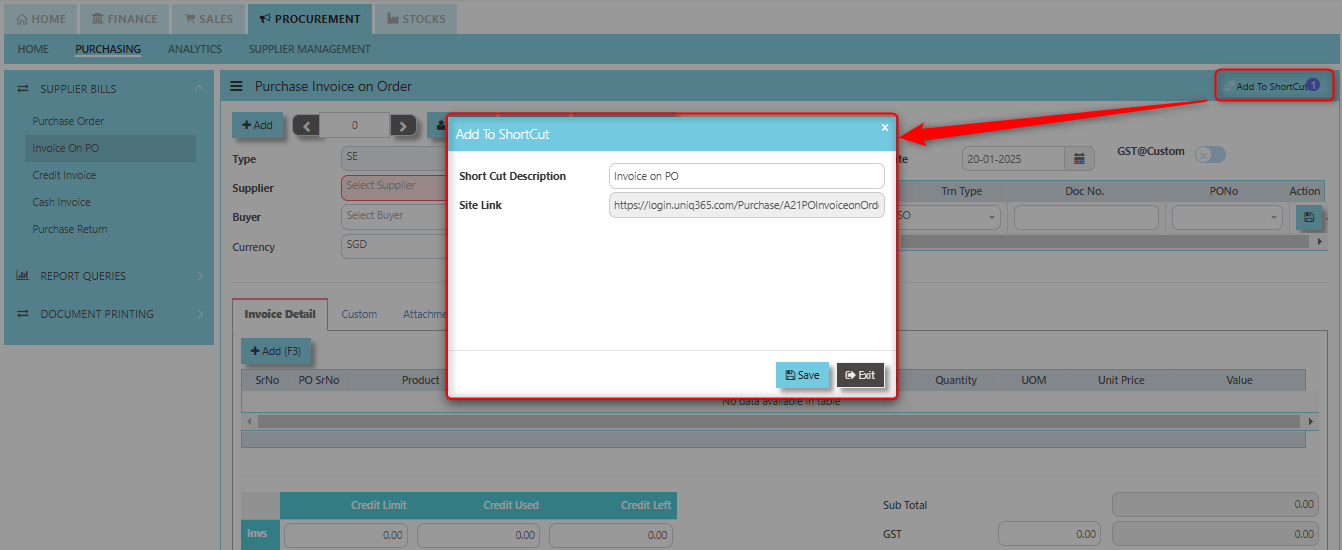
2. Enter Short Cut Description
3. Click SAVE then click OK.
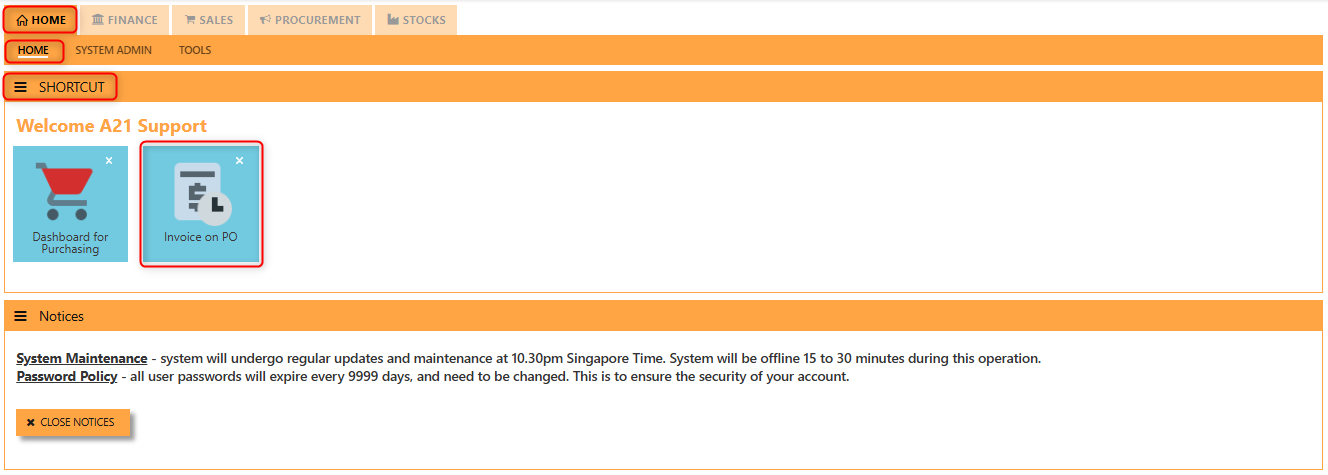
4. User may look to the Homepage for the added function or page. Click on HOME - HOME - SHORTCUT for the screen below.
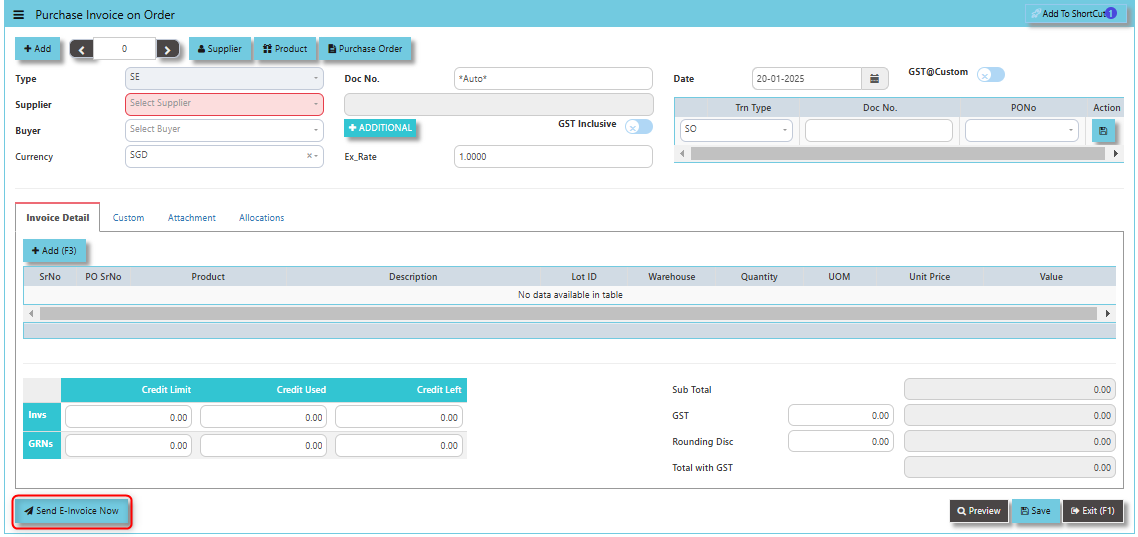
"Send E-Invoice Now" Button: serves the purpose of immediately sending an electronic invoice (e-invoice) to the relevant party, typically the supplier or vendor, once the purchase invoice has been generated. Supplier company should get "Peppol ID" as a pre-requisite for this function and user can maintain under supplier maintenance of the specific supplier.
Credit Invoice (SI)
A Supplier Credit Invoice directly updates the inventory status and post a direct transaction for invoicing. It will also update the Accounts Payable at the same time.
How to set create Credit Invoice?
1. Click on PROCUREMENT – PURCHASING – SUPPLIER BILLS - CREDIT INVOICE for the screen below.
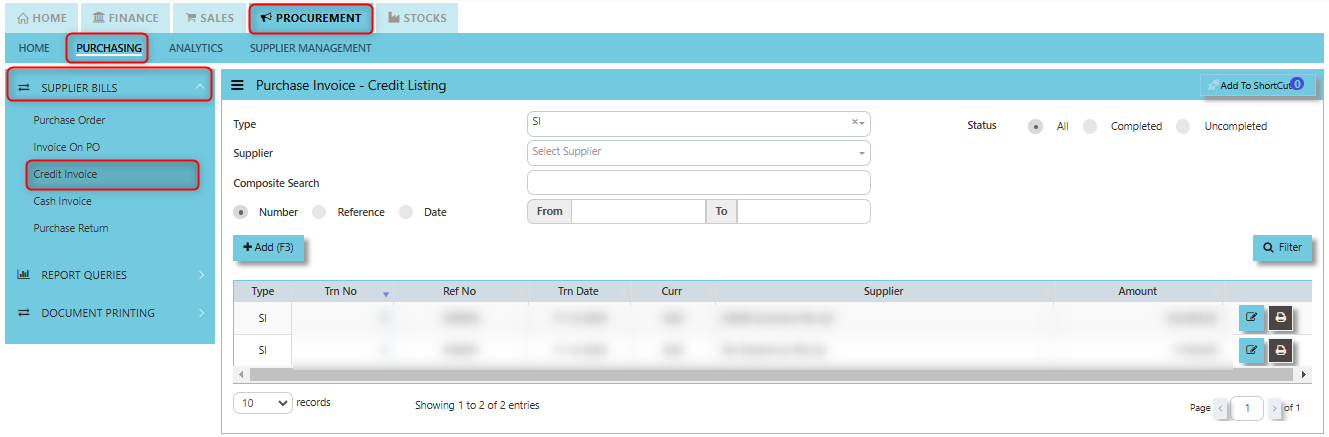
2. Click Add (F3) to create new record.
3. Click the Type - drop-down to select transaction type – SI (Credit Invoice).
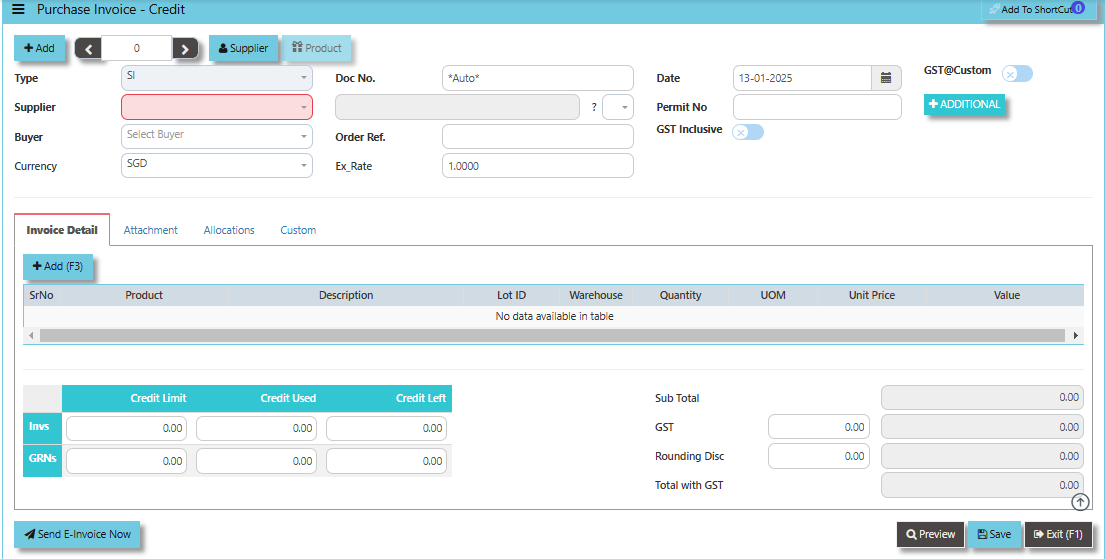
4. After selecting the transaction type, use the tab button to go to the Ref No., Date and other fields.
5. Click the Supplier - drop-down list to select Supplier Name, followed by the Buyer, PDS, Currency, Exchange Rate, Our D/O, Order Ref No. and Narration if applicable.
6. After completing the above steps, go to Invoice Details to enter the product code, name, quantity, and unit price. Save the transaction.
Add to ShortCut - Serves the purpose of creating a shortcut for quick access to a specific credit note or purchase invoice credit transaction. By clicking this button, users can add the current credit note or credit invoice related to a purchase to their personalized shortcut list, allowing them to access it instantly without having to search for it repeatedly.

How to use Add to ShortCut?
1. Click "Add to ShortCut" and system will open below windows:

2. Enter Short Cut Description
3. Click SAVE then click OK.
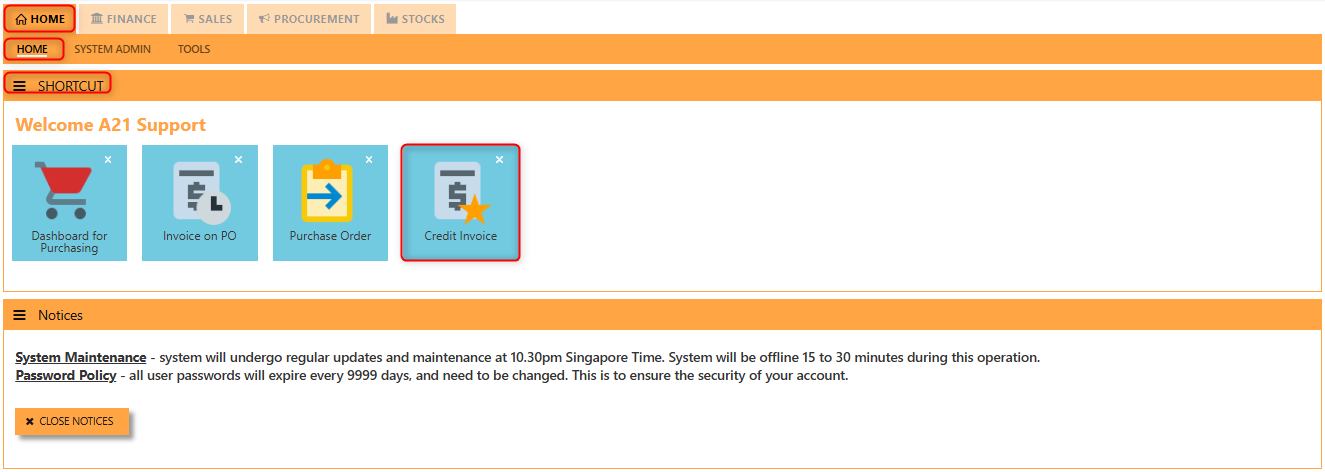
4. User may look to the Homepage for the added function or page. Click on HOME - HOME - SHORTCUT for the screen below.
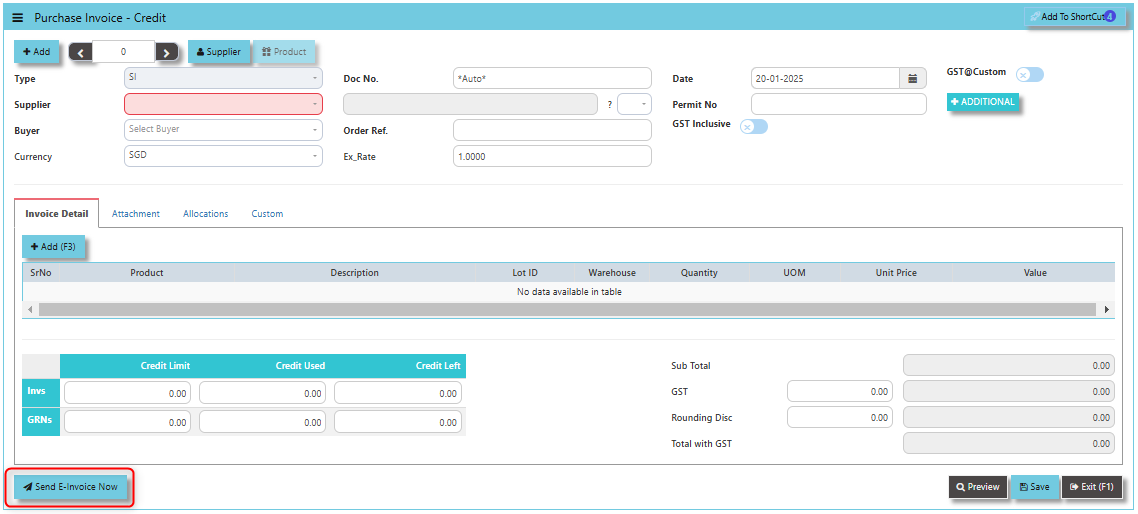
"Send E-Invoice Now" Button: Used to immediately send the credit note or purchase invoice credit to the supplier or vendor in an electronic format. This functionality automates the process of transmitting the credit note, making it quicker, more efficient, and ensuring compliance with e-invoicing regulations in regions where applicable. Supplier company should get "Peppol ID" as a pre-requisite for this function and user can maintain under supplier maintenance of the specific supplier.
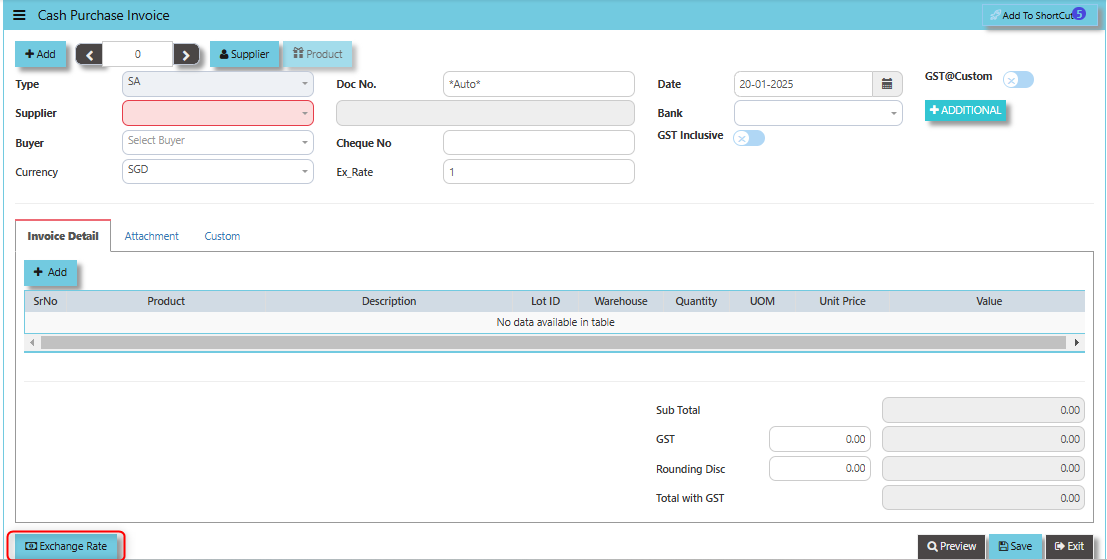
Cash Invoice (SA)
Unlike the Purchase Credit Invoice, the Supplier Invoice – Cash directly credit the bank as it is a direct cash transaction. This transaction updates the inventory as well as the GL. The Bank code is mandatory and must be specified before saving the transaction.
How to set create Cash Invoice?
1. Click on PROCUREMENT – PURCHASING – SUPPLIER BILLS - CASH INVOICE for the screen below.
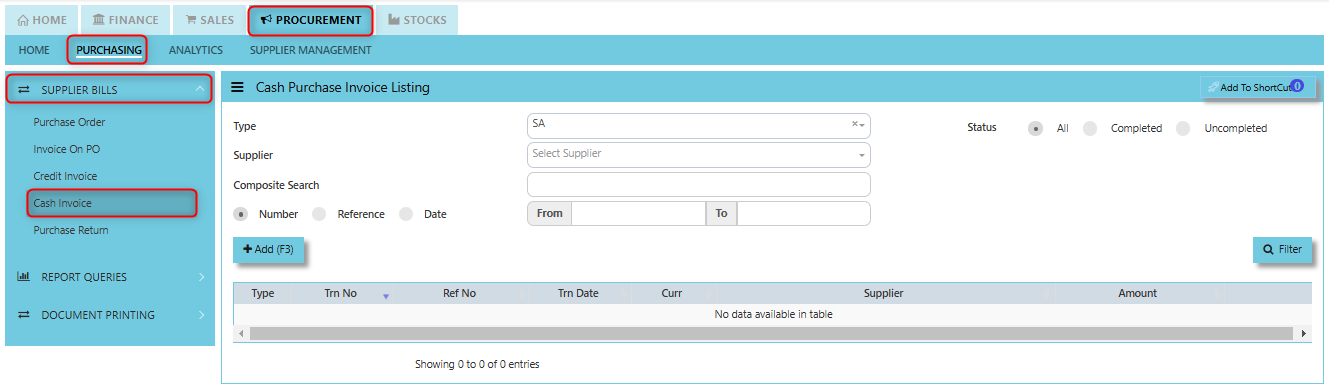
2. Click Add (F3) to create new record.
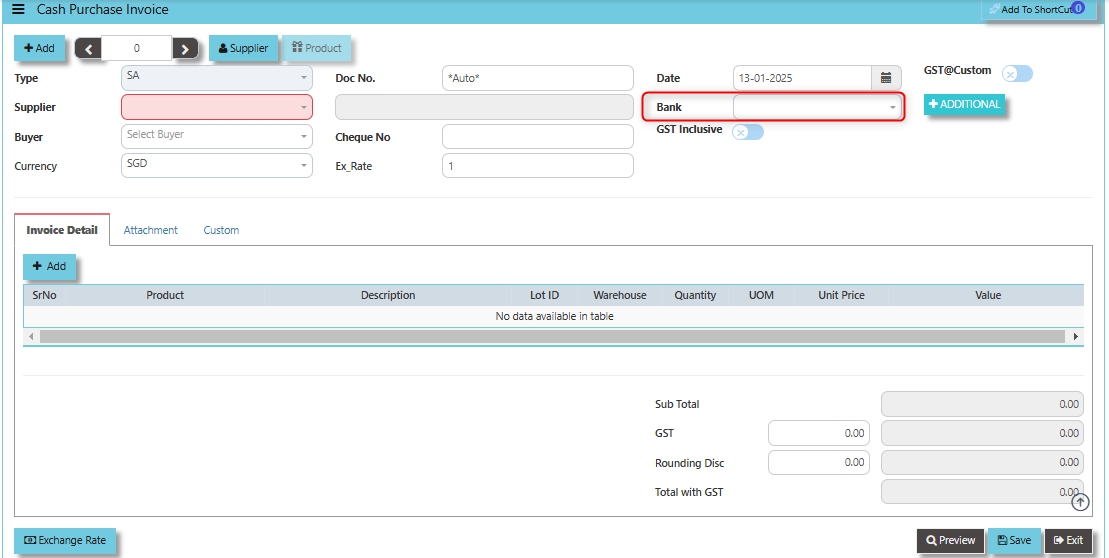
3. Click the Type - drop-down to select transaction type – SA (Cash Invoice).
4. After the transaction type selection, use the tab button to go to the Ref No., Date and other fields.
5. Click the Supplier - drop-down list to select Supplier Name, followed by the Buyer, PDS, Currency and Exchange Rate.
6. The “Bank Code” is an important field and must be entered, followed by the Cheque Number (refer the highlighted screen).
7. Once all the header information has been entered, go to the Details section to select the product code and name from the drop-down list. Save the transaction after this is done.
Add to ShortCut - By clicking the "Add to Shortcut" button, the cash purchase invoice or related feature (such as the specific purchase transaction or screen) is saved to the user's personalized shortcut list. This allows for faster navigation in the future, eliminating the need to go through multiple menus to access the same page or function.

How to use Add to ShortCut?
1. Click "Add to ShortCut" and system will open below windows:
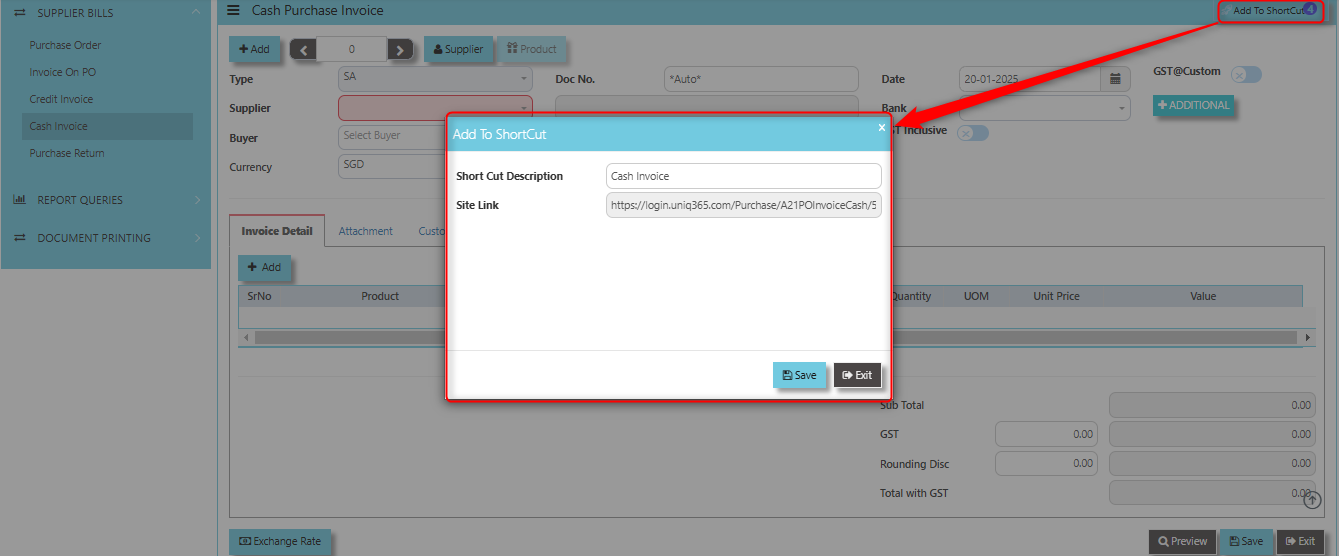
2. Enter Short Cut Description
3. Click SAVE then click OK.
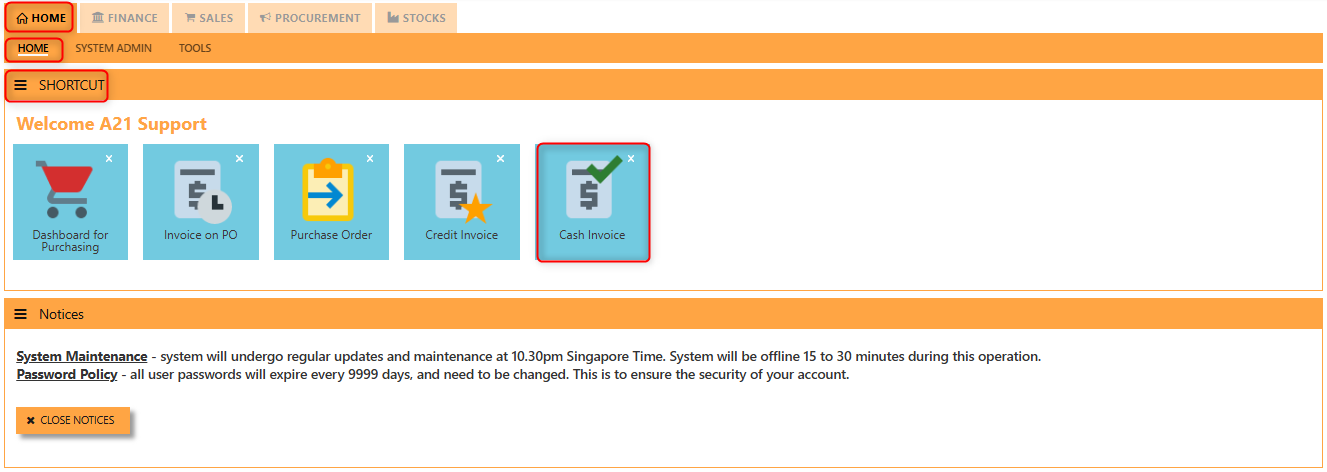
4. User may look to the Homepage for the added function or page. Click on HOME - HOME - SHORTCUT for the screen below.
"Exchange Rate" button - Used to define or update the exchange rate when the invoice involves foreign currency transactions. This feature allows users to accurately convert the purchase invoice amount from the foreign currency into the company’s base currency, based on the prevailing exchange rate at the time of the transaction.
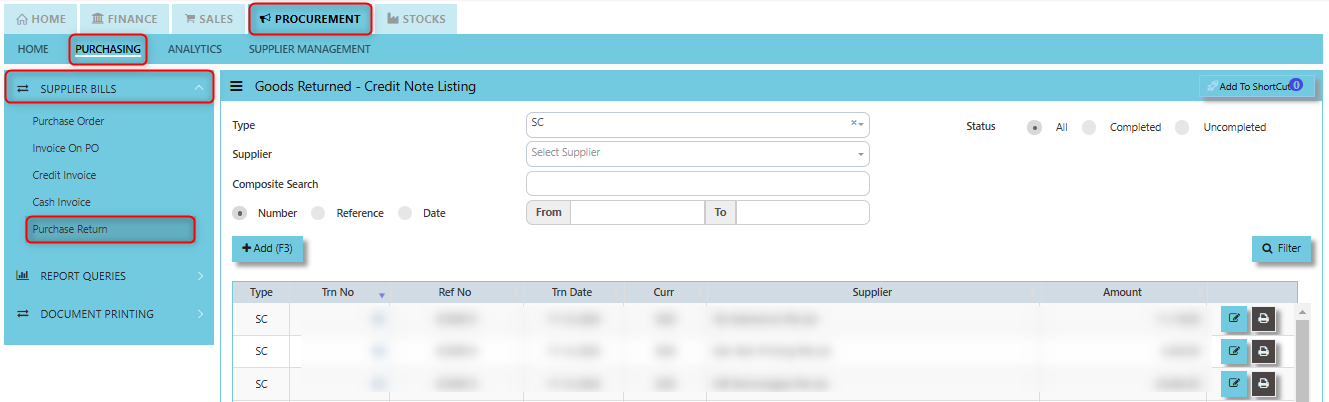
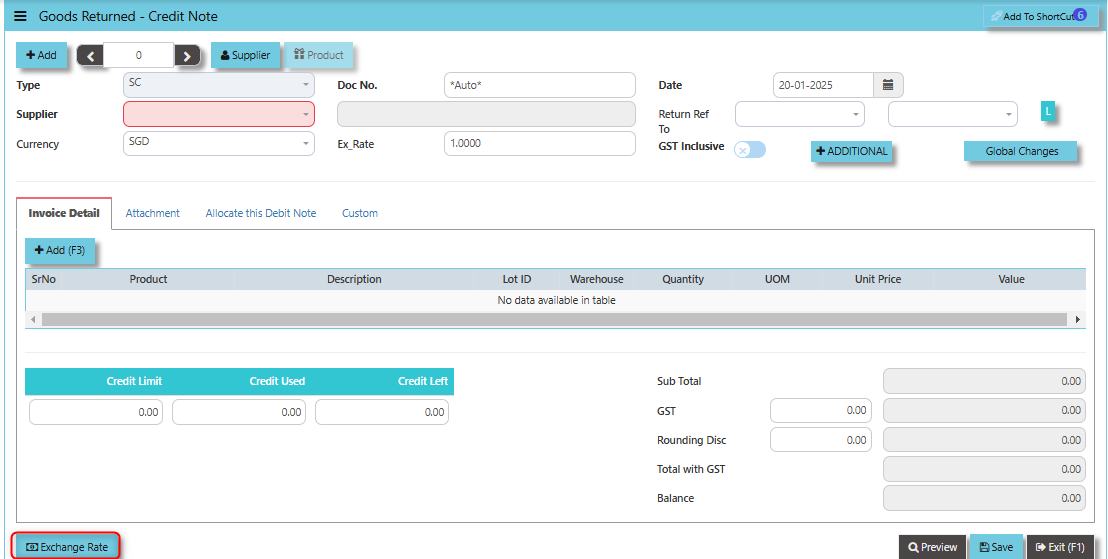
Purchase Return (SC)
This is used to create a Credit Note to suppliers when Goods are returned. This will update the GL and the stock status.
How to set create Purchase Return?
1. Click on PROCUREMENT – PURCHASING – SUPPLIER BILLS - PURCHASE RETURN for the screen below.
2. Click Add (F3) to create new record.
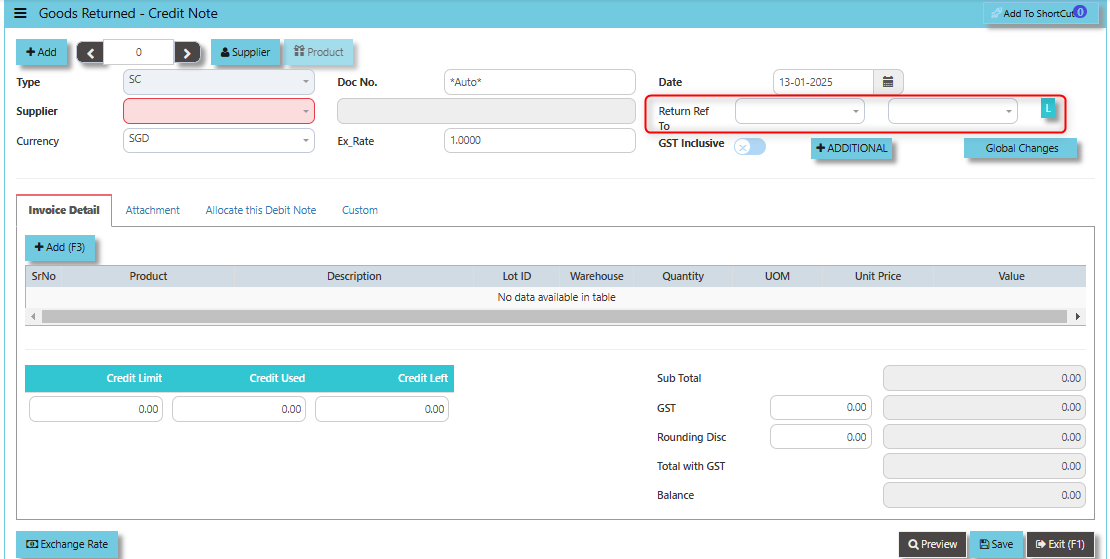
3. Click Type - drop-down to select transaction type – SC (Goods Returned – Credit Note).
4. After transaction type selection, use the tab button to go to the Ref No., Date, and other fields.
5. Click the Supplier - drop-down list to select Supplier Name, followed by the Buyer, PDS, Currency, Exchange Rate, RMA Ref and Narration if applicable.
Add to ShortCut - Clicking this button allows users to add a specific supplier's profile or page to a shortcut list. Once added, this shortcut enables the user to quickly navigate to the supplier’s details directly from a dashboard or main menu, without having to search for the supplier each time.
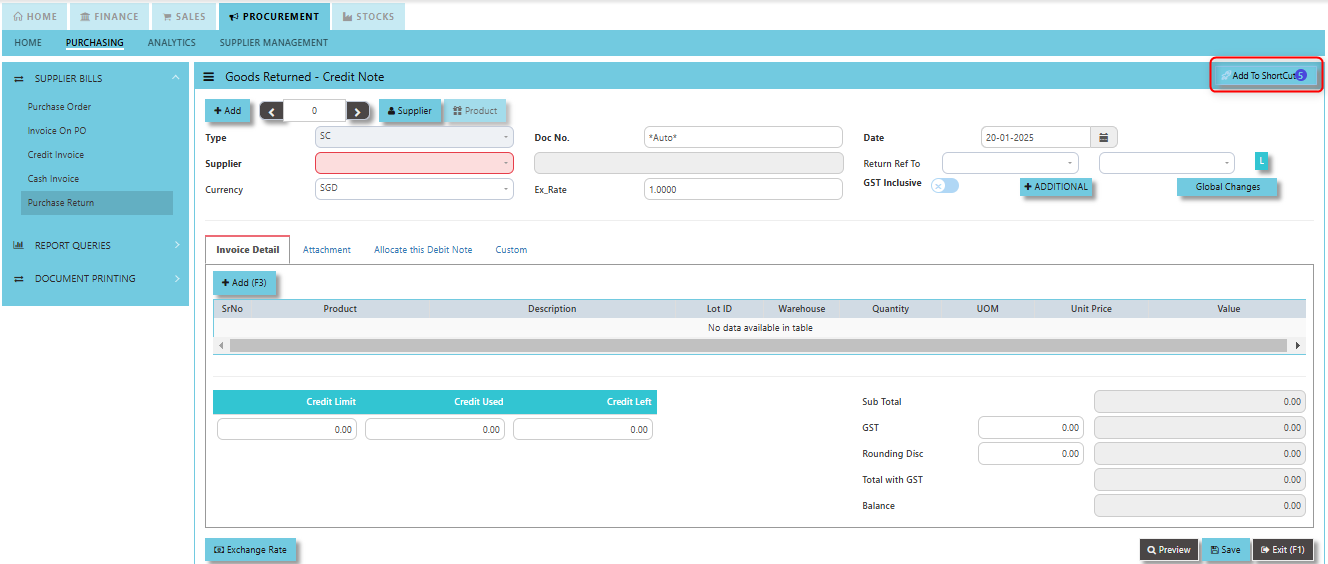
How to use Add to ShortCut?
1. Click "Add to ShortCut" and system will open below windows:
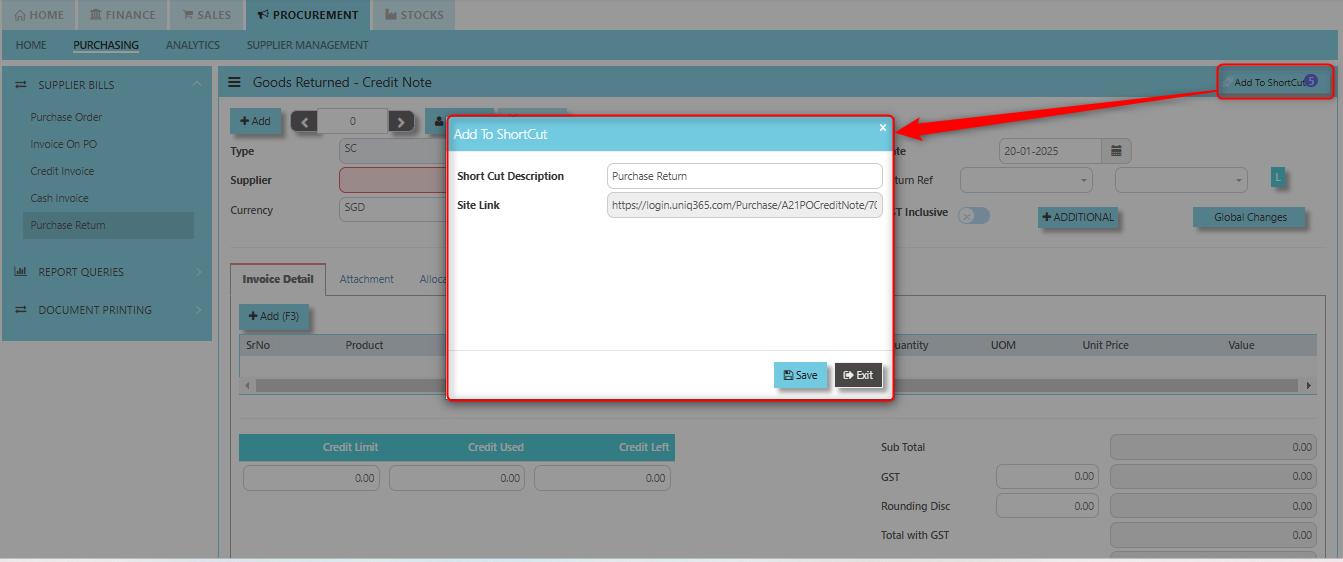
2. Enter Short Cut Description
3. Click SAVE then click OK.
4. User may look to the Homepage for the added function or page. Click on HOME - HOME - SHORTCUT for the screen below.

"Exchange Rate" Button - used to define or update the exchange rate when a goods return or credit note transaction involves foreign currency. This allows users to convert the value of the returned goods or the credit amount from the supplier’s currency into the company’s base or local currency based on the applicable exchange rate.
Supplier Debit Note (SD)
This is a direct Debit Note which sells product directly to suppliers. Its updates the GL and Inventory status.
How to set create Supplier Debit Note?
1. Click on PROCUREMENT – PURCHASING – SUPPLIER BILLS - SUPPLIER DEBIT NOTE for the screen below.
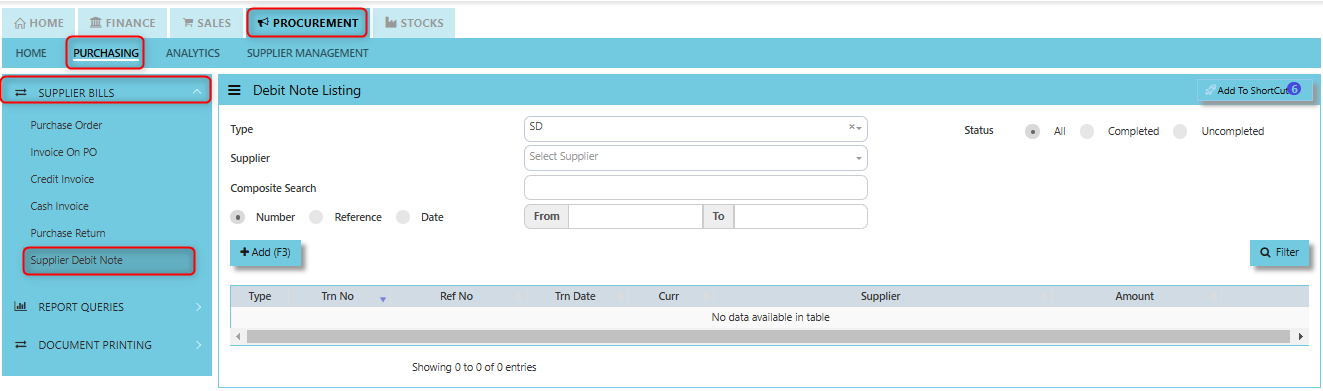
2. Click Add (F3) to create new record.
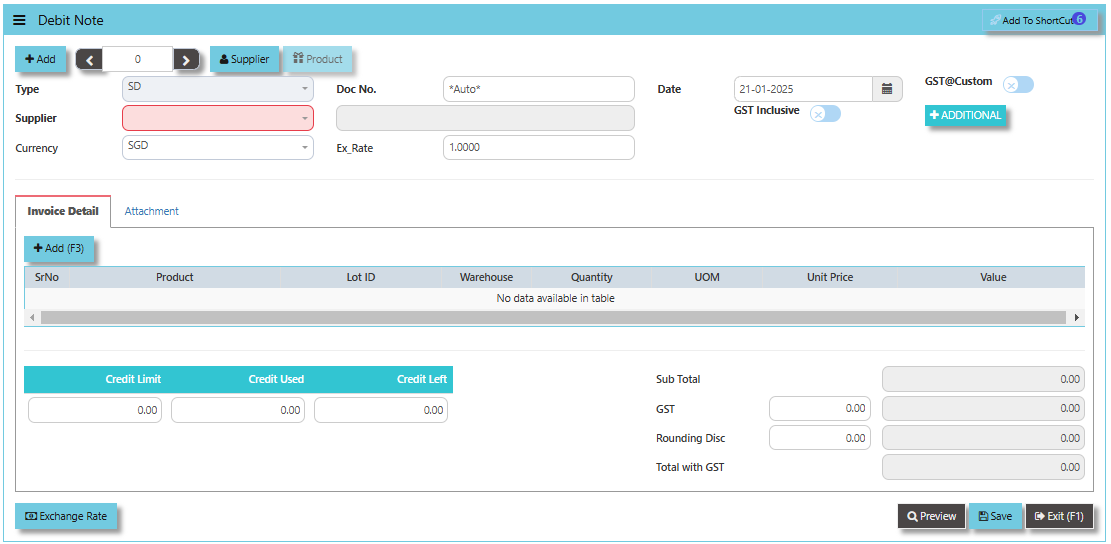
3. Click Type - drop-down to select transaction type – SD (Debit Note).
4. After transaction type selection, use the tab button to go to the Ref No., Date, and other fields.
5. Click the Supplier drop-down list to select Supplier Name, followed by the Buyer, PDS, Currency, Exchange Rate and Narration if applicable.
6. After updating the header information, go to Details section to enter the product items. Save the transaction after this is done.