
Purchasing
In a typical setup, the user may put up a Typical Purchase Requisition (note the difference between a Purchase Requisition & a Sales Quotation. A Purchase Requisition allows you to indicate which supplier you are sending the order to). Once the requisition is confirmed, a Purchase Order can be created. Upon confirmation of all the Purchase Orders, the goods will then be delivered by the stated suppliers. You may record a Goods Received Note (GRN – Optional) for your reference and then send the supplier’s invoice to the Accounts Department. Alternatively, you can just record the Invoice straight upon receiving it from supplier.
Another scenario is that no Purchase Order is created, only a verbal order is placed to the suppliers. You received goods from suppliers and the invoice is sent to you later. The final scenario is where the Purchase is done simply by placing an order and you just receive the goods and invoice from suppliers, in which case the Credit/Cash Invoice will be created directly. Some Purchase transactions can be done by placing a deposit first.
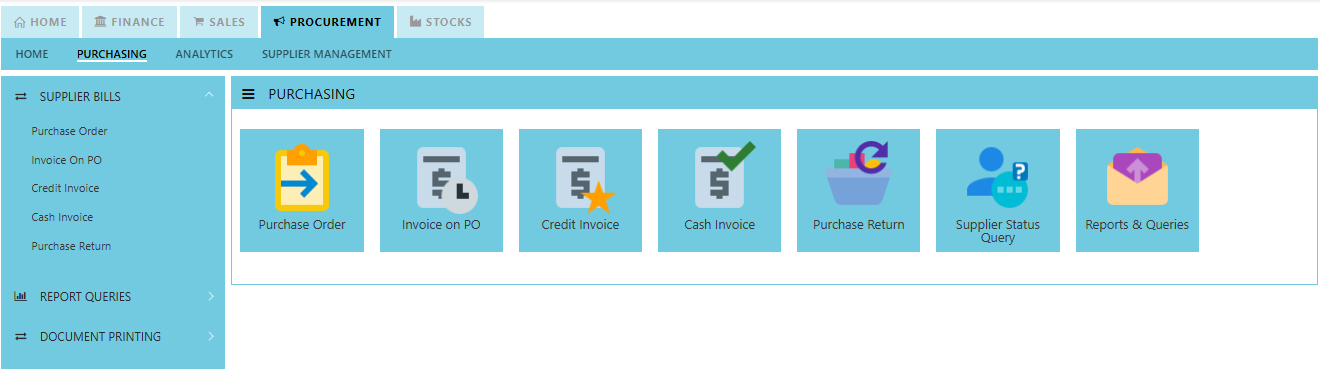
How to locate Purchasing?
- Click on Procurement – Purchasing for the screen below.
Supplier Purchase Order (SO)
In Uniq365, you can indicate the Supplier Delivery Mode in the Supplier Maintenance or Transactions. You can also sort or filter reports by Delivery Mode. The Purchase Order in the Purchase Module serves as a document to update the system that goods are on order. No ledger postings take place at this point. Purchase Order is denoted by the transaction type “SO”.
How to set Supplier Purchase Order?
- Click on Procurement – Purchasing – Purchase Order for the screen below.
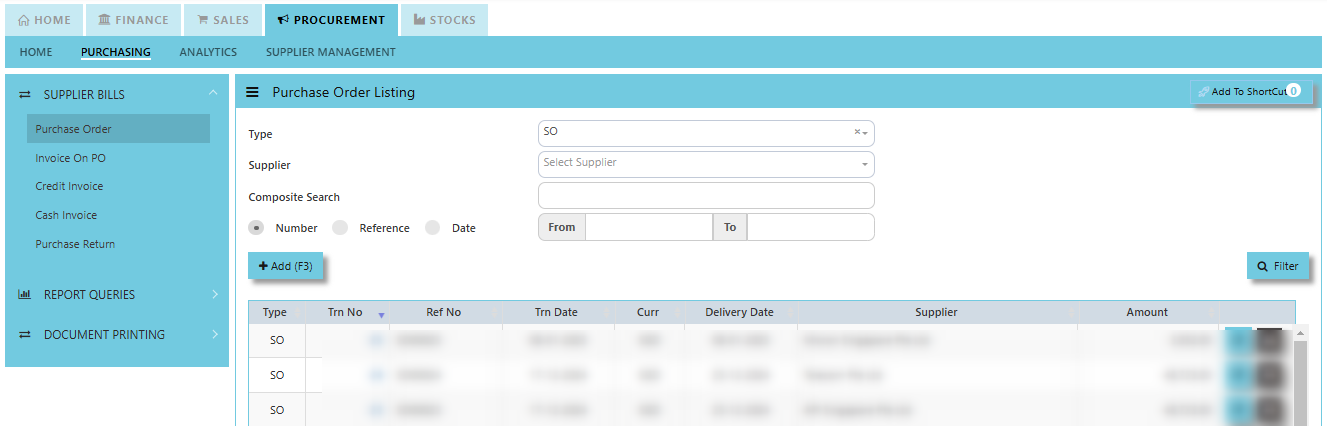
- Click Add (F3) to create new record.
- Click Type - drop-down to select transaction type – SO (Purchases Order).
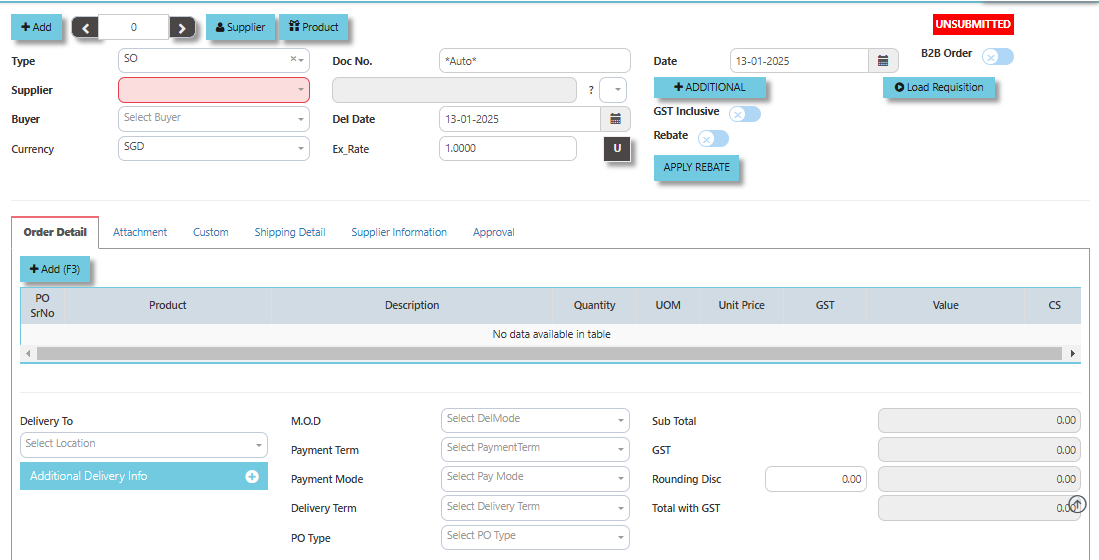
- After transaction type selection, use the tab button to go to the Ref No., Date, and other fields.
- Click the Supplier - drop-down list to select Supplier Name, followed by the Buyer, PDS, Currency, Rate, Narration, Delivery Date & Lead Time if applicable.
- After all the header information has been entered, go to the Details section to select the Product Code and Name for that Purchase Order. Save the transaction after this is done.
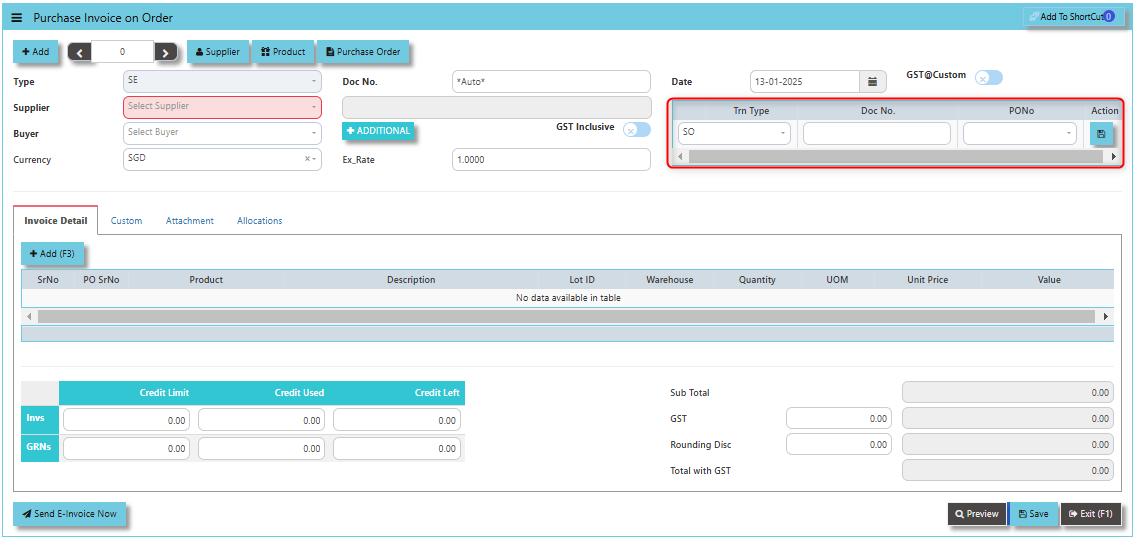
Invoice on PO (SE)
Following the Purchase Operation, you will create the Supplier Invoice on Order. Enter the required fields before selecting the Purchase Order at the top right hand corner of the screen. The product line items must be verified and entered one by one. After entering all the item details, click on the Save button. The GL and Inventory will be updated.
How to create Invoice on Order?
- Click on Procurement – Purchasing – Invoice on PO for the screen below.
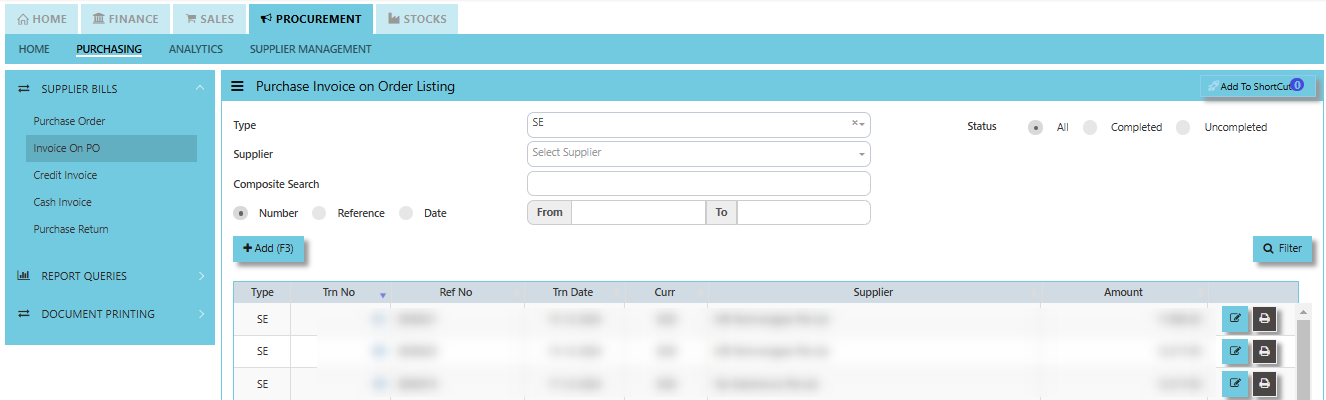
- Click Add (F3) to create new record.
- Click Type - drop-down to select transaction type – SE (Invoice on Order).
- After transaction type selection, use the tab button to go to the Ref No., Date and other fields.
- Click the Supplier - drop-down list to select Supplier Name, followed by the Buyer, PDS, Currency and Exchange Rate.
- After the above steps are done, click on the Order No. drop- down list to select a Purchase Order (SO) (refer to the highlighted screen).
- After selecting the SO transaction from the Order No. column, user can use the “L” button beside the Order No. to load all the product items at one go. Alternatively, you can use the Ref column which appears at product line details, to enter the items from the Purchase Order one by one. After all the items are called out, save the transaction.
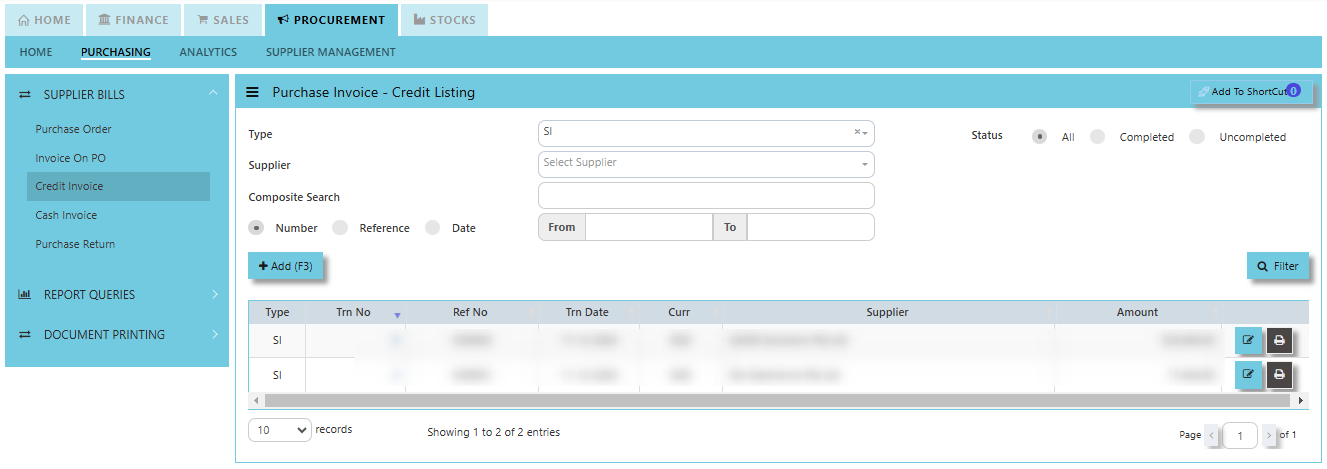
Credit Invoice (SI)
A Supplier Credit Invoice directly updates the inventory status and post a direct transaction for invoicing. It will also update the Accounts Payable at the same time.
How to set create Credit Invoice?
- Click on Procurement – Purchasing – Credit Invoice for the screen below.
- Click Add (F3) to create new record.
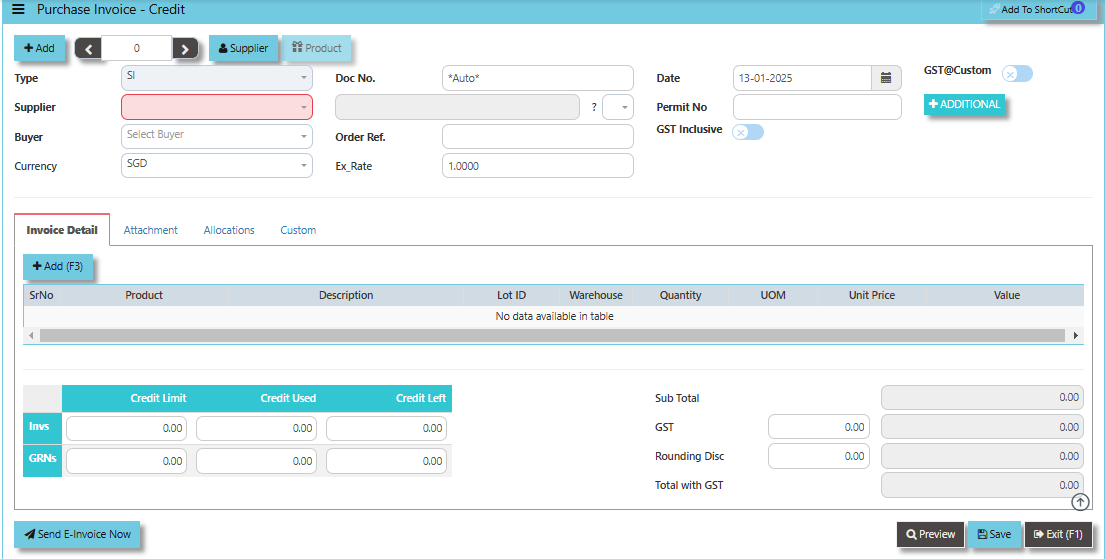
- Click the Type - drop-down to select transaction type – SI (Credit Invoice).
- After selecting the transaction type, use the tab button to go to the Ref No., Date and other fields.
- Click the Supplier - drop-down list to select Supplier Name, followed by the Buyer, PDS, Currency, Exchange Rate, Our D/O, Order Ref No. and Narration if applicable.
- After completing the above steps, go to Invoice Details to enter the product code, name, quantity, and unit price. Save the transaction.
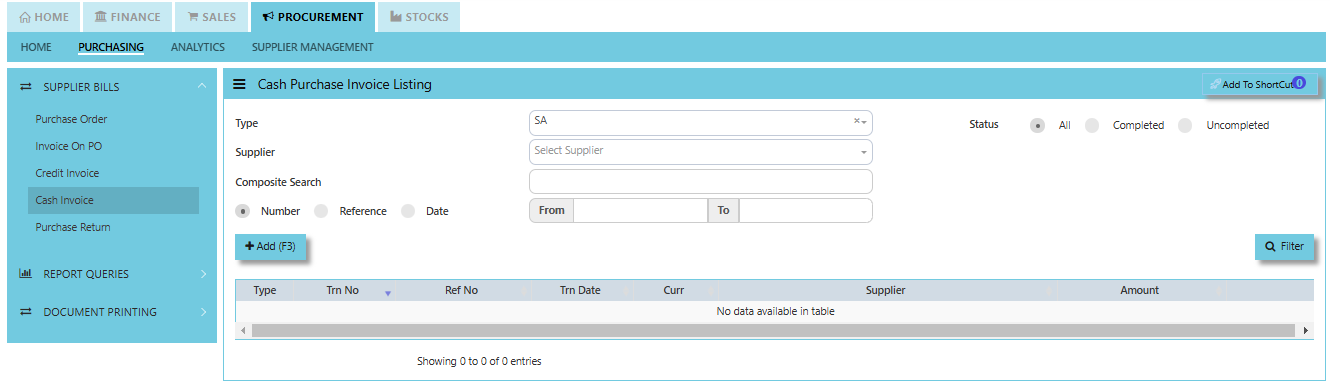
Cash Invoice (SA)
Unlike the Purchase Credit Invoice, the Supplier Invoice – Cash directly credit the bank as it is a direct cash transaction. This transaction updates the inventory as well as the GL. The Bank code is mandatory and must be specified before saving the transaction.
How to set create Cash Invoice?
- Click on Procurement – Purchasing – Cash Invoice for the screen below.
- Click Add (F3) to create new record.
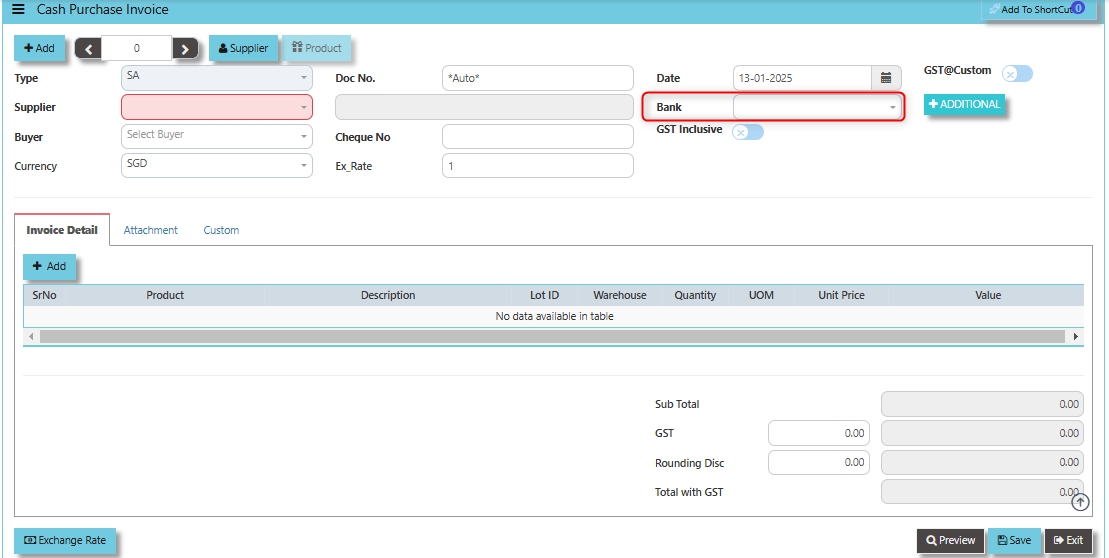
- Click the Type - drop-down to select transaction type – SA (Cash Invoice).
- After the transaction type selection, use the tab button to go to the Ref No., Date and other fields.
- Click the Supplier - drop-down list to select Supplier Name, followed by the Buyer, PDS, Currency and Exchange Rate.
- The “Bank Code” is an important field and must be entered, followed by the Cheque Number (refer the highlighted screen).
- Once all the header information has been entered, go to the Details section to select the product code and name from the drop-down list. Save the transaction after this is done.
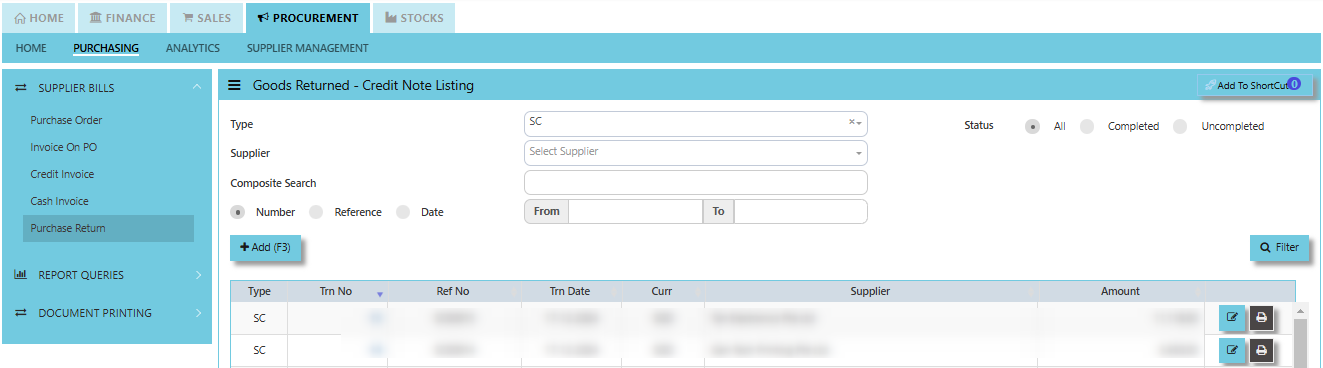
Purchase Return (SC)
This is used to create a Credit Note to suppliers when Goods are returned. This will update the GL and the stock status.
How to set create Purchase Return?
- Click on Procurement – Purchasing –Purchase Return for the screen below.
- Click Add (F3) to create new record.
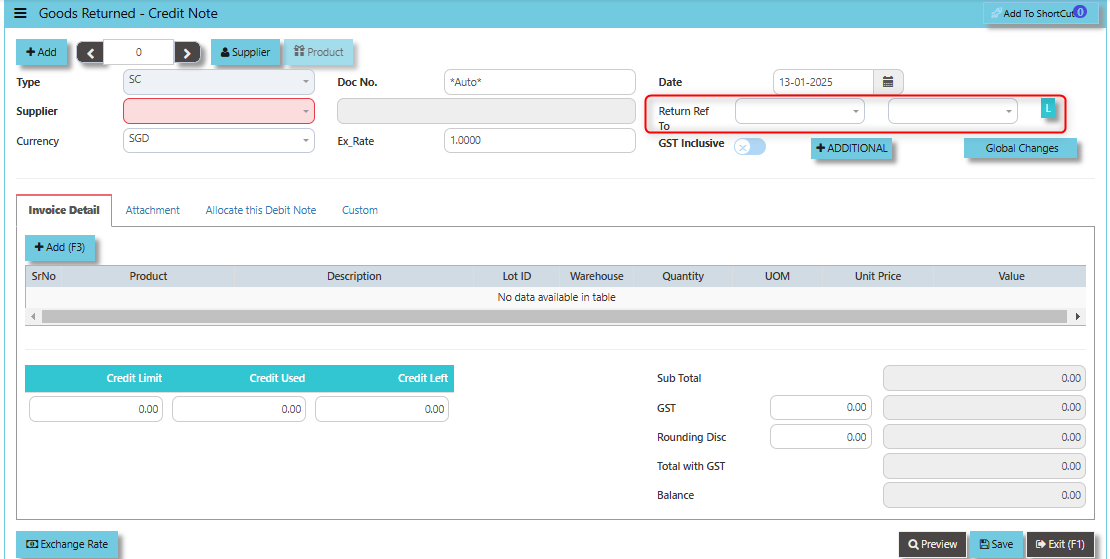
- Click Type - drop-down to select transaction type – SC (Goods Returned – Credit Note).
- After transaction type selection, use the tab button to go to the Ref No., Date, and other fields.
- Click the Supplier - drop-down list to select Supplier Name, followed by the Buyer, PDS, Currency, Exchange Rate, RMA Ref and Narration if applicable.
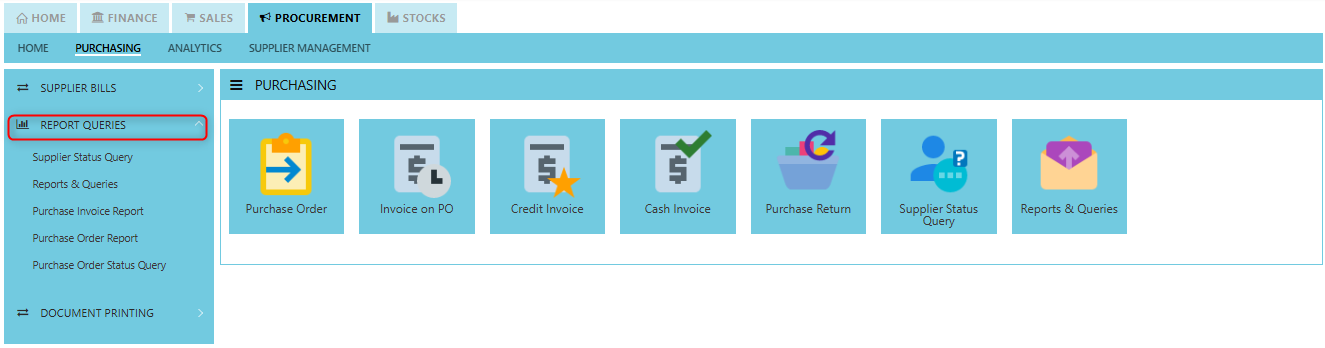
Report Queries
This is where all the Purchase reports such as Pending Purchase Orders, Purchase Invoice and GRN Listing, as well as Purchase Order Listing are located. The available reports in the Reports/Queries also have the capability to export to Microsoft Word, Excel and PDF. Users can filter the reports according to transaction type, date, reference number, transaction number and supplier. Detailed reports are available, and the reports can also be sorted by Default, Supplier, Product, Reference No and Delivery Date.
How to locate Report Queries?
- Click on Procurement – Purchasing – Report queries for the screen below.
Supplier Status Query
Uniq365 accounting provides a very convenient interface which allows the user to drill down to the detailed transactions.
How to view Supplier Status Query?
- Click on Procurement – Purchasing –Report and Queries – Supplier Status Query for the screen below.
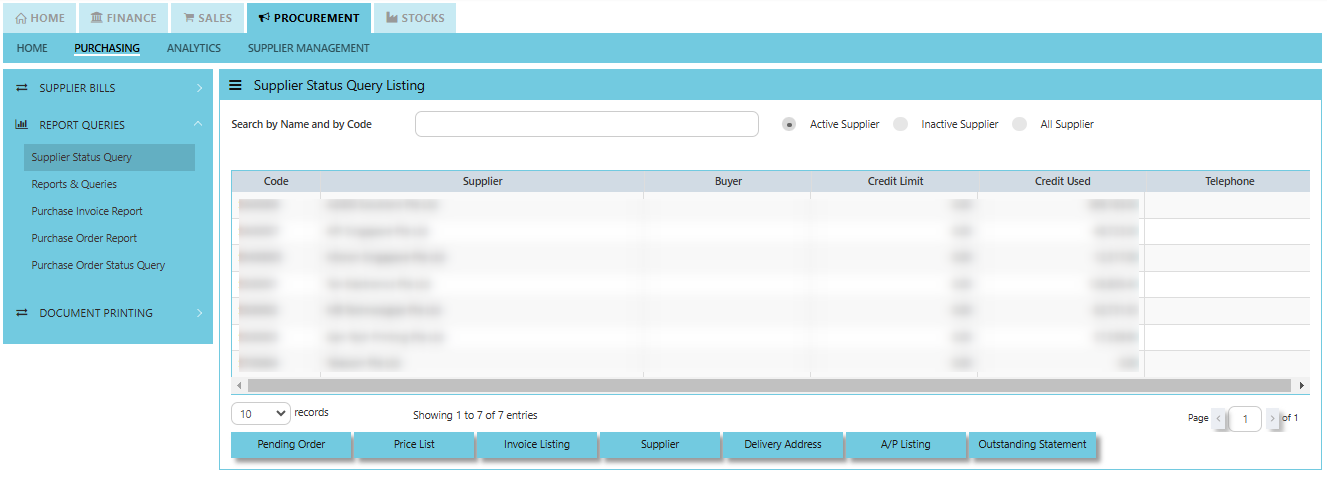
- You may filter by individual suppliers. The following data can be drilled down to transaction level:
- Pending Orders
- Delivery Addresses
- Price List
- AR Listing
- Invoice Listing
- Outstanding Statement - Instead of listing all invoices, you may choose to display only those that are outstanding. From this report, you may also drill down to the document level by clicking Go To Transaction.
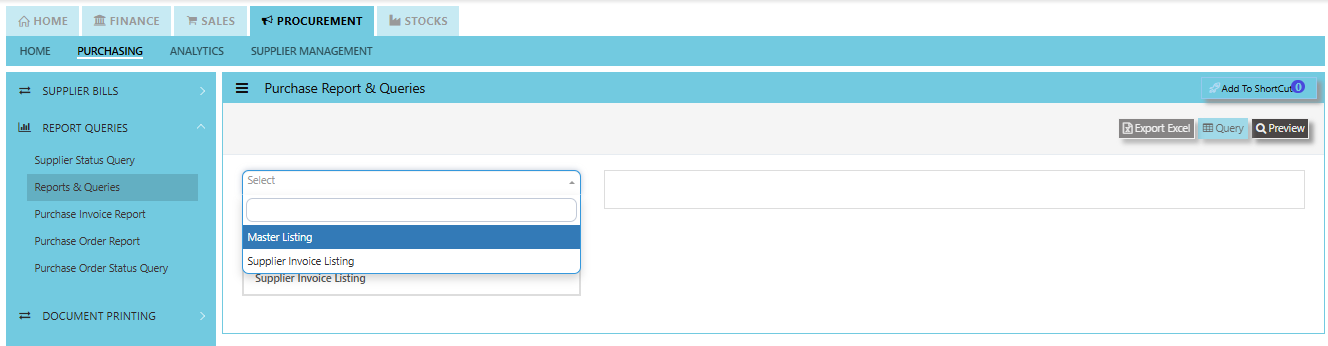
Reports and Queries
Uniq365 Reports & Queries interface make it extremely easy for you to take a report in any way you need, whether it is by date, or PDS.
How to view Report and Queries?
- Click on Procurement – Purchasing –Report and Queries – Report & Queries for the screen below.
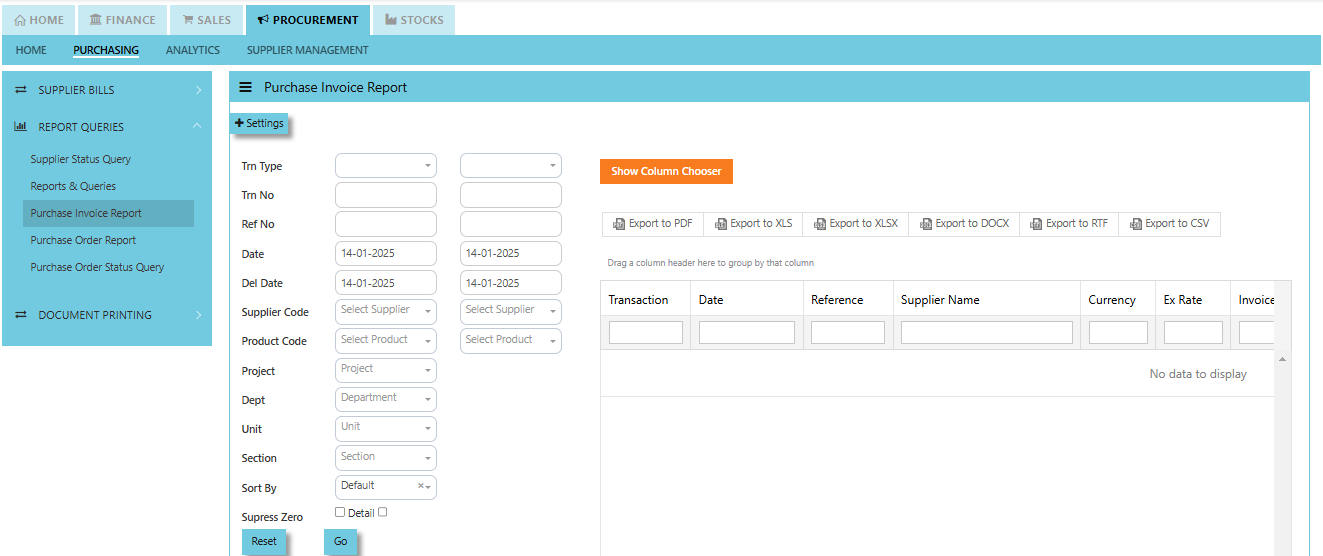
Purchase Invoice Report
In Uniq365, this report provides a detailed summary of all purchase invoices that have been generated within a specific time period or for a particular set of criteria and verify purchase transactions, manage supplier payments, and ensure the accuracy of financial records related to procurement activities.
This report provides a very convenient interface which allows user to drill down to the detailed transaction and user can create their own report format to generate by filtering information base on their own preferences. The available reports in the section also have the capability to export to Microsoft Word, Excel and PDF.
How to view Purchase Invoice Report?
- Click on Procurement – Purchasing – Report Queries – Purchase Invoice Report for the screen below.
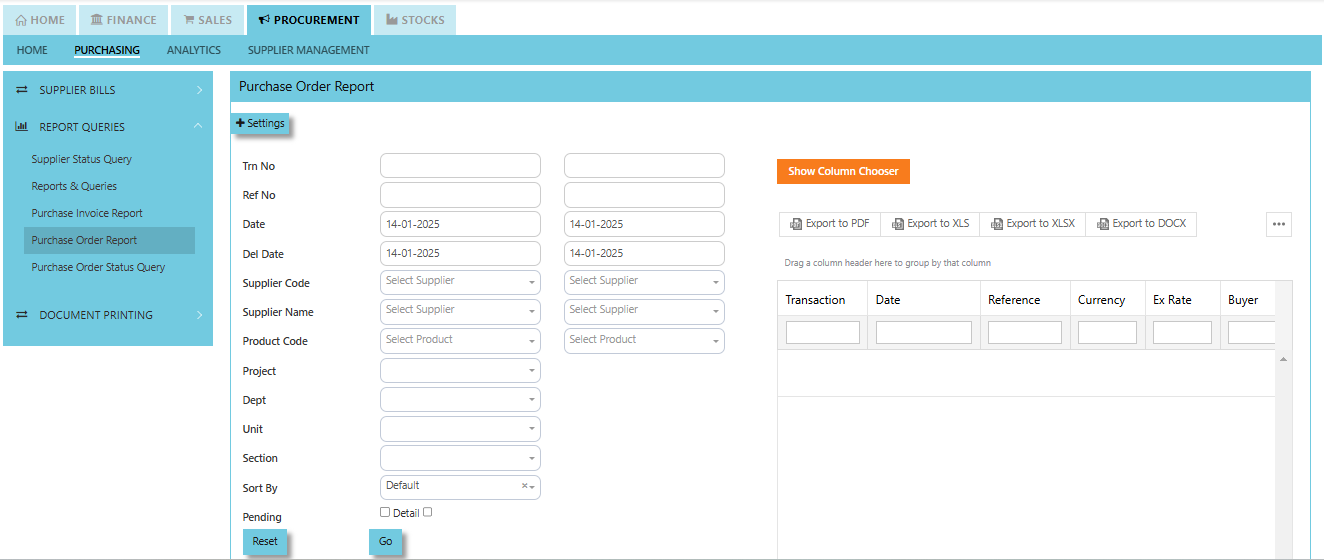
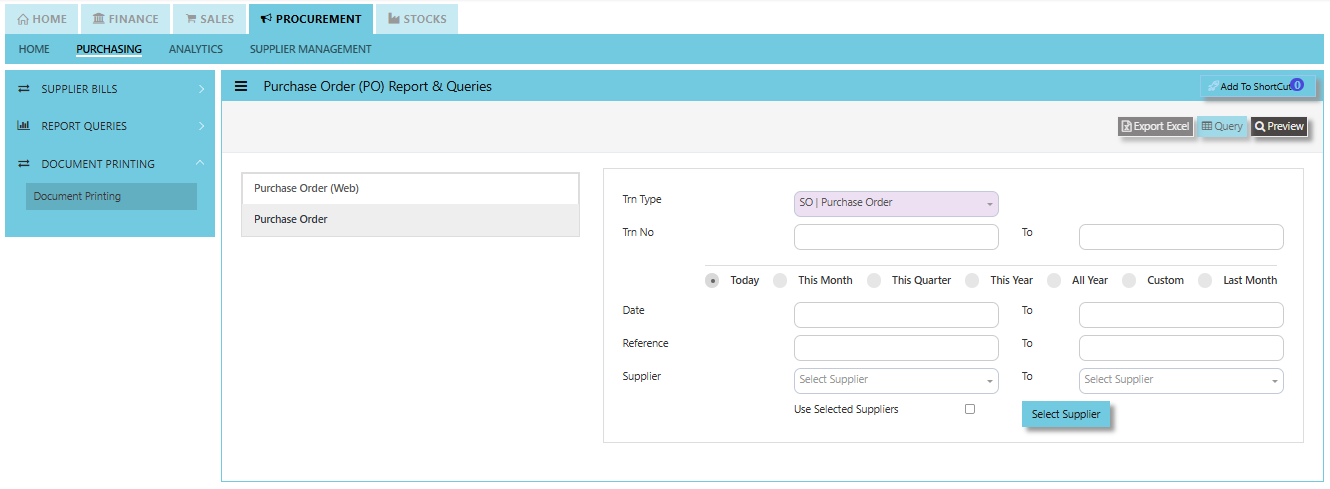
Purchase Order Report
This is a standard report that provides detailed information about purchase orders (POs) created, processed, or pending within the system. It is typically part of the report queries and is used to track and analyze purchasing activities.
The user can dig down to the specific transaction using this report's very user-friendly layout, and they can even customize the report structure by filtering data according to their own preferences. Additionally, the section's accessible reports can be exported to PDF, Excel, and Microsoft Word.
How to view Purchase Order Report?
- Click on Procurement – Purchasing –Report Queries – Purchase Order Report for the screen below.
Document Printing
Document Printing
- Finally, the document printing option opens the menu for document printing.
How to use Document Printing?
- Click on Procurement – Purchasing –Document Printing for the screen below.
- This option allows user to select the printing of documents a range of document numbers.