
Create New Product
The Product Management tab comprises the following options that are crucial in setting up and using the STOCKS Module:
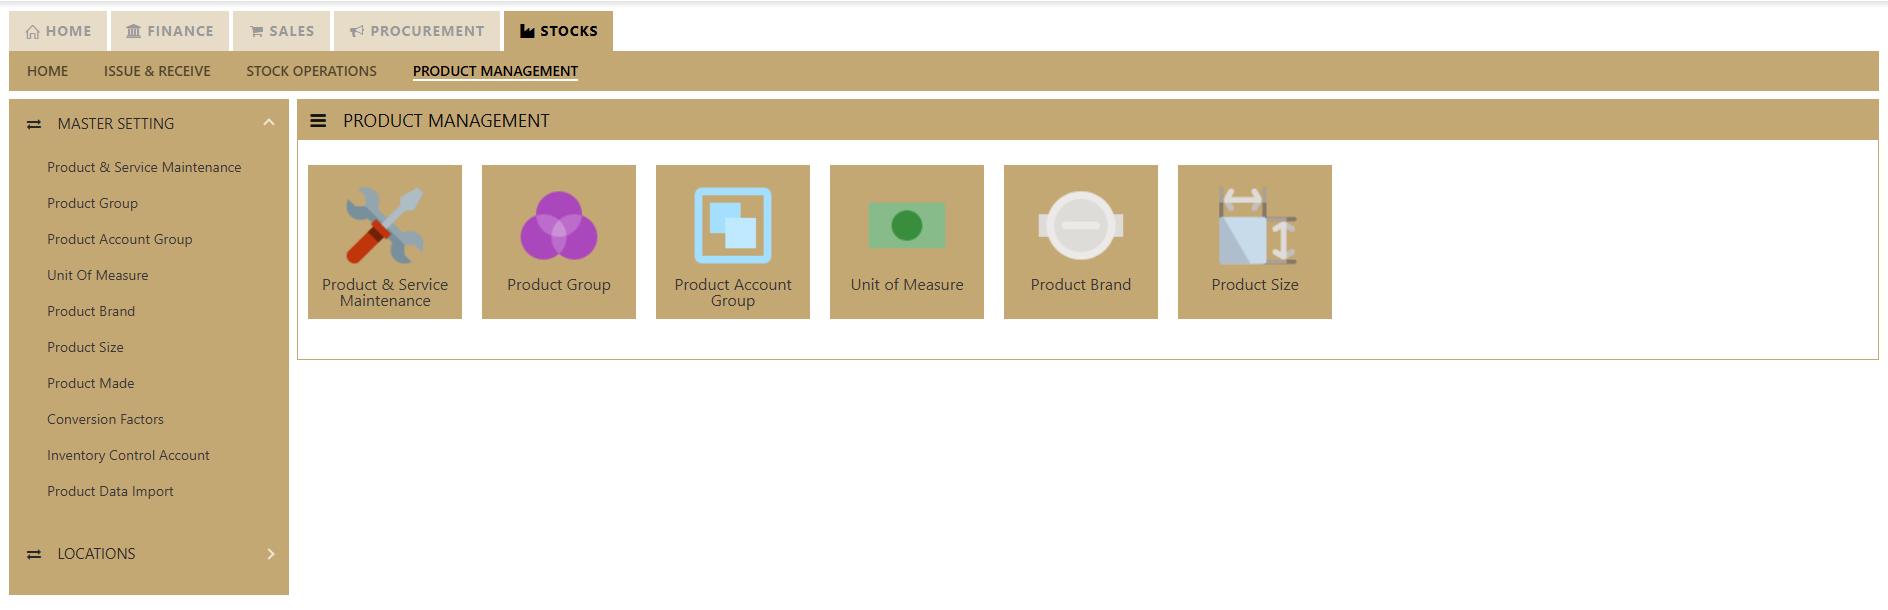
- Product & Service Maintenance
- Product Group
- Product Account Group
- Unit of Measure
- Product Brand
- Product Size
- Product Made
- Conversion Factors
- Inventory Control Account
- Product Data Import
Important: Before proceeding to create a new product or service code, we need to setup some Optional fields (such as Product Group, Size, Model, and Made, Discount Group, Customer/Supplier IM Group and Product Price Group), as well as some Mandatory fields (such as Product Account Group, Inventory Control Account, Units of Measures and Conversion Factors).
Product & Service Maintenance
Product Group
How to Create Product Group?
- Click on Stock – Product Management – Product Group icon for the following screen.

2. Enter the Product Groups as per the above example.
Important: Product groups are mainly used as additional analysis tool for various reports in the system. Some of the most commonly used reports are Sales Analysis-Product Group Wise and Inventory reports that can be sorted by Product groups.
Product Account Group
How to Set-up Product Account Group?
a. Click on Stock – Product Management – Product Account Group icon for following screen.
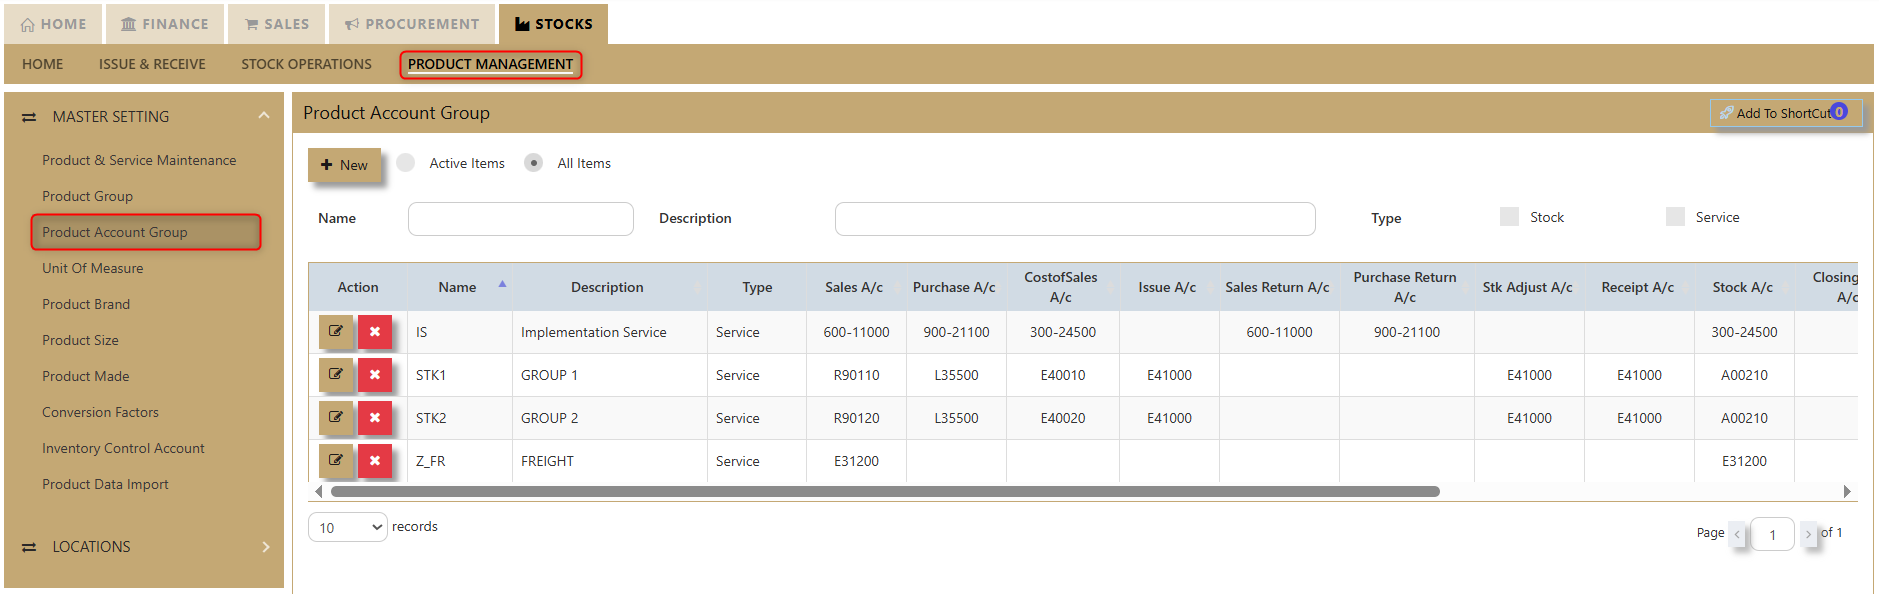
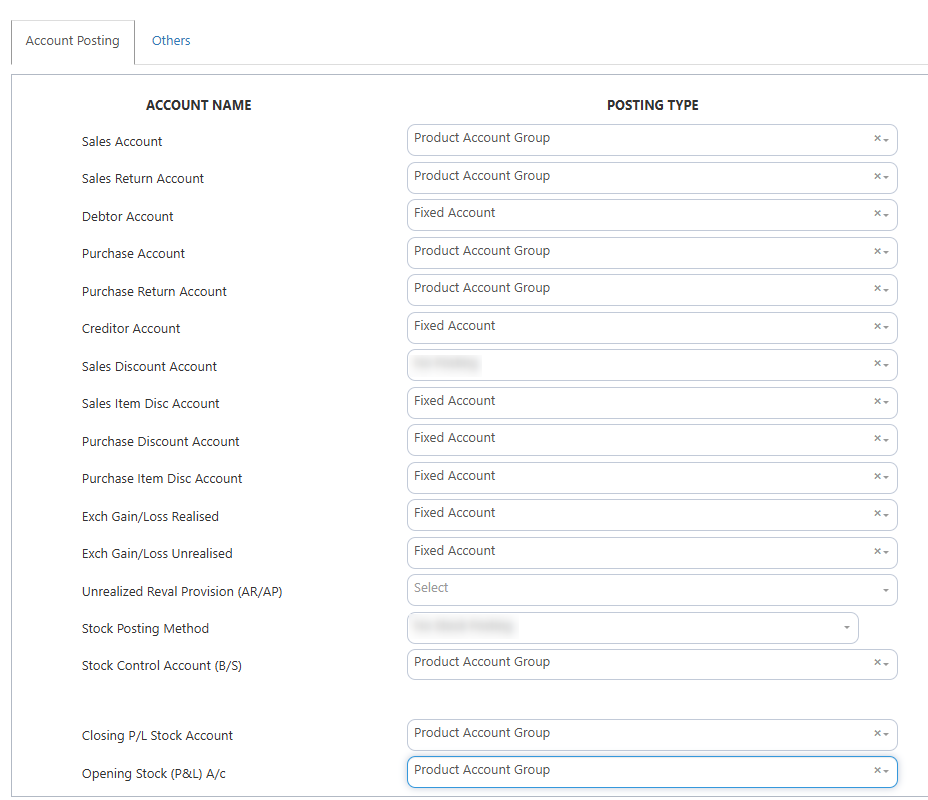
This setup is mandatory when the posting type selected in the Inventory Account Posting Settings is configured as by Product Account Group. To verify or configure this setting, users should navigate to their system settings and access Account Posting Settings.
b. How to Add a New Item to Your Product Account Group
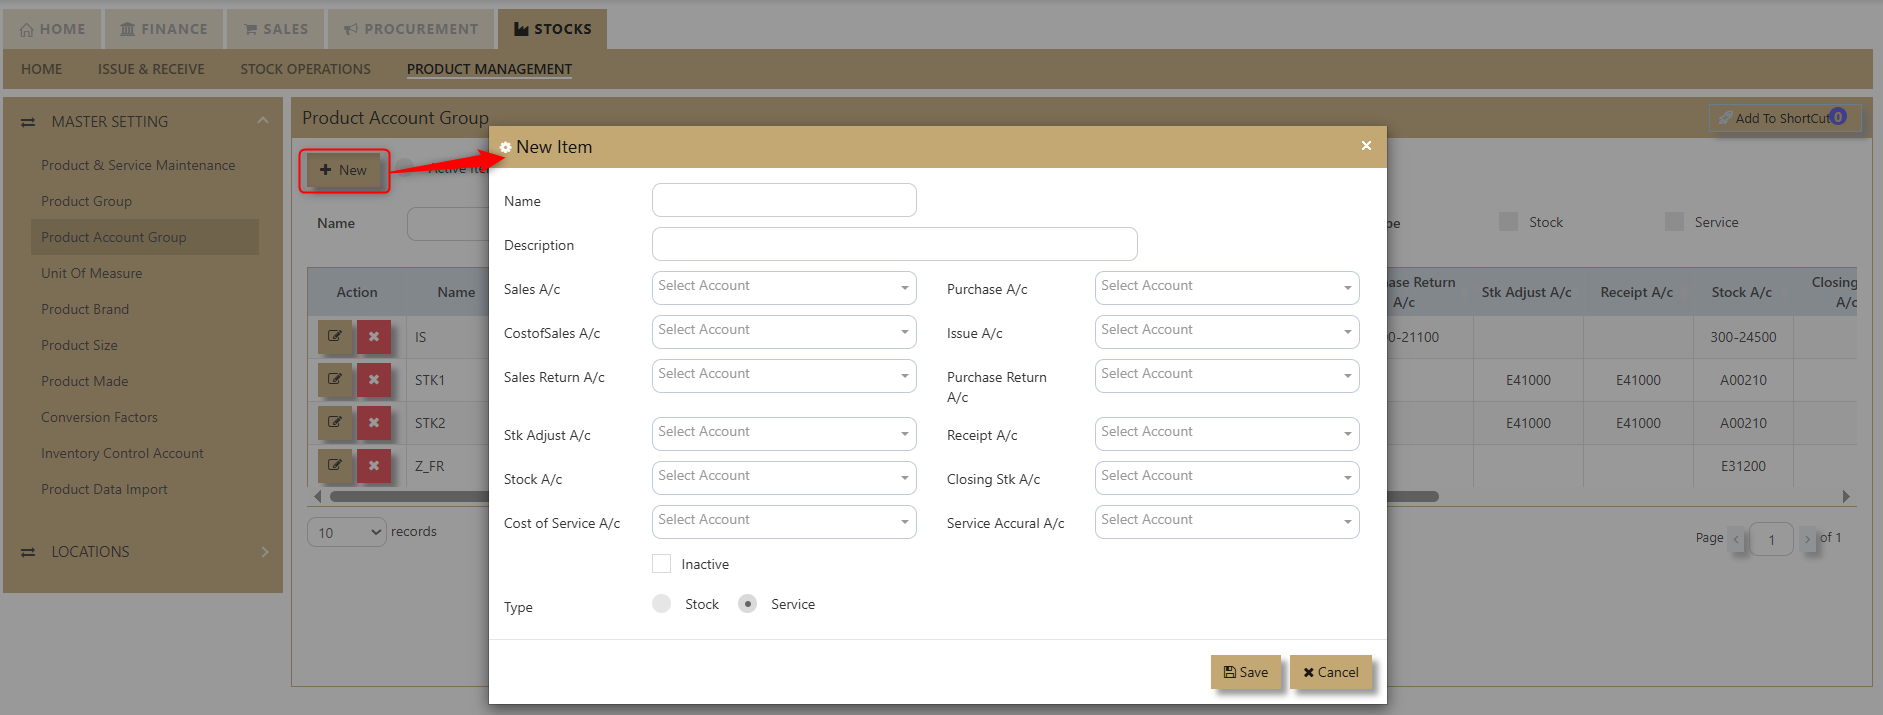
-
Click the New Icon:
In the upper-left portion of the screen, click the New icon to begin. -
Fill in the Item Information:
A table will appear where you need to enter the following details:- New Item Name
- Description
- Sales Account
- Cost of Sales Account
- Sales Return Account
- Stock Adjustment Account
- Stock Surcharge Account
- Cost of Service Account
- Purchase Account
- Issue Account
- Purchase Return Account
- Receipt Account
- Closing Stock Account
- Service Accrual Account
-
Select Corresponding Accounts:
For each category, choose the appropriate account based on your business processes. -
Select Item Type:
In the 'Type' section, tick the boxes for Service and/or Stock, depending on the nature of your item. -
Mark as Inactive (if applicable):
If the item is no longer in use, you can check the Inactive option. -
Save the Information:
After filling in all the necessary fields, click Save. Your new item will now be added to your product account group.
Unit of Measure
Product Brand, Size, Made
How to Create Product Brand/Size/Made?
Click on Stocks – Product Management – Product Brand icon for the following screen.
Click on Stocks – Product Management – Product Size icon for the following screen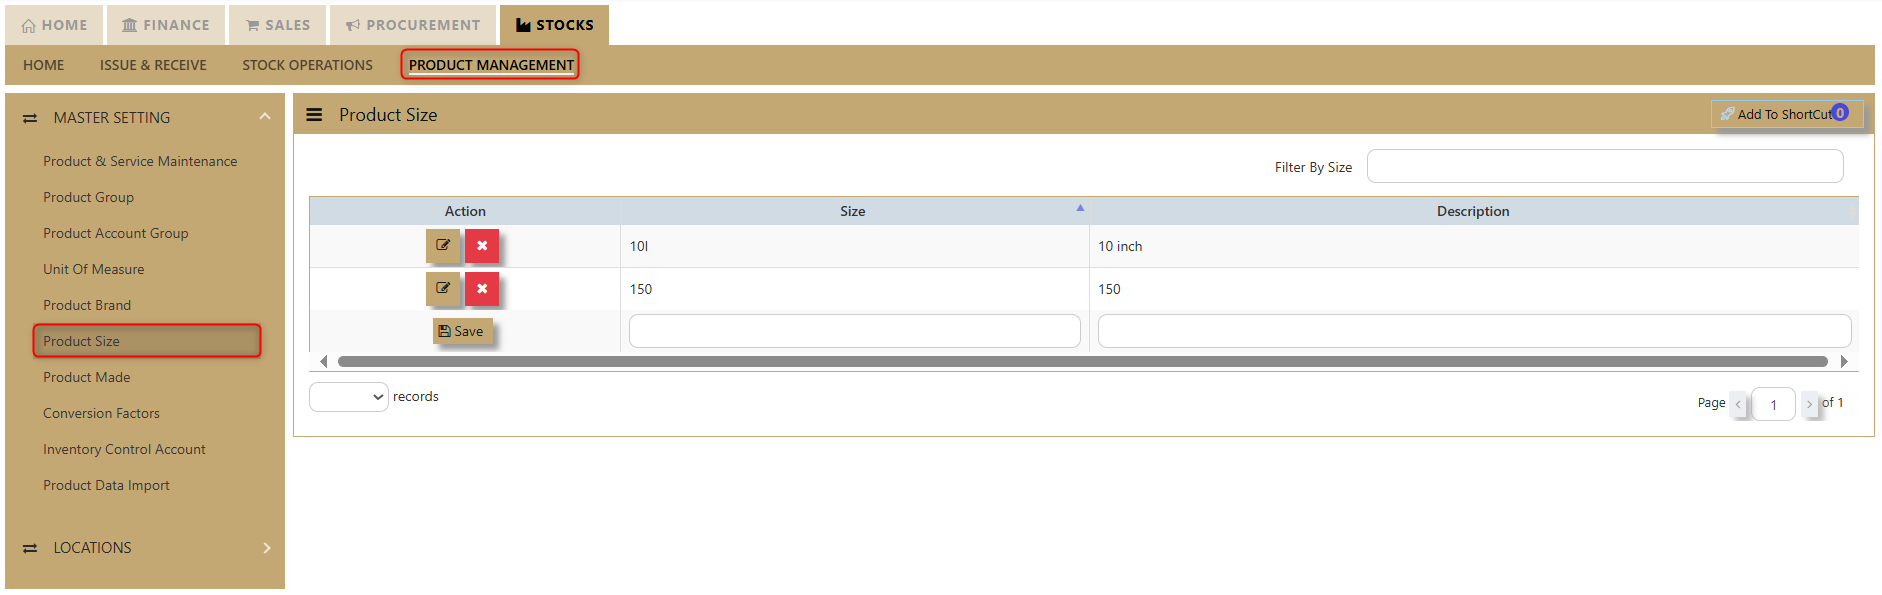
Click on Stocks – Product Management – Product Made icon for the following screen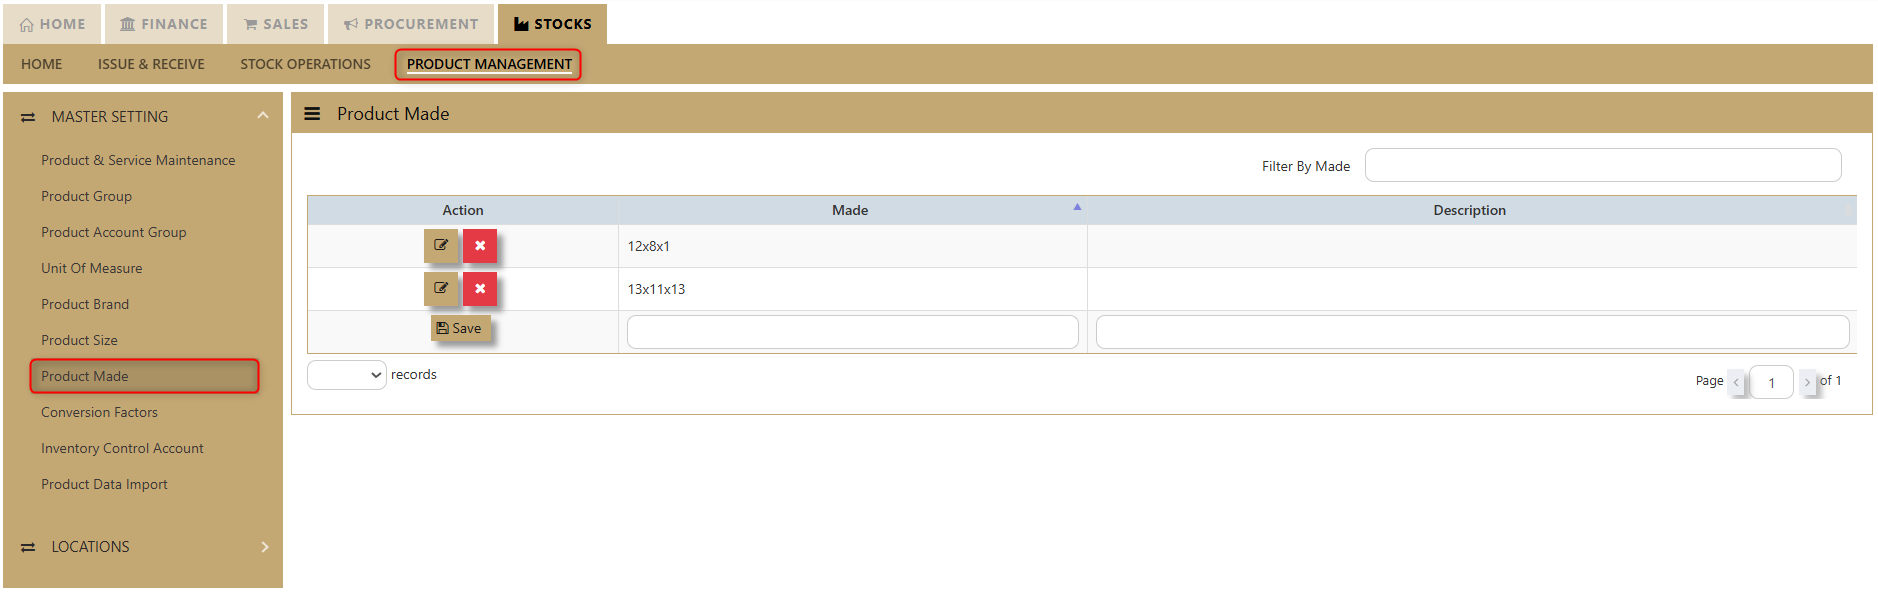
- Enter the Size, Brand, Model, and Made options as shown in the examples above.
- The codes are limited to 4 alphanumeric characters.
- The descriptions are limited to 40 alphanumeric characters.
Important: Size, Model, Brand and Made are mainly used as additional analysis tools for various reports in the system. Some of the most commonly used reports are Sales Analysis-Product Size Model Wise and Inventory reports that can be sorted by Model and Brand.
Conversion Factors
Inventory Control Account
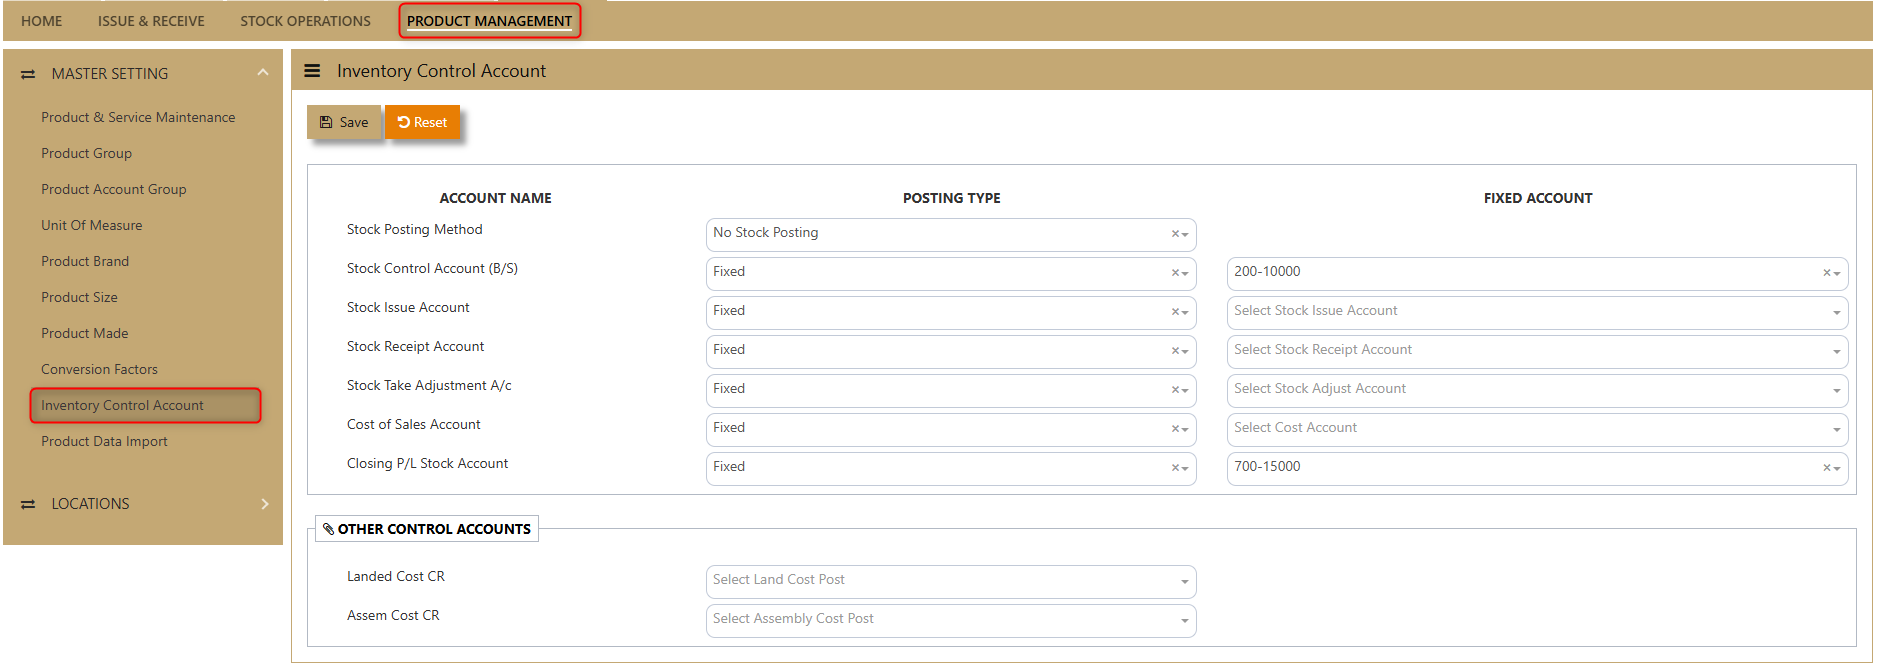
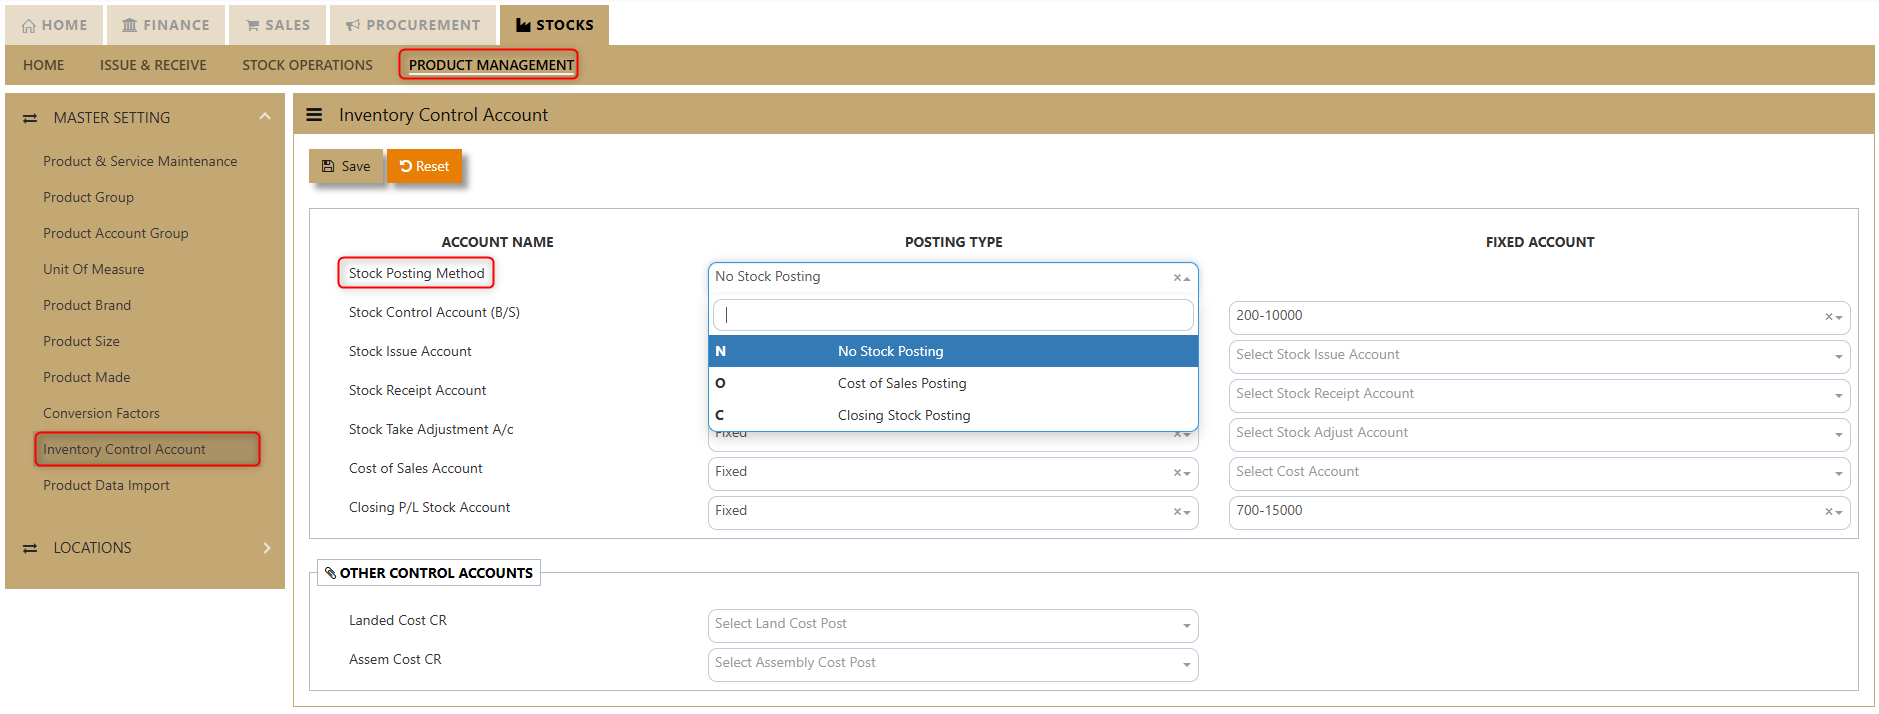
How to Set-up Inventory Control Account?
Click on Stock – Maintenance – Inventory Control Account for following screen.
In UNIQ365, this option determines how the GL is to be updated when saving transactions. You need to specify the chart of account codes for Sales, Purchase and Inventory transactions.
Important: Being a packaged solution, UNIQ365 caters for almost any type of industries with 3 types of stock posting options.
1. No Stock Posting
2. Cost of Sales Posting
3. Closing Stock Posting
Stock Posting Methods
1. No Stock Posting
- Inventory module is not linked to GL.
- All the movement of the stock could still be captured in inventory module.
- User needs to post a journal entry manually to Closing stock & Opening stock accounts for month end closing or year-end closing.
- Normally, Profit and Loss Account will be presented as follows:
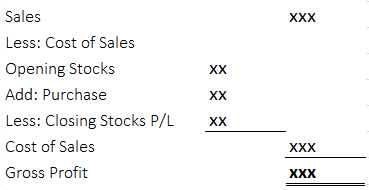
In this case, Purchase Account will be categorized under Expense account.
Below is an example of a double entry for: -
a. Purchase Invoice amounted to $500.00
| Debit | Credit | |
| Purchase Account | S$500 | |
| Trade Creditor Control | S$500 |
b. Sales Invoice amounted to $1,000.00
| Debit | Credit | |
| Trade Debtor Control | S$1000 | |
| Sales Account | S$1000 |
2. Cost of Sales Posting
- Inventory module is linked to GL.
- Closing stock will be automatically updated when Sales,
- Purchase or Inventory transactions are performed.
Profit and Loss Account will be presented as follows:
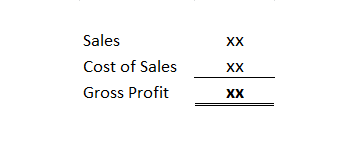
- In this case, Purchase Account will be categorized under Liabilities account.
Below is an example of a double entry for:-
a. Purchase Invoice amounted to $500.00
| Debit | Credit | |
| Purchase Account | ||
| Trade Creditor Control | ||
| Closing Stock B/S |
b. Sales Invoice amount of $1000
| Debit | Credit | |
| Trade Debtor Control | S$1000 | |
| Sales Account | S$1000 |
3. Closing Stock Posting
- Inventory module is linked to GL.
- Closing stock will be automatically updated when Sales, Purchase or Inventory transactions are performed.
- Normally, Profit and Loss Account will be presented as follows:
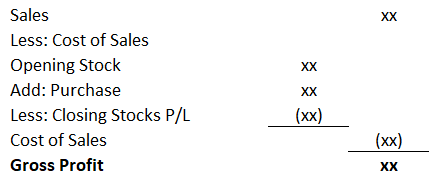
- In this case, Purchase Account will be categorized under Expense account.
- Below is an example of a double entry for: -
a. Purchase Invoice amounted to $500.00
| Debit | Credit | |
| Purchase Account | S$500.00 | |
| Trade Creditor Control | S$500.00 | |
| Stock B/S | S$500.00 | |
| Closing Stock A/C (P&L) | S$500.00 |
b. Sales Invoice amount of $1000
| Debit | Credit | |
| Trade Debtor Control | S$1000 | |
| Sales Account | S$1000 | |
| Stock B/S | S$500.00 | |
| Closing Stock A/C (P&L) | S$500.00 |
You need to fix the relevant GL Account for Stock Control A/c (B/S), Stock Issue Account, Stock Receipt Account and Closing Stock Account.
Important: After you have decided on the Stock Posting Method, you can now set up the auto posting for the Stock Control Account (B/S), Stock Issue Account, Stock Receipt Account, Stock Take Adjustment A/c, Cost of Sales A/c &
Closing P/L Stock Account based on the guidelines set above.Guide: The setting is Fixed if you only have one account but should be set as Product if you have multiple accounts. For example, if you have multiple Stock accounts (i.e. Stock-Computer Hardwares, Stock Software, Stock-Accessories, Stock-Others).
Product Data Import
Warehouse Locations