Cash Book Transaction
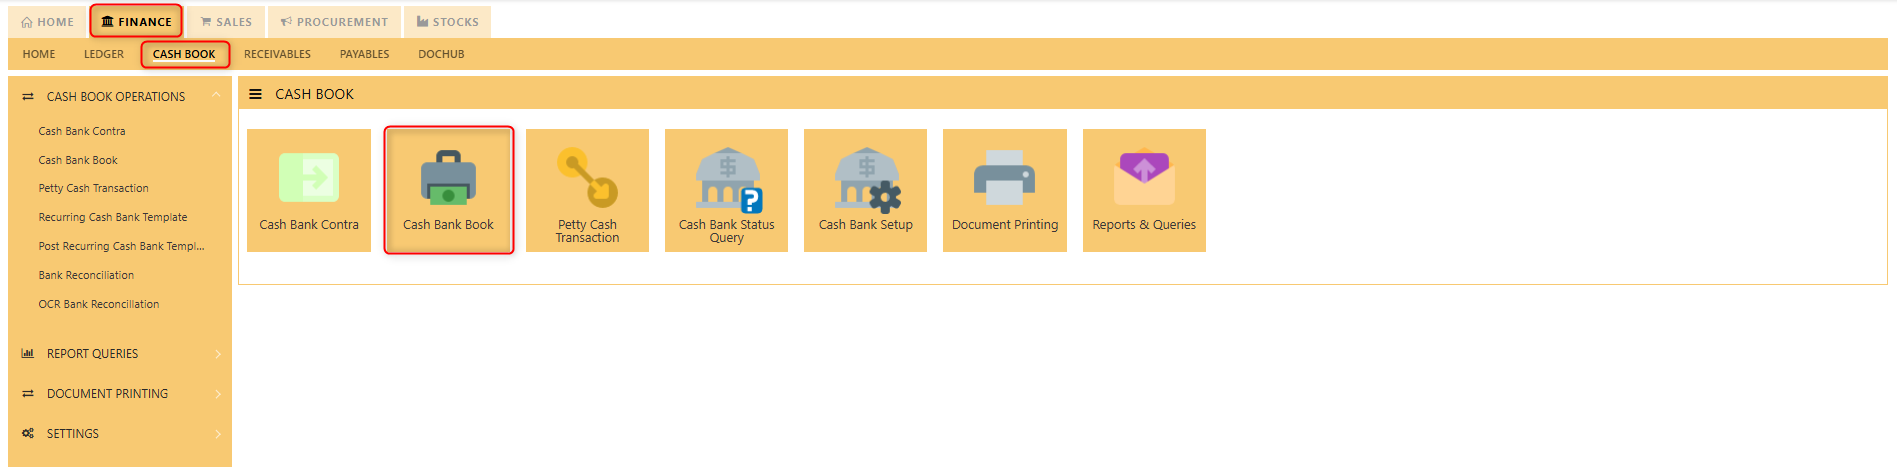
The Cash Book main function is to keep track of all the cash and bank transactions that occur daily. The GC can be found in the Finance tab under Cash book Section. A cash book transaction refers to the recording of all cash inflows (receipts) and outflows (payments) made by an organization. These transactions are entered and categorized as either receipts (e.g., cash sales, customer payments) or payments (e.g., cash purchases, payroll). It automates the process, ensuring real-time updates and accurate financial tracking through double-entry accounting. Cash book transactions are seamlessly integrated with other modules like Accounts Receivable and Payable, providing a comprehensive view of cash flow and facilitating tasks such as bank reconciliation and the generation of detailed financial reports.
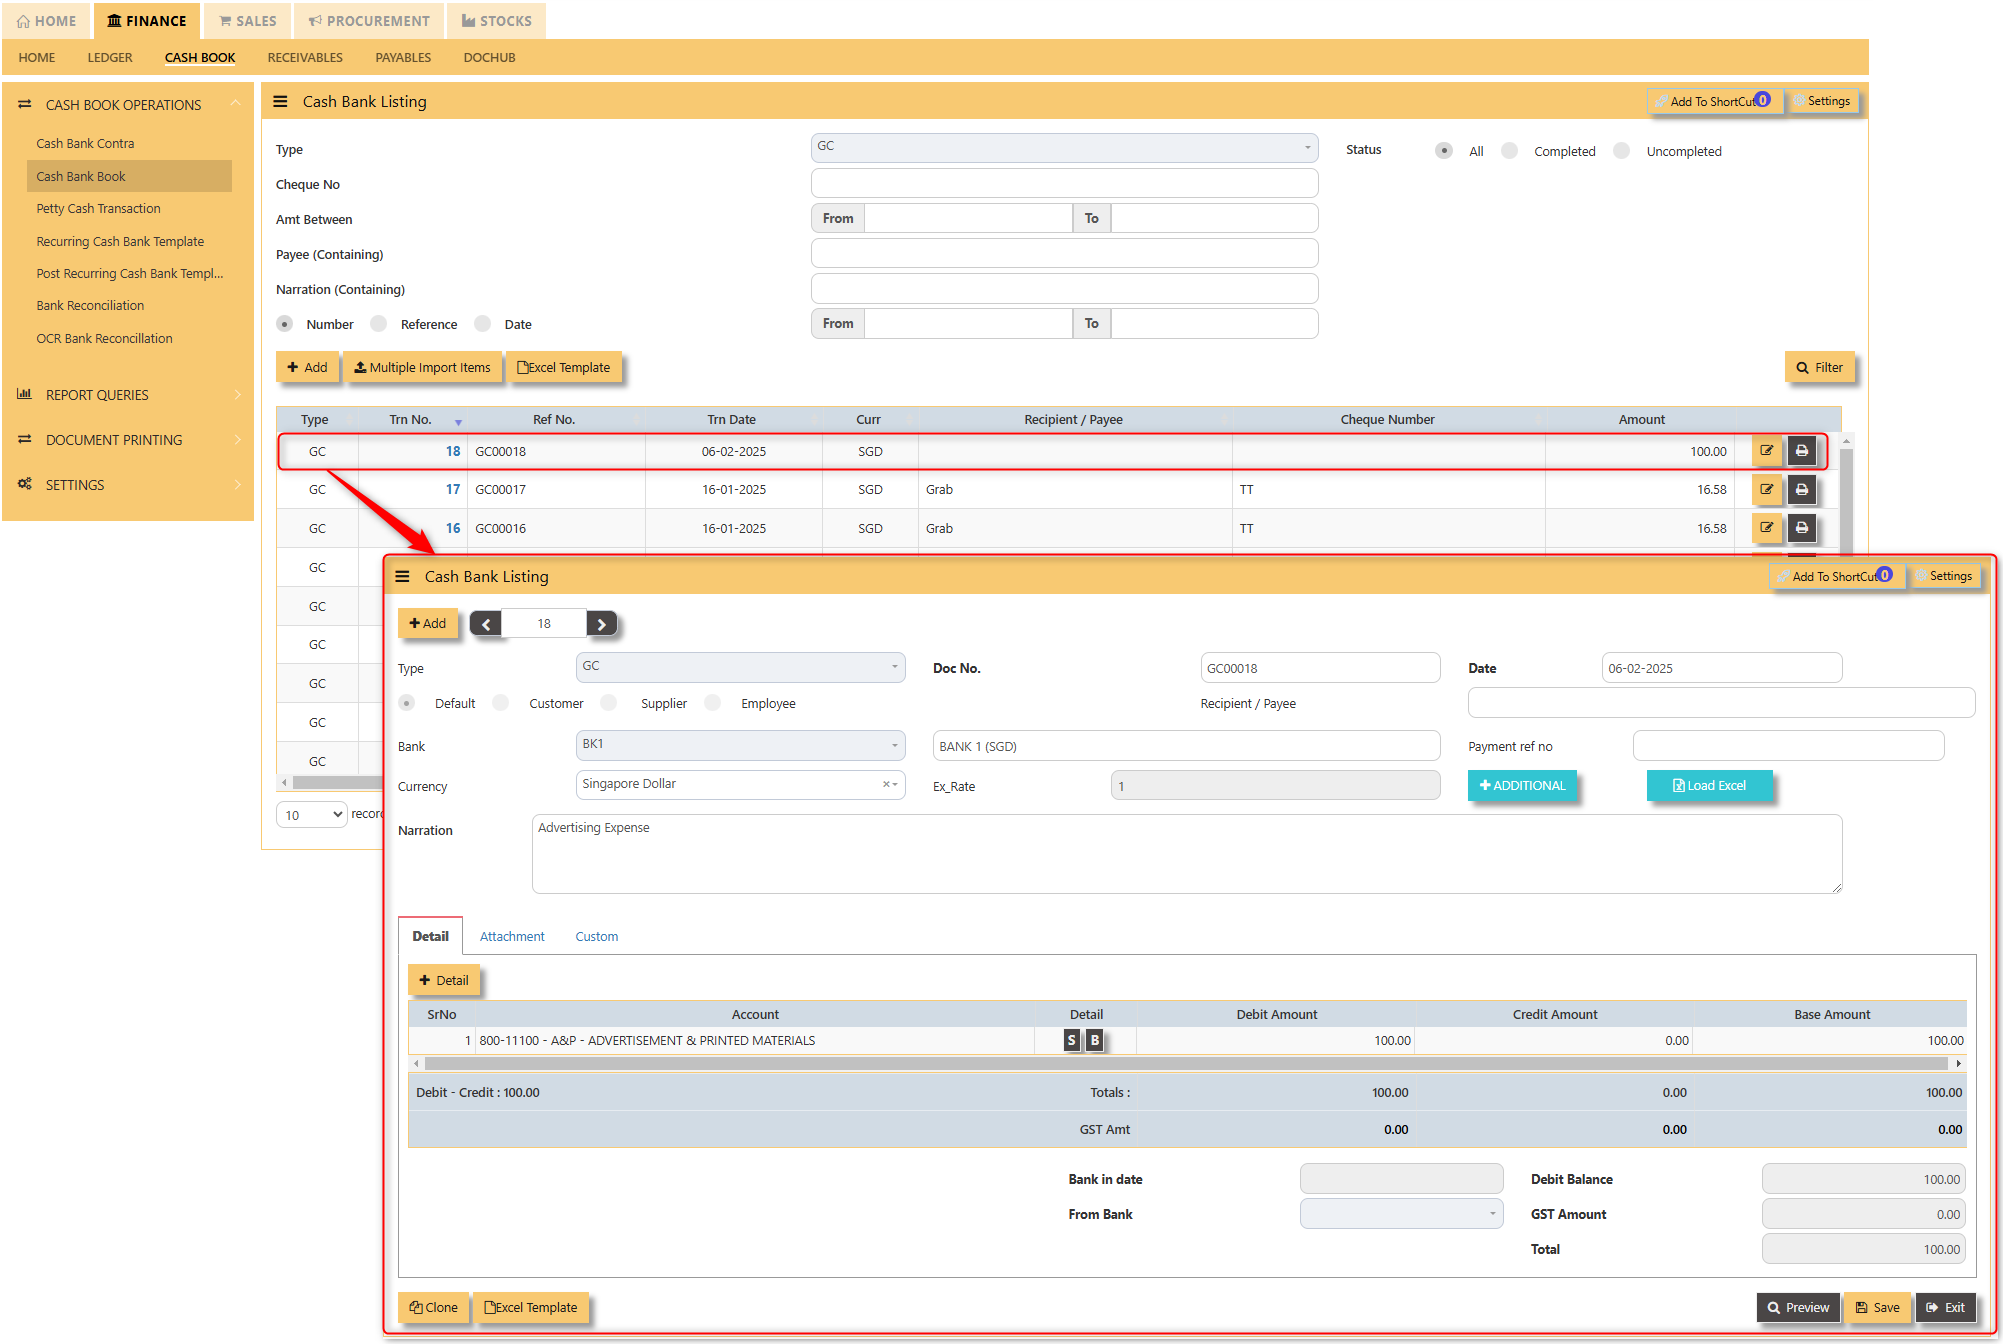
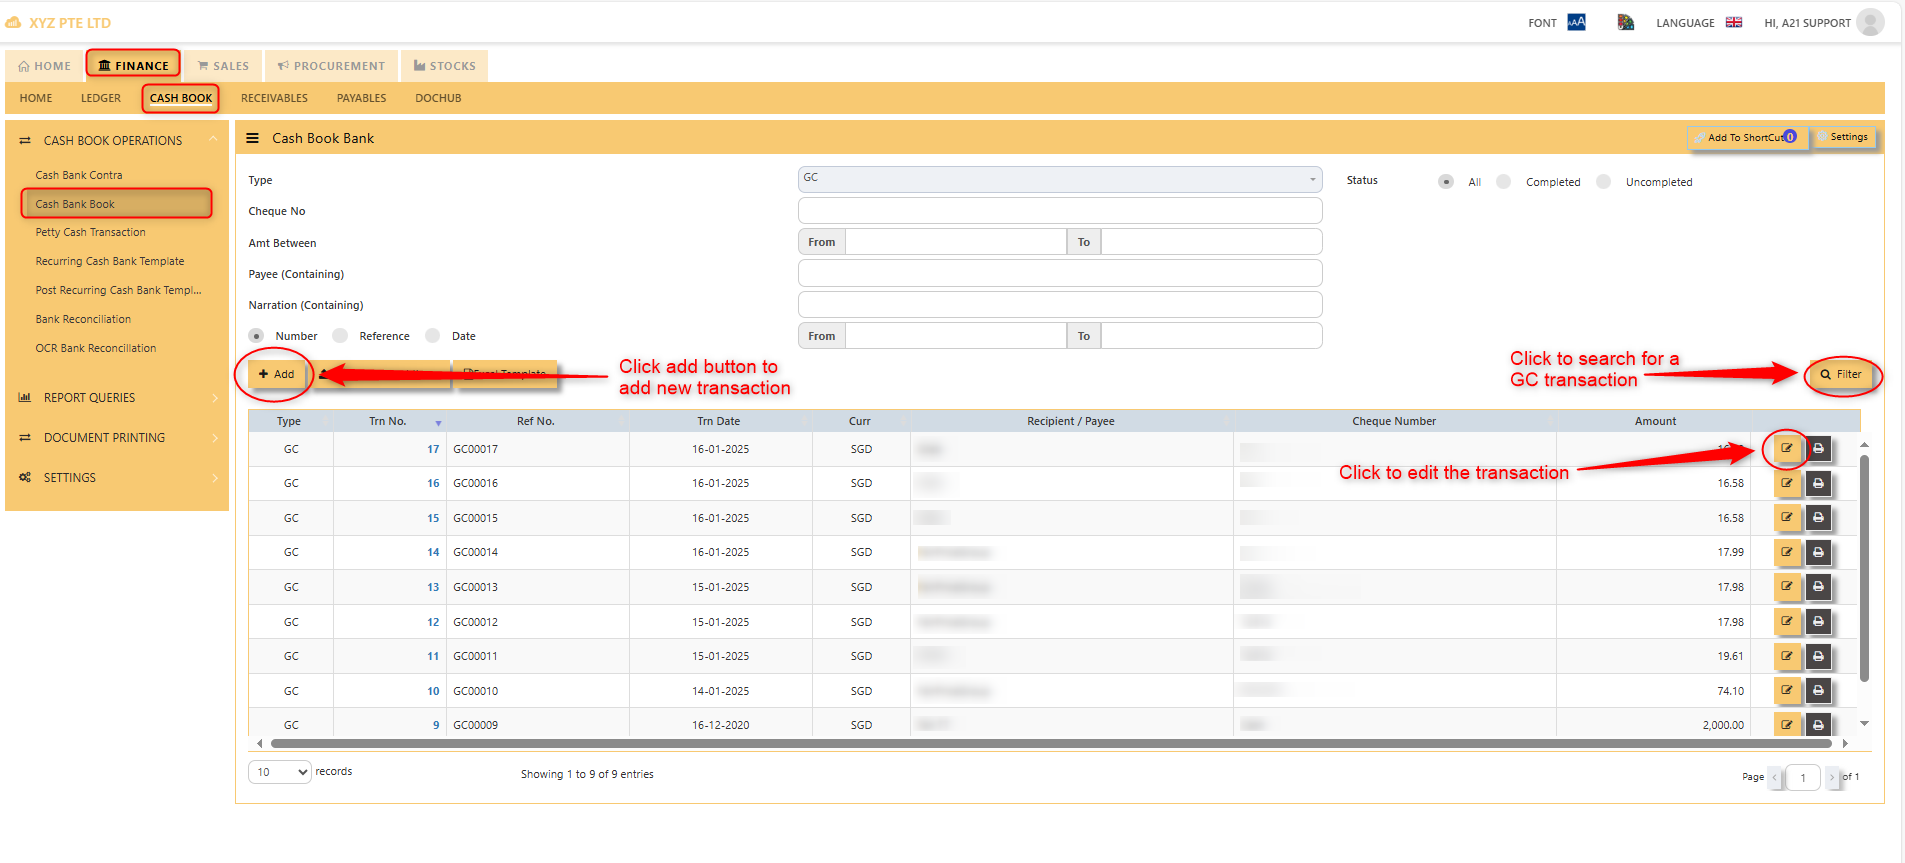
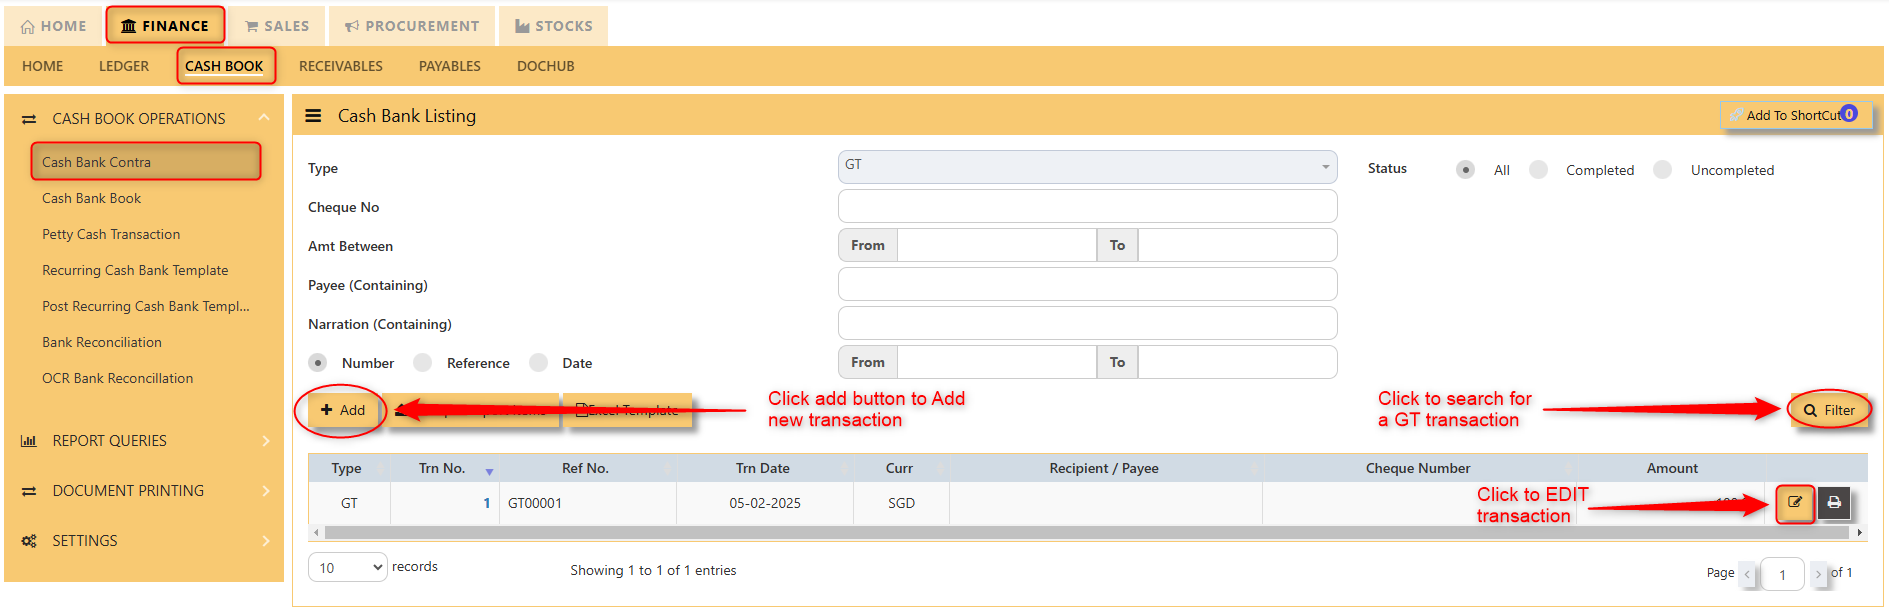
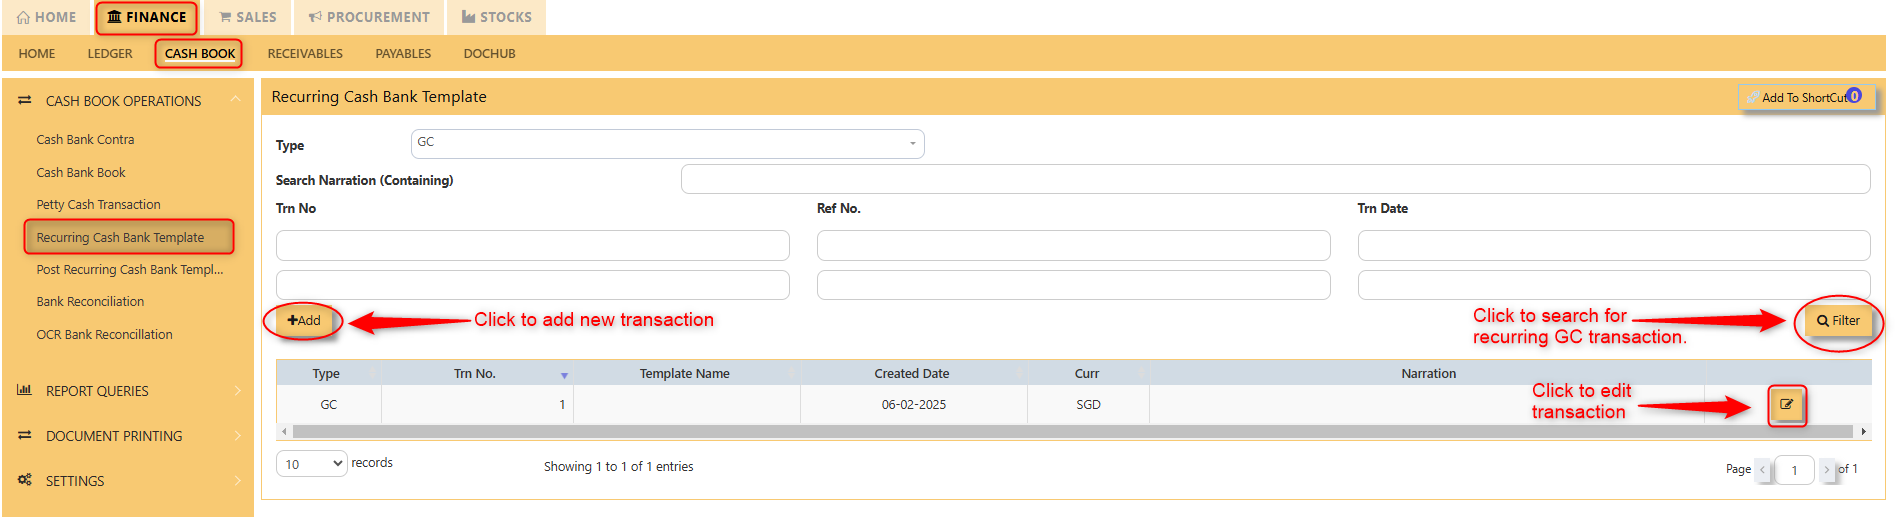
After clicking the cash/bank book button, you will see the GC transactions, wherein you can add new transactions, search existing GC transactions, and edit them if needed.
HOW TO ADD NEW GC TRANSACTIONS?
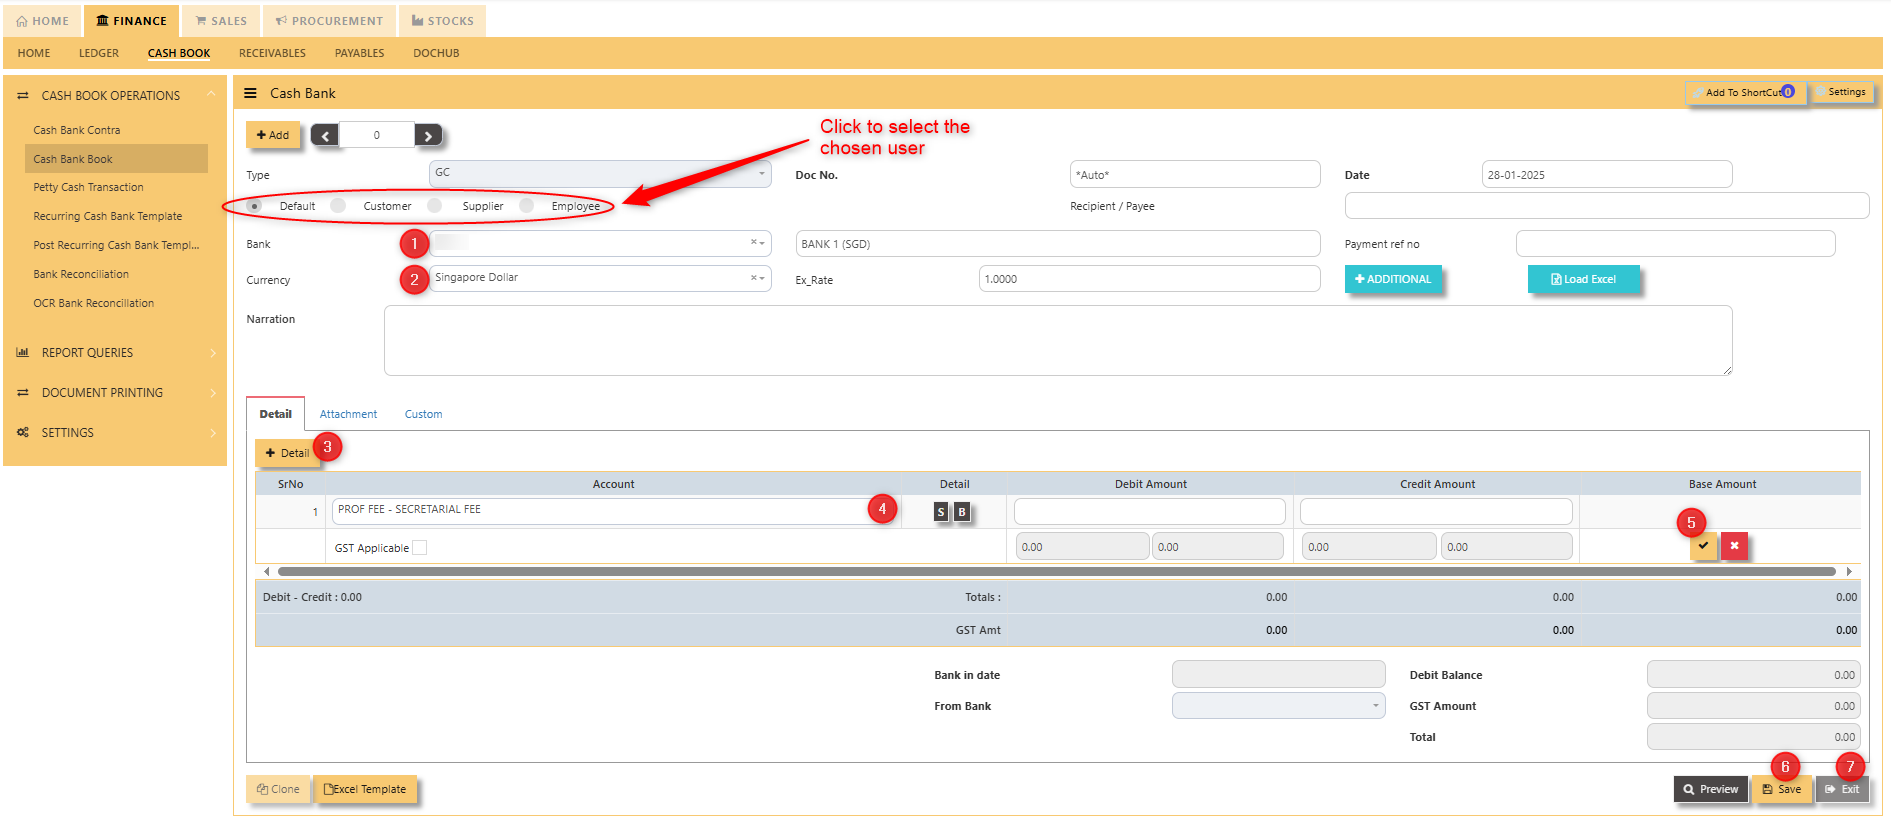
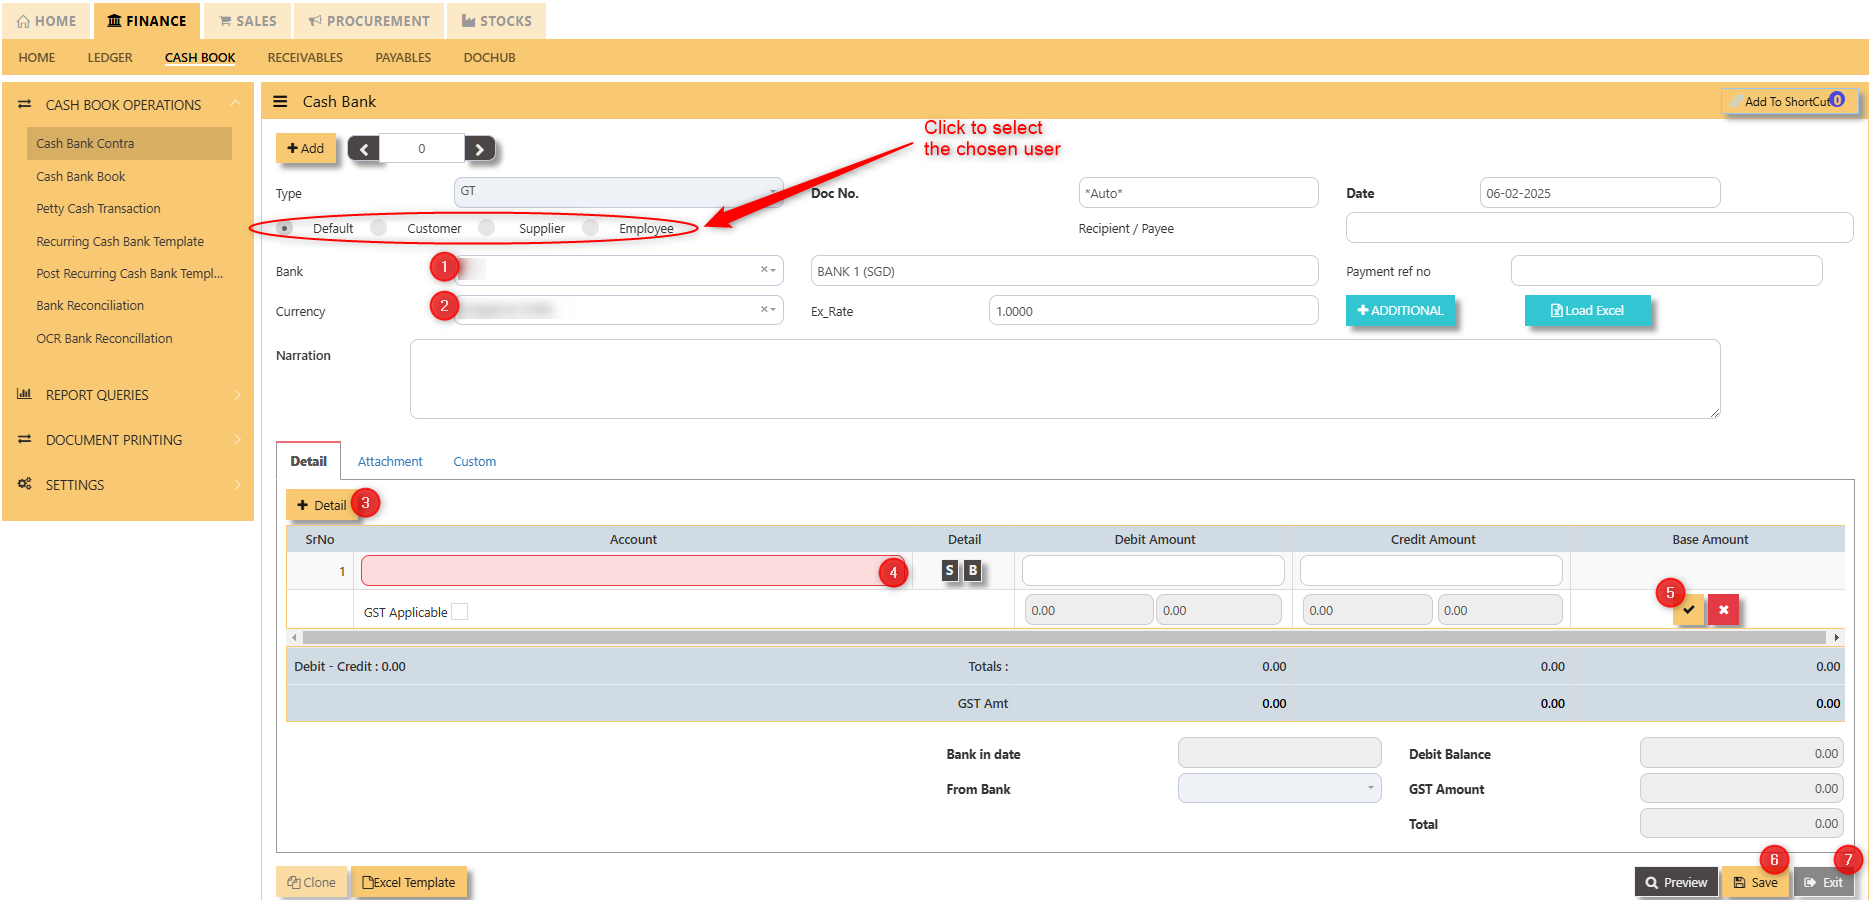
- Click to select chosen bank
- Click to select chosen currency
- Click to add new details
- Click to select new account
- Click to “check” to save the new details
- Click ‘’save’’ to save the transaction
- Click “exit” to exit the transaction
Cash Bank Contra
HOW TO CREATE CASH BANK CONTRA TRANSACTIONS?
Go to Finance> Cash Book> Cash book operations > Cash Book Contra
A contra transaction in the cash book of UNIQ365 refers to a transaction that involves the movement of money between two cash or bank accounts within the organization, without affecting the overall cash balance. For example, when cash is transferred from the petty cash account to the main cash account, or when funds are moved between different bank accounts, it is recorded as a contra transaction. These transactions are typically non-revenue or non-expense related but still need to be documented for accurate financial tracking. The ERP system records the debit and credit entries for both accounts, ensuring proper internal cash flow management and accurate accounting, while the overall cash position remains unchanged.
- Click to select chosen bank
- Click to select chosen currency
- Click to add new details
- Click the select new account
- Click to “check” to save the new details
- Click ‘’save’’ to save the transaction
- Click “exit” to exit the transaction
Petty Cash Transaction
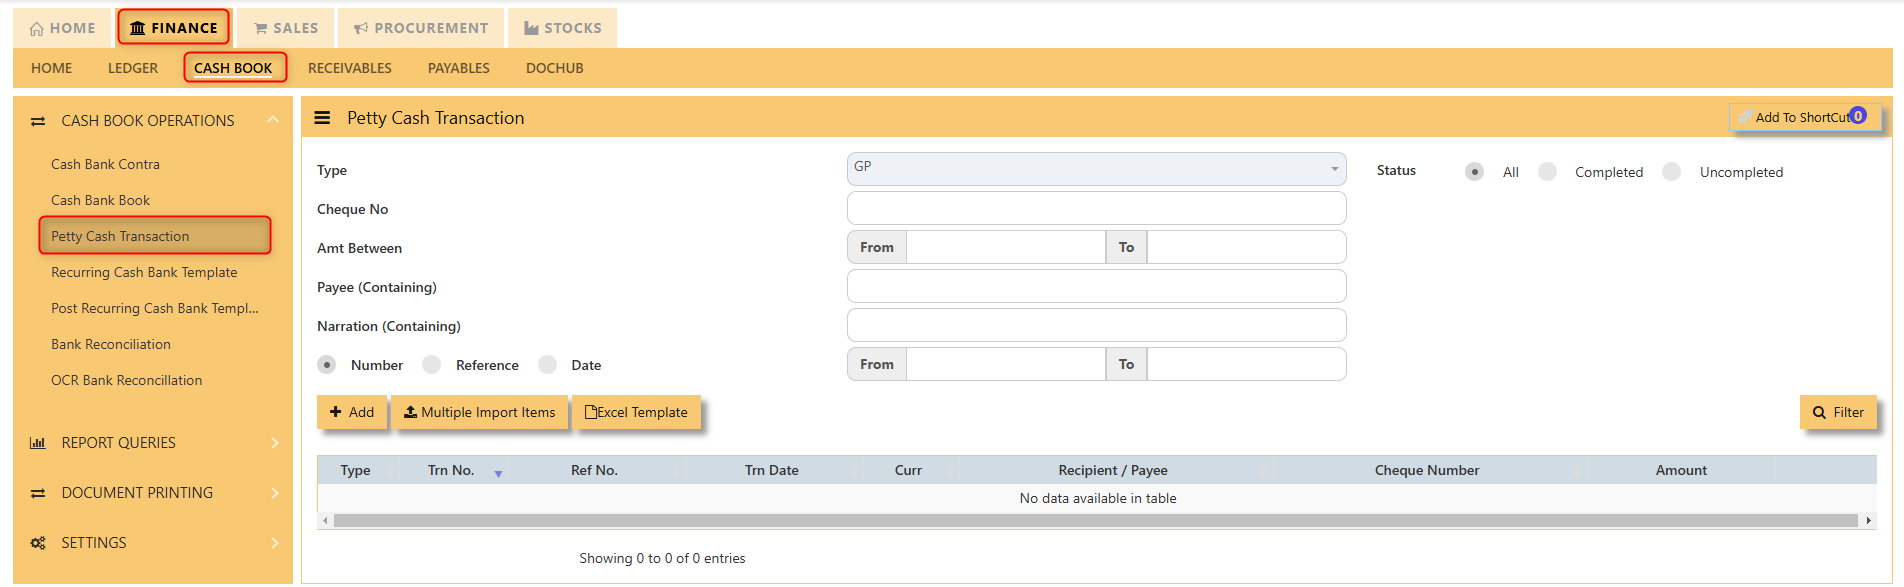
HOW TO CREATE PETTY CASH TRANSACTIONS?
Go to Finance> Cash Book> Petty Cash Transaction.
Petty Cash Transaction involves recording small, day-to-day cash expenditures that are made for minor expenses, such as office supplies, employee reimbursements, or incidental costs. These transactions are typically managed through a dedicated petty cash account. When a petty cash transaction occurs, the ERP system records the expenditure, adjusting the petty cash balance and categorizing the expense under the appropriate account (e.g., office supplies, travel expenses). As petty cash is replenished, the ERP updates the balance and ensures proper documentation for reconciliation with the general ledger. This helps maintain accurate financial records for small cash outflows while ensuring control and accountability over the use of petty cash.
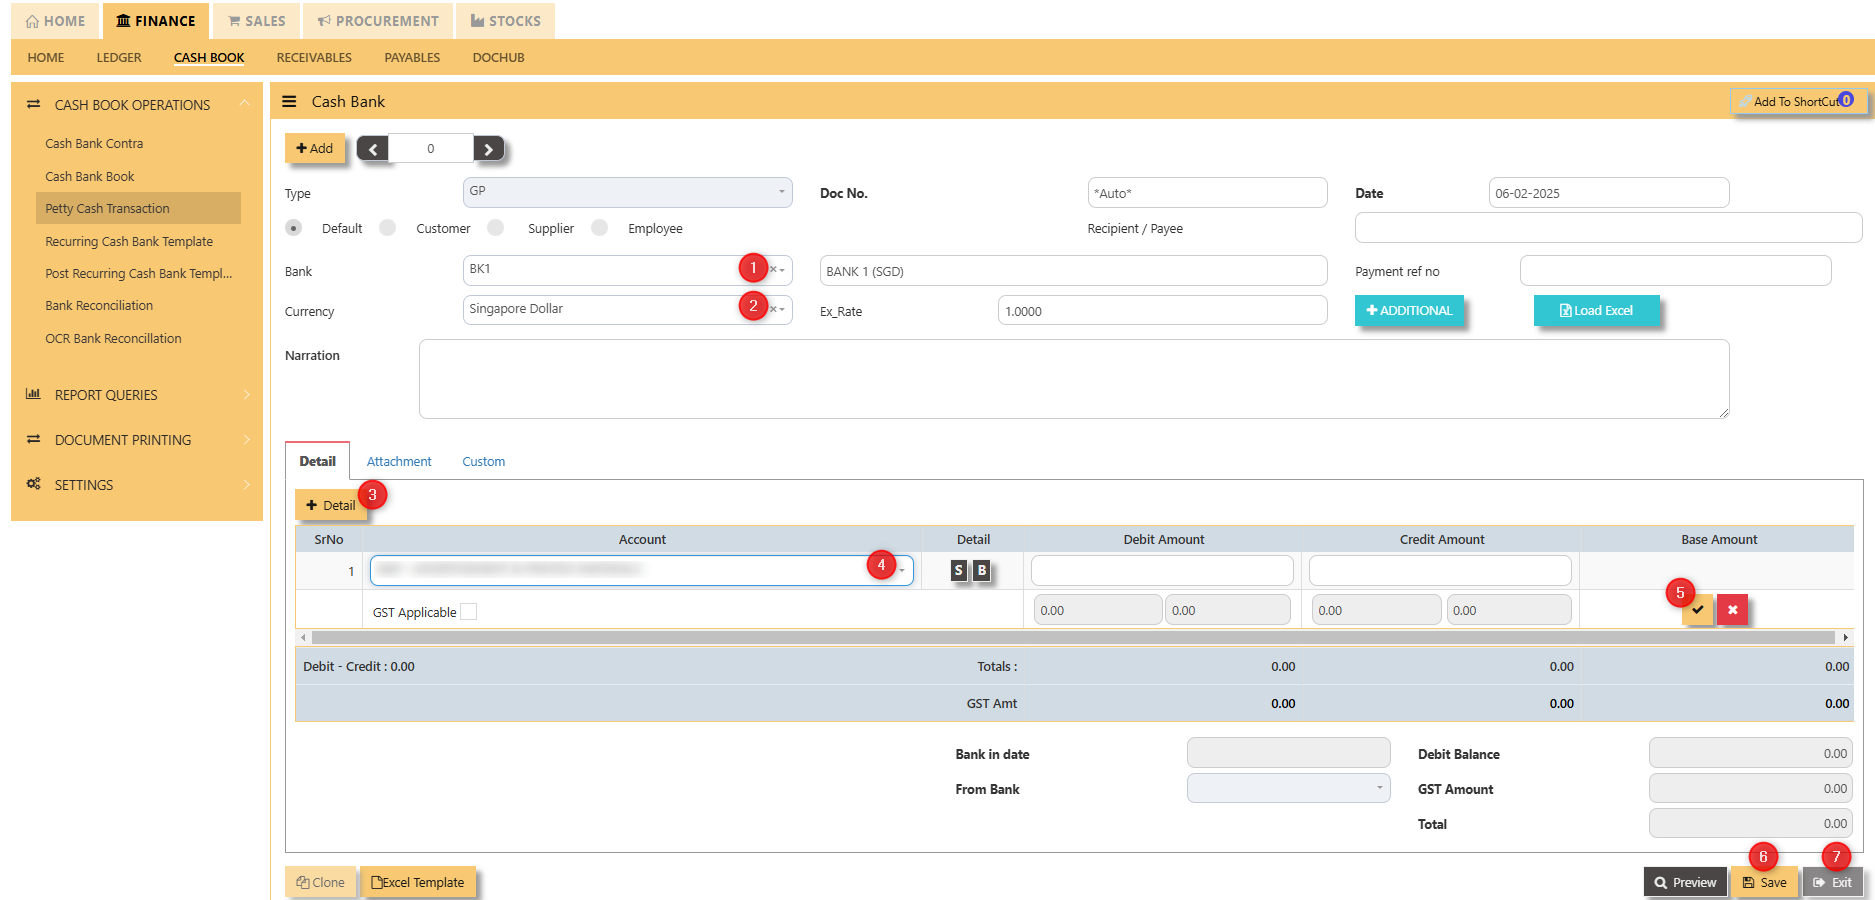
- Click to select chosen bank
- Click to select chosen currency
- Click to add new details
- Click the select new account
- Click to “check” to save the new details
- Click ‘’save’’ to save the transaction
- Click “exit” to exit the transaction
Recurring Cash Bank Template
HOW TO CREATE RECURRING CASH BANK TEMPLATE?
Recurring Cash Bank Template in a web ERP system is a feature that automates and manages repetitive cash or bank transactions that occur on a regular basis, such as monthly rent payments, loan installments, or subscription fees. The template allows users to set up these transactions once, specifying the frequency (e.g., weekly, monthly, quarterly) and the relevant amounts, accounts, and categories. The ERP system then automatically generates and records these transactions on the specified dates without manual intervention. This automation streamlines cash flow management, ensures timely payments or receipts, and reduces the risk of errors or missed entries, all while maintaining consistency and improving the accuracy of financial reporting. This can also be done with petty cash transactions.
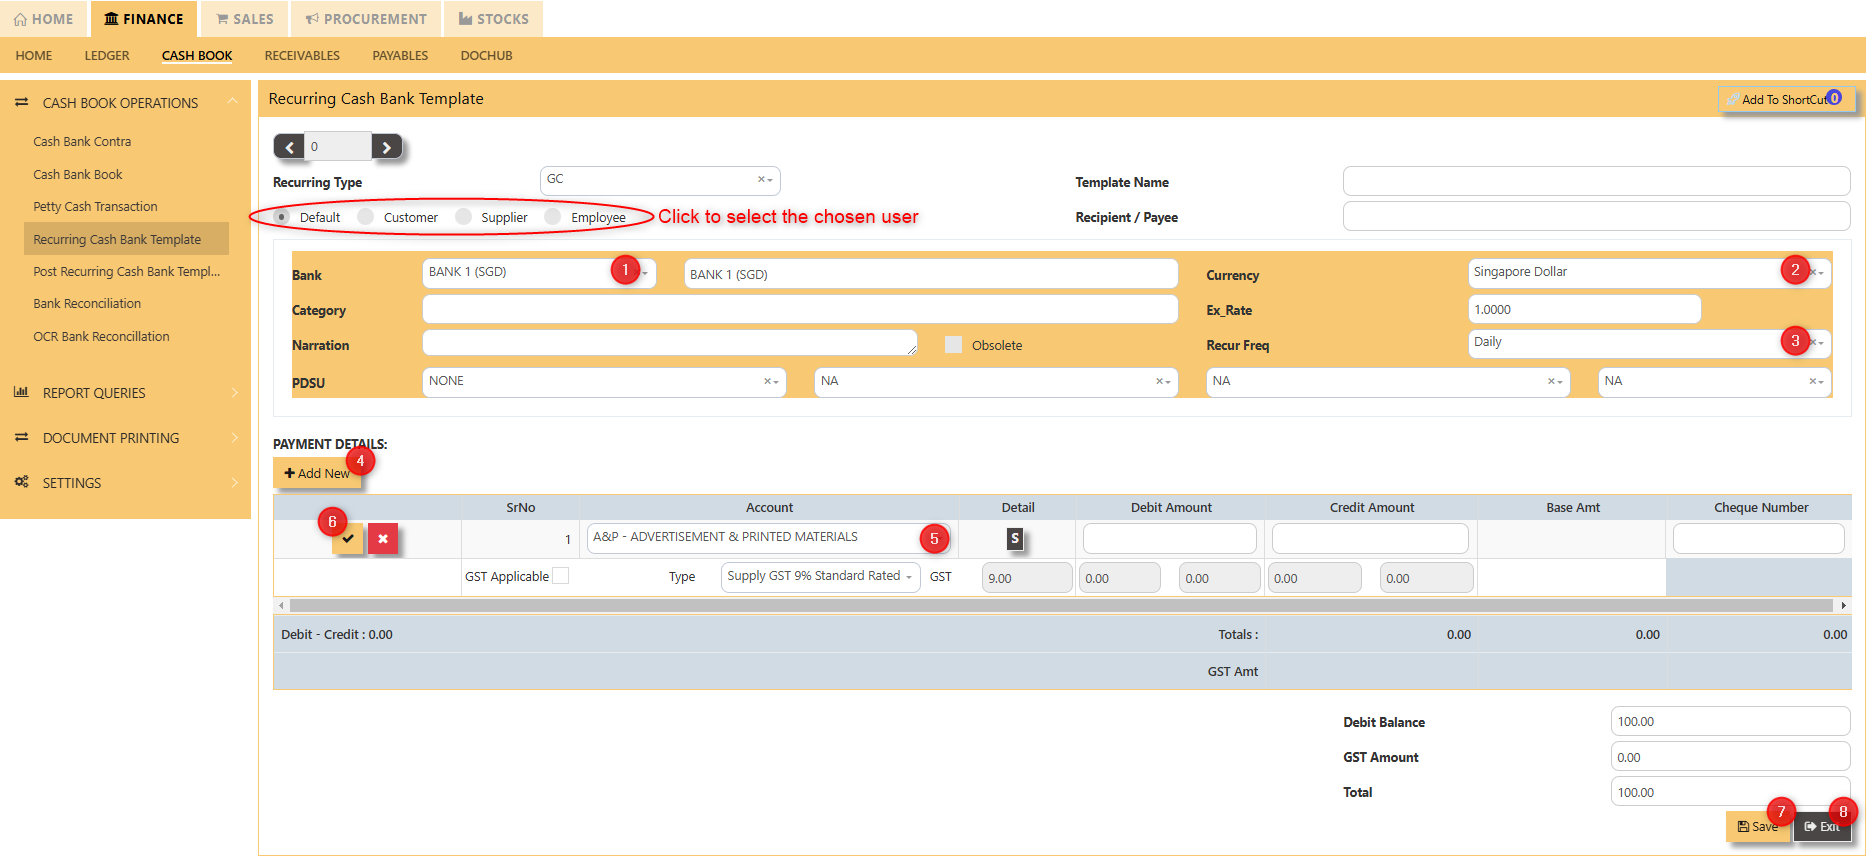
- Click to select chosen bank.
- Click to select chosen currency.
- Choose how frequent the transaction will reoccur.
- Click "add new" to add line details.
- Select new account.
- Click to “check” to save the new details.
- Click ‘’save’’ to save the transaction.
- Click “exit” to exit the transaction.
Post Recurring Cash Bank Template
HOW TO POST RECURRING CASH BANK TEMPLATE?
To Post Recurring Cash Bank Template in a web ERP system, you first set up a template for a transaction that occurs regularly, such as monthly rent or utility payments, by specifying details like the transaction amount, frequency, involved bank accounts, and associated categories.
Once the template is configured, the system automatically posts the transaction on the scheduled date, generating the necessary journal entries to debit and credit the relevant accounts, such as cash or bank and the expense accounts. This automation ensures timely, accurate recording of recurring transactions without the need for manual entry each time, streamlining cash flow management and maintaining consistent financial records.
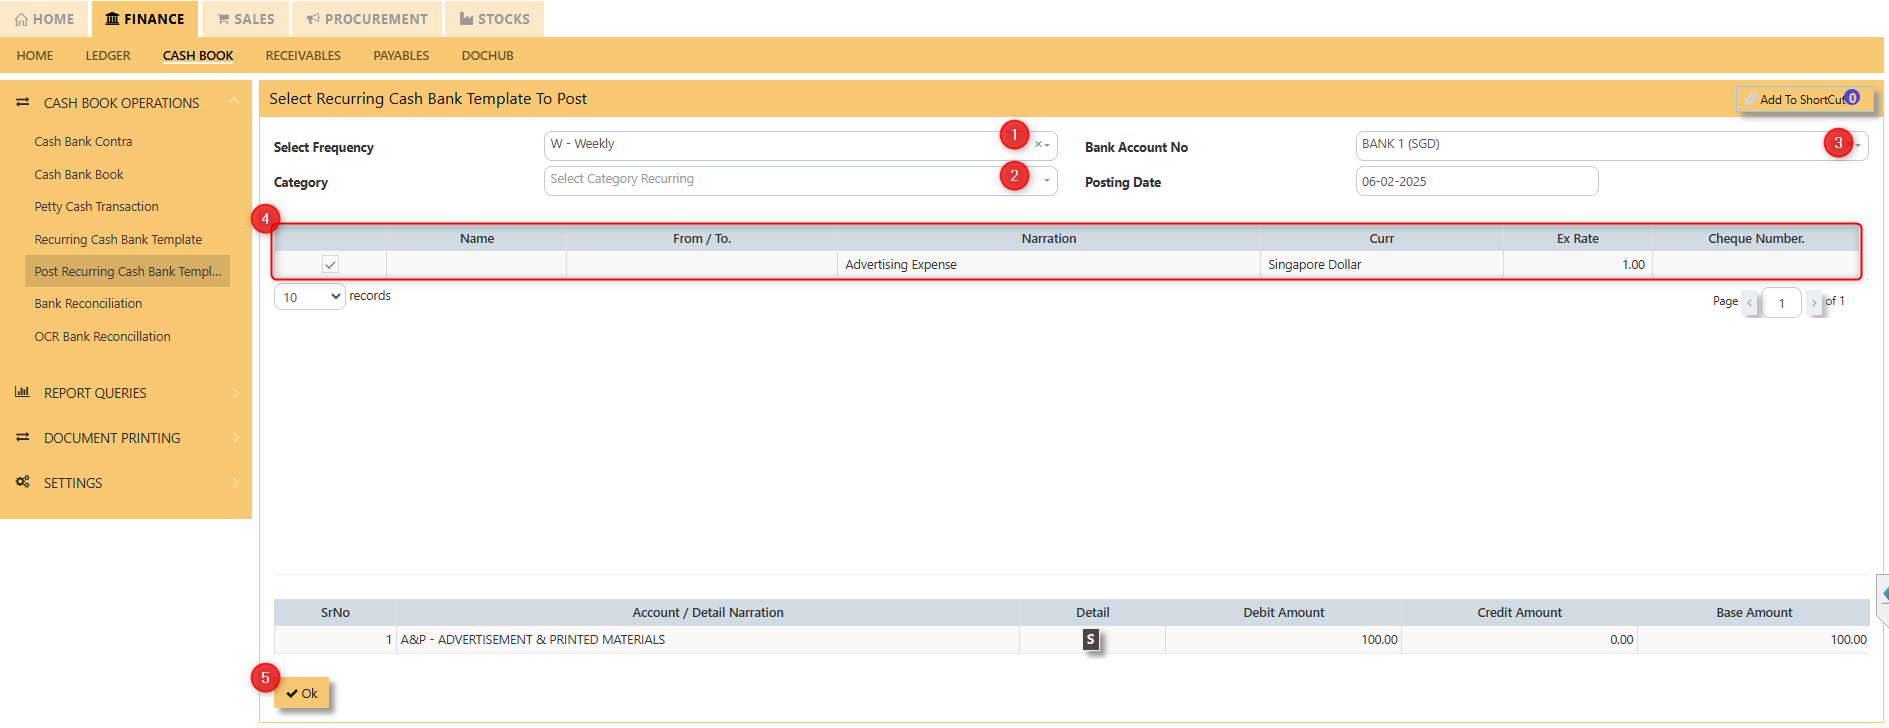
- Select the frequency of the recurring transaction.
- Select the category recurring.
- Select Bank Account No.
- Tick the recurring transaction that you want to post.
- Click "Okay" once finalized.
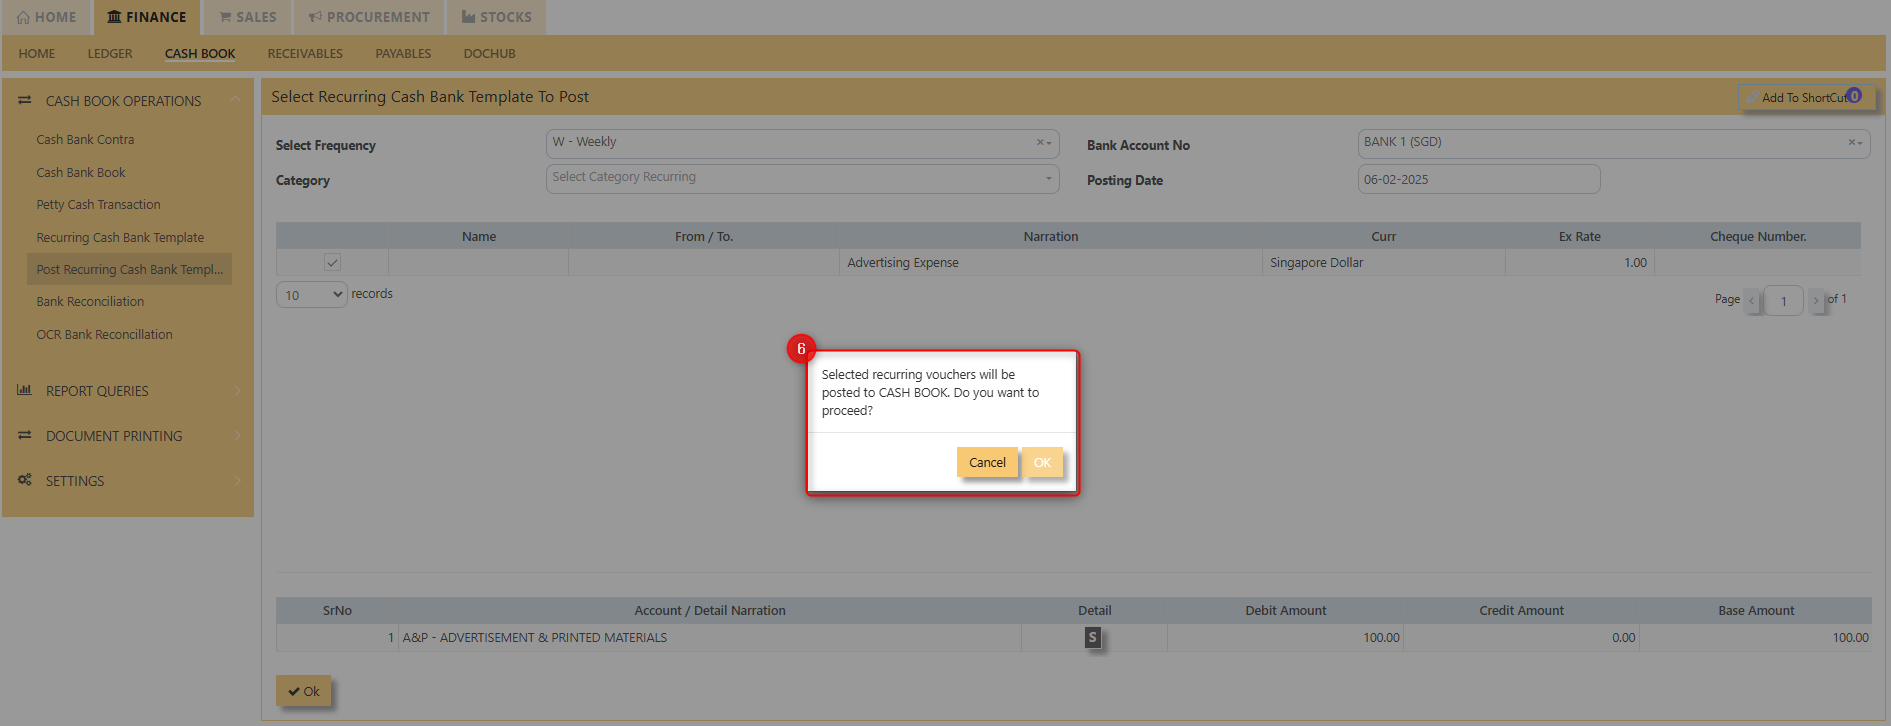
- Prompt will occur confirming the transaction to posted. Click ok to post
After posting the recurring GC transaction, it will be visible in the Cash Bank Book screen.