
AR - OPERATIONS
CREDIT NOTE
CREDIT NOTE
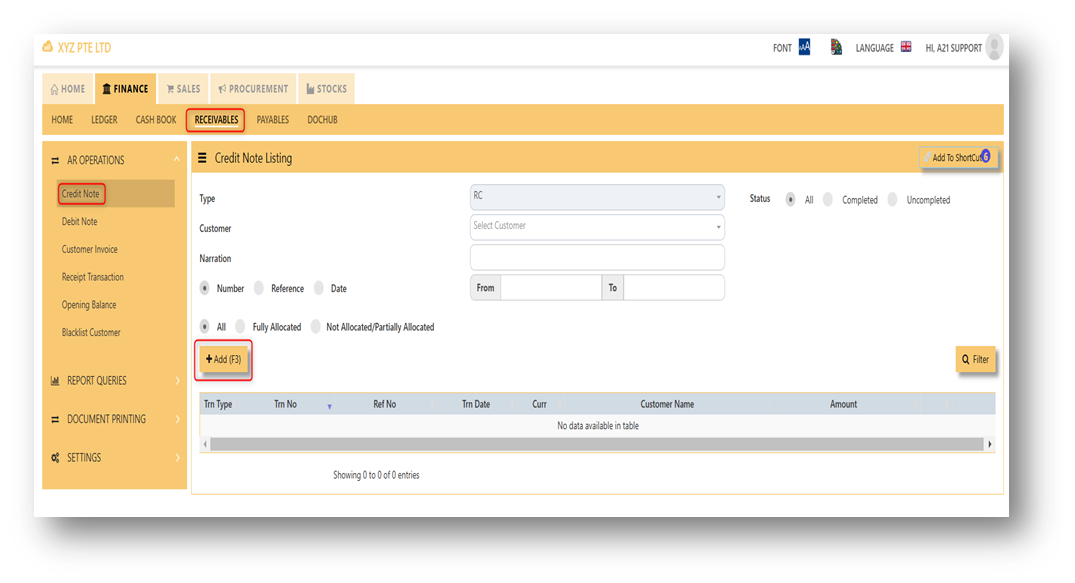
A credit note usually issued when clients return goods or services. To record a receivable credit note in Uniq365, you have to go in receivables module and look for credit note tab. Attached photo in reference where you can find it.
Steps on how to enter new transaction in Credit Note:
- Click on Receivables – AR Operations – Credit Note (RC) and the following screen will appear.
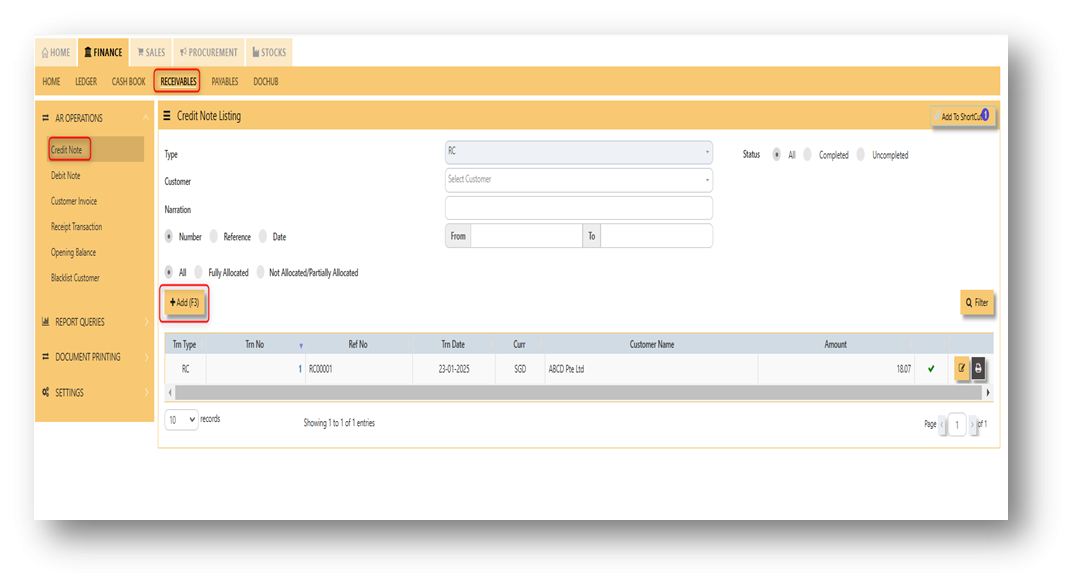
- Click on Add button to create a new transaction.


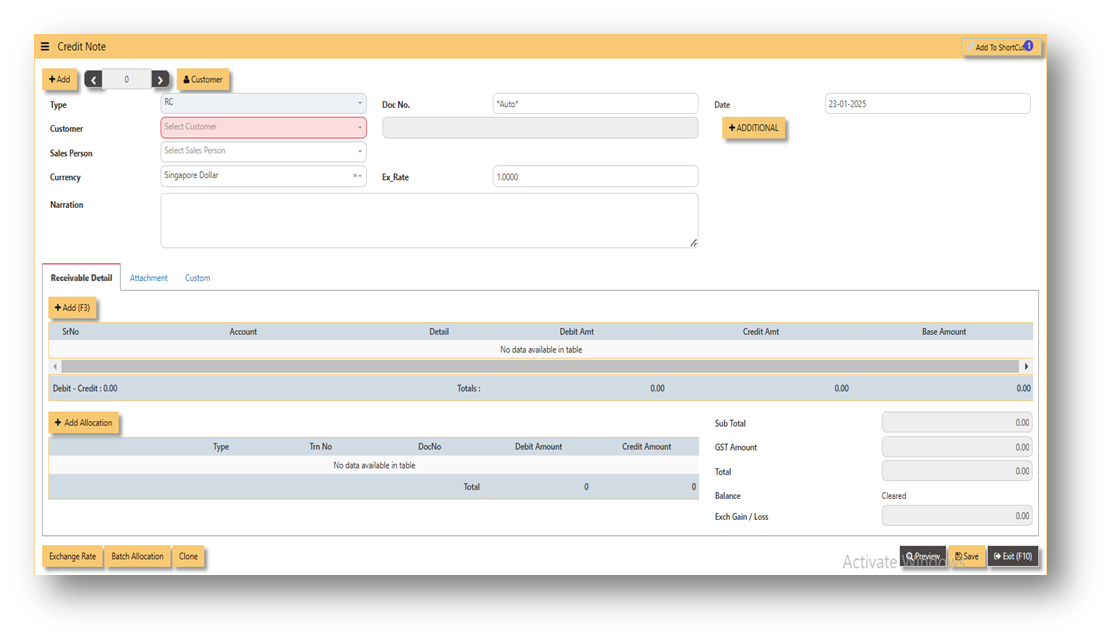
- Fill up the fields in the header section such as Ref No, Date, Supplier, Contact Person, Currency and Exchange Rate.
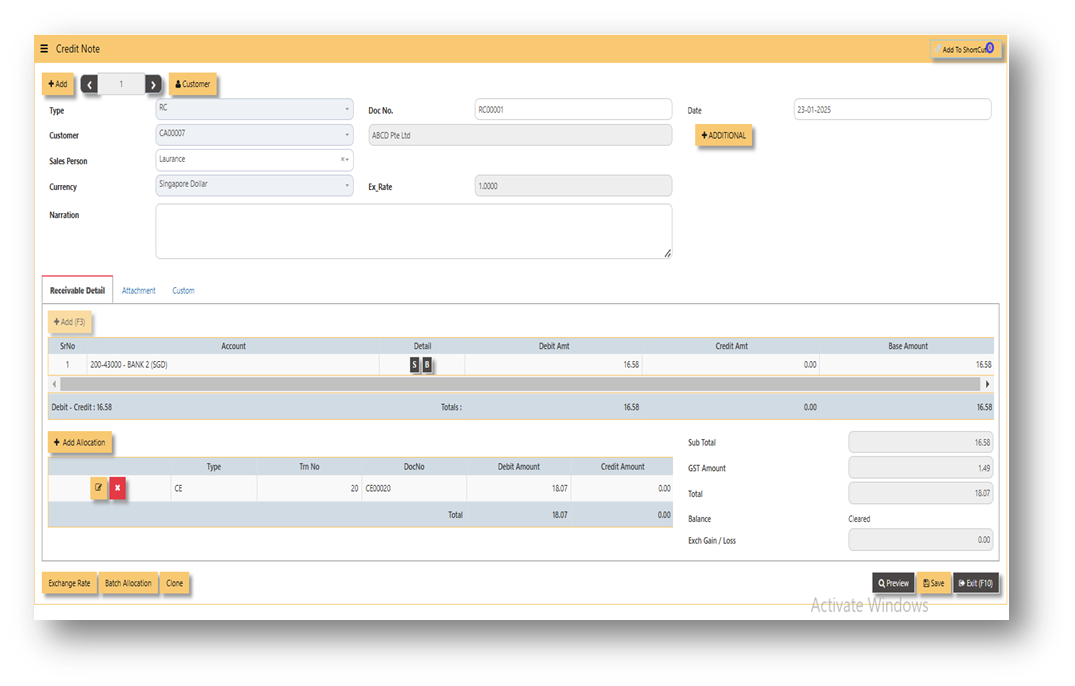
- Then select the account concerned at the detail section.
- Click on SAVE button to complete the entry.
ADDITIONAL INFORMATION:
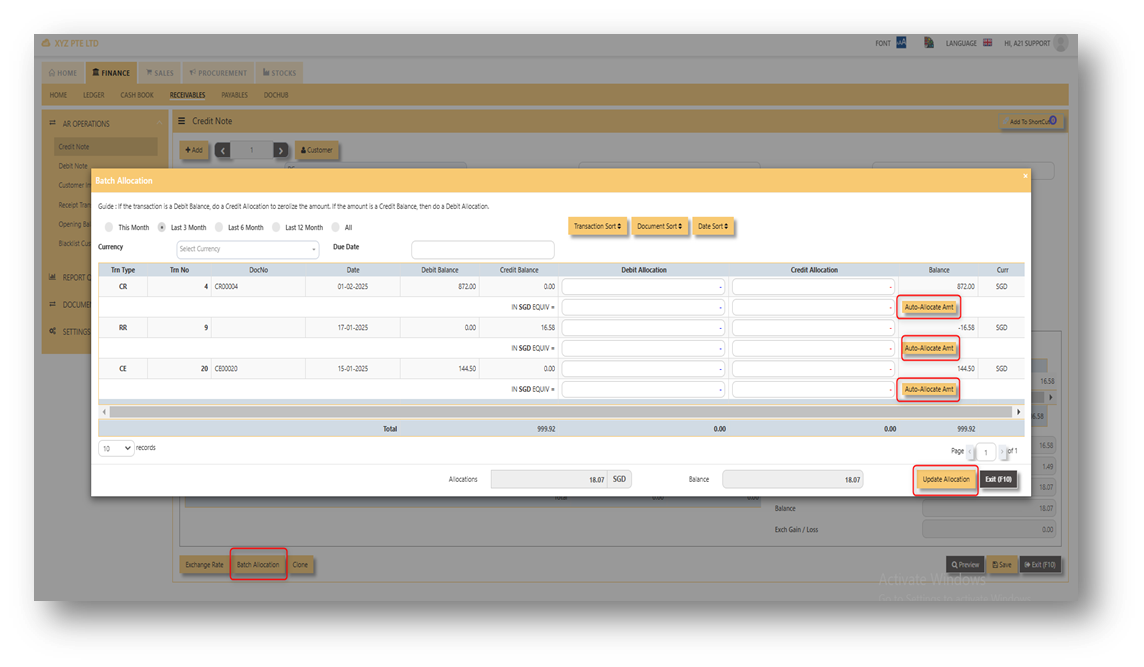
2.1 Batch Allocation
If user has a lot of transactions needed to allocate, they may use the batch allocation button to allocate more transactions in convenient way. Refer to attached photo on how batch allocation works.
2.2 Clone
If user wanted to create new RC transaction with same details from previous transaction, user can click the button of "clone" in order to create new RC transaction with same details from previous transaction. In this way, no need to key-in manually all the details, hence will just choose which customer should it be clone.
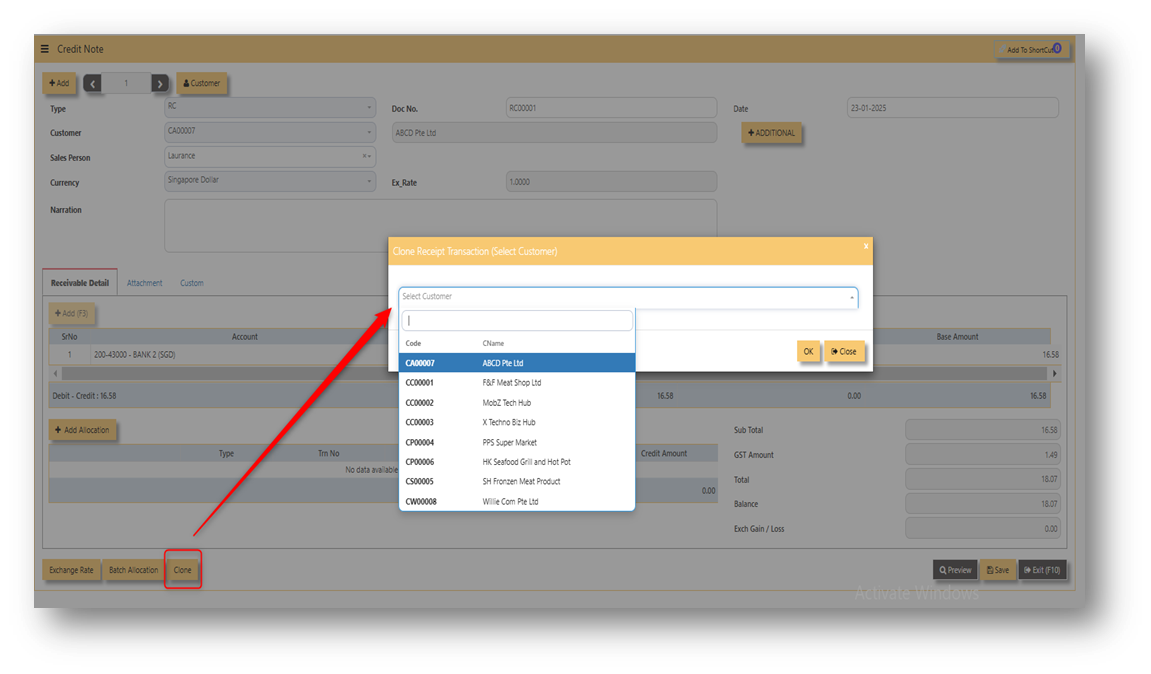
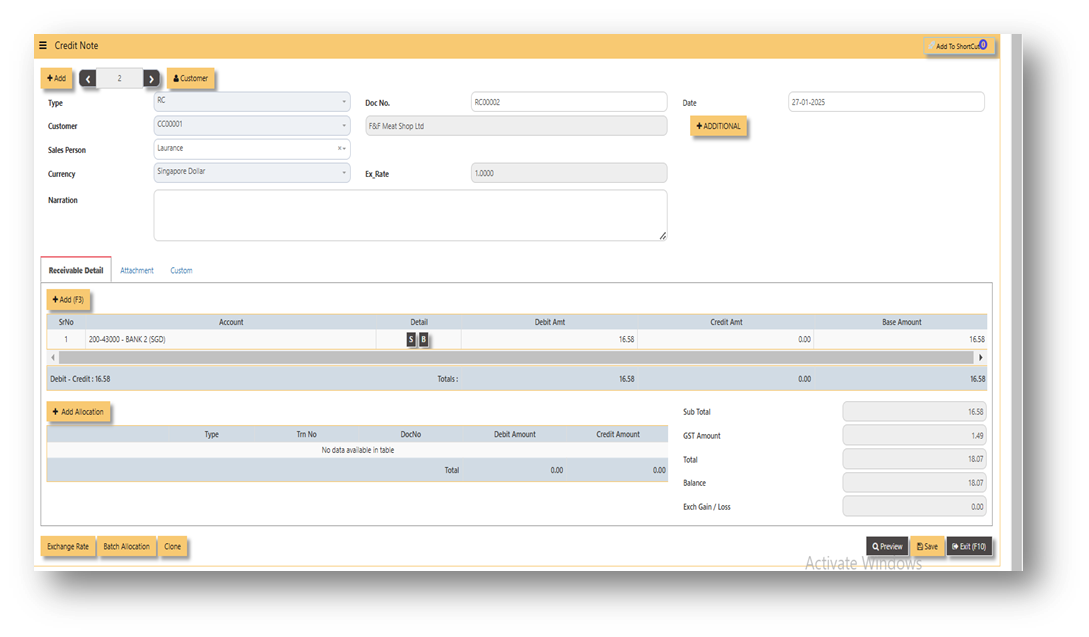
Attached photo is an example of transaction newly created from clone button.
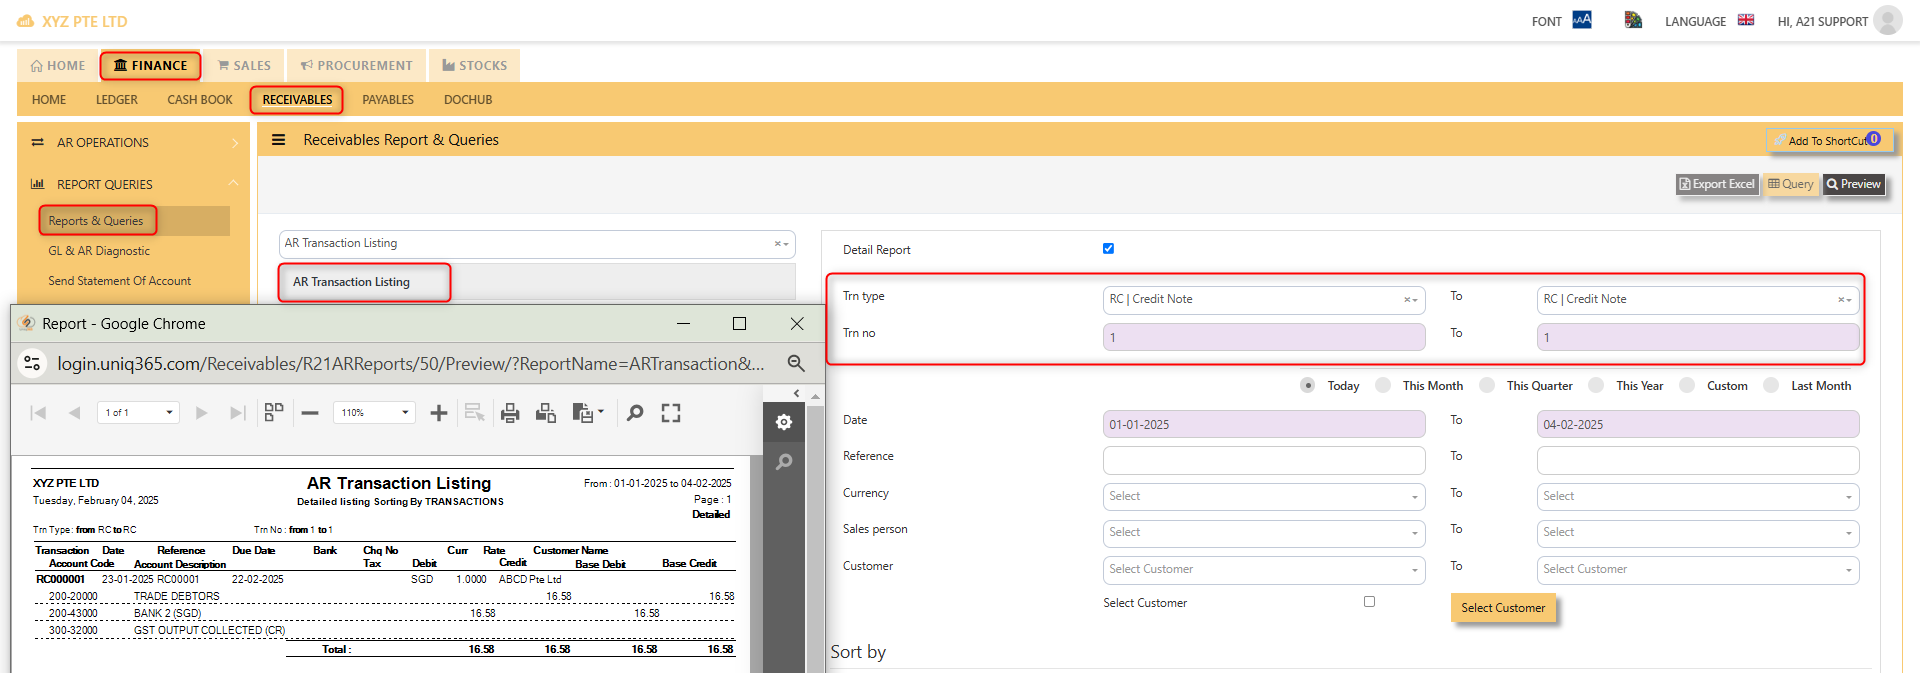
3. Report and Queries
For the double entries of the said RC transaction above, it can verify to check under AR transaction listing.
DEBIT NOTE
DEBIT NOTE
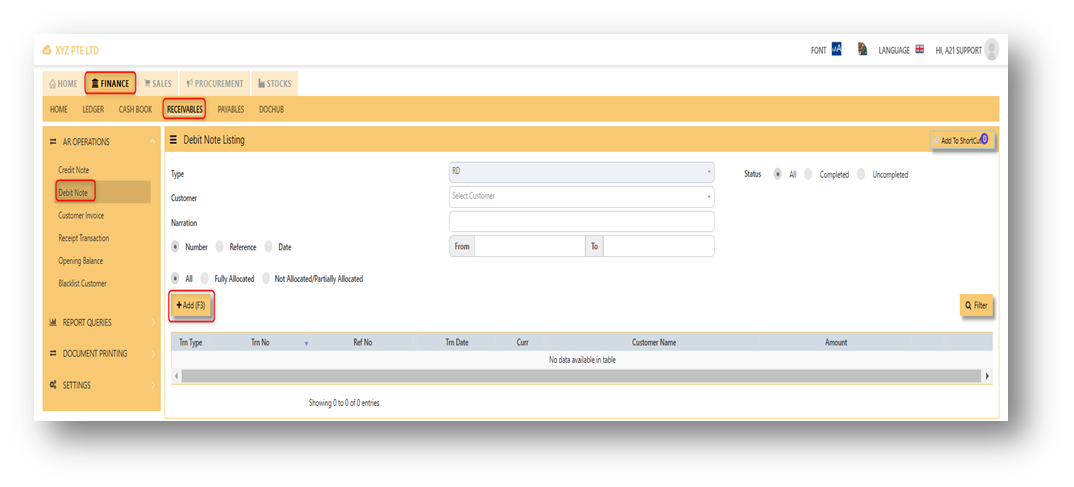
Debit note is the form issued for any additional amount of goods or services rendered to customers wherein no product code and quantity involved. Shortly known as Receivable debit note or RD. In UNIQ365, the receivable debit note can be found receivable module under operations. Please refer attached photo for reference where could it be found.
Steps on how to enter new transaction in Credit Note:
- Click on Receivables – AR Operations – Debit Note (RD) and the following screen will appear.

2. Click on Add button to create a new transaction.
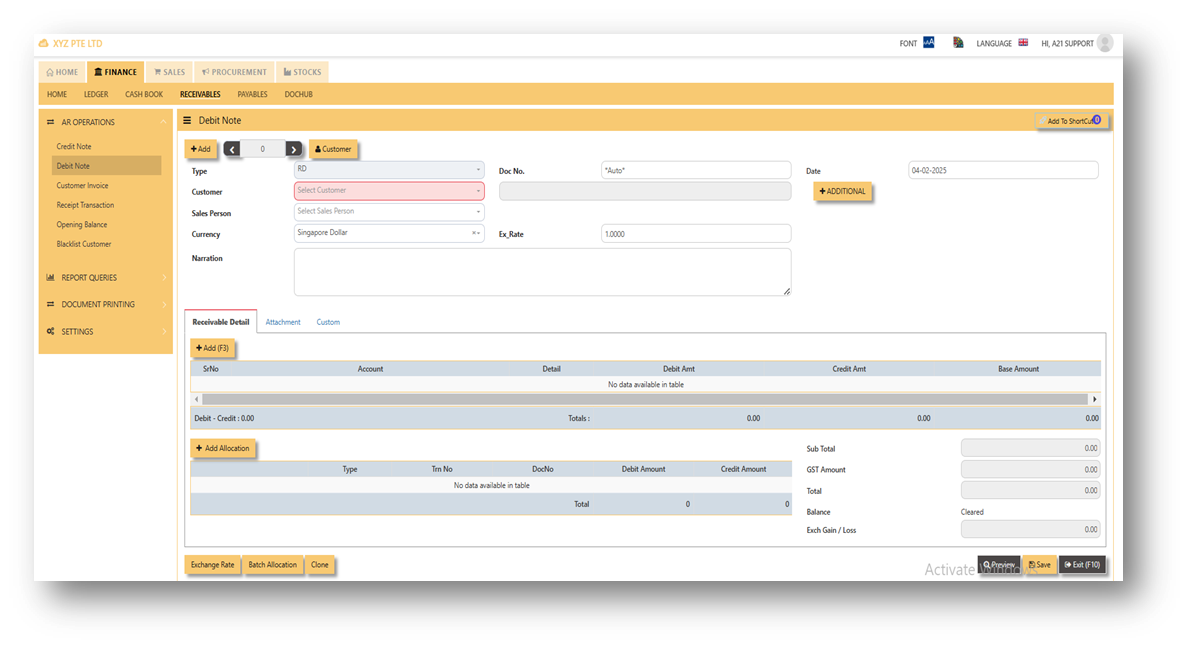
- Fill up the fields in the header section such as Ref No, Date, Supplier, Contact Person, Currency and Exchange Rate.
- Then select the account concerned at the detail section.
- Click on SAVE button to complete the entry.
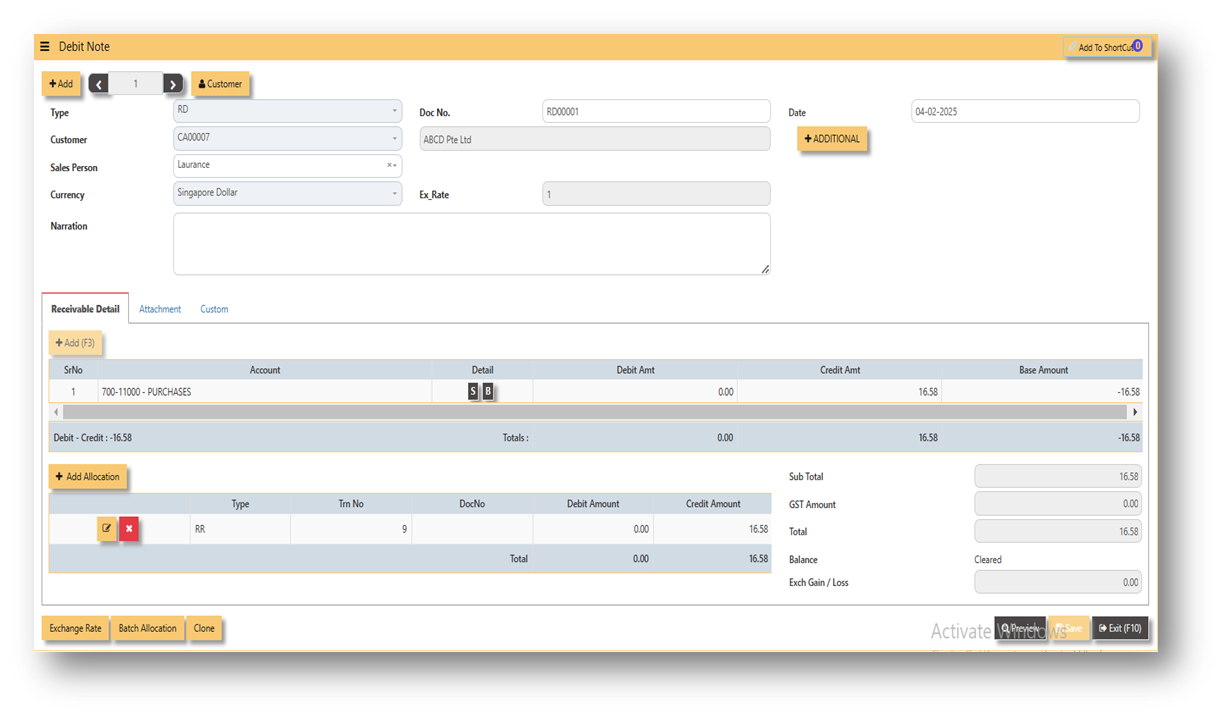
3. Attached photo is a sample transaction of Debit Note (RD).
ADDITIONAL INFORMATION:
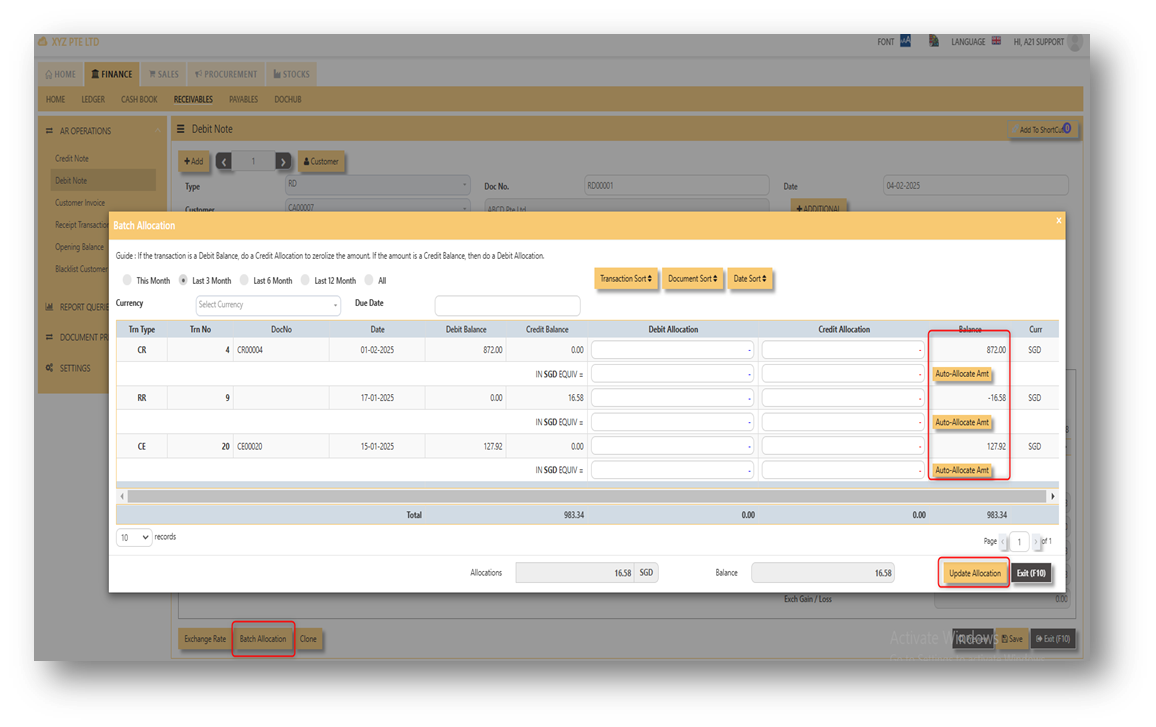
2.1 Batch Allocation
If user has a lot of transactions needed to allocate, they may use the batch allocation button to allocate more transactions in convenient way. Refer to attached photo on how batch allocation works.
2.2 Clone
If user wanted to create new RD transaction with same details from previous transaction, user can click the button of "clone" in order to create new RD transaction with same details from previous transaction. In this way, no need to key-in manually all the details, hence will just choose which customer should it be clone.
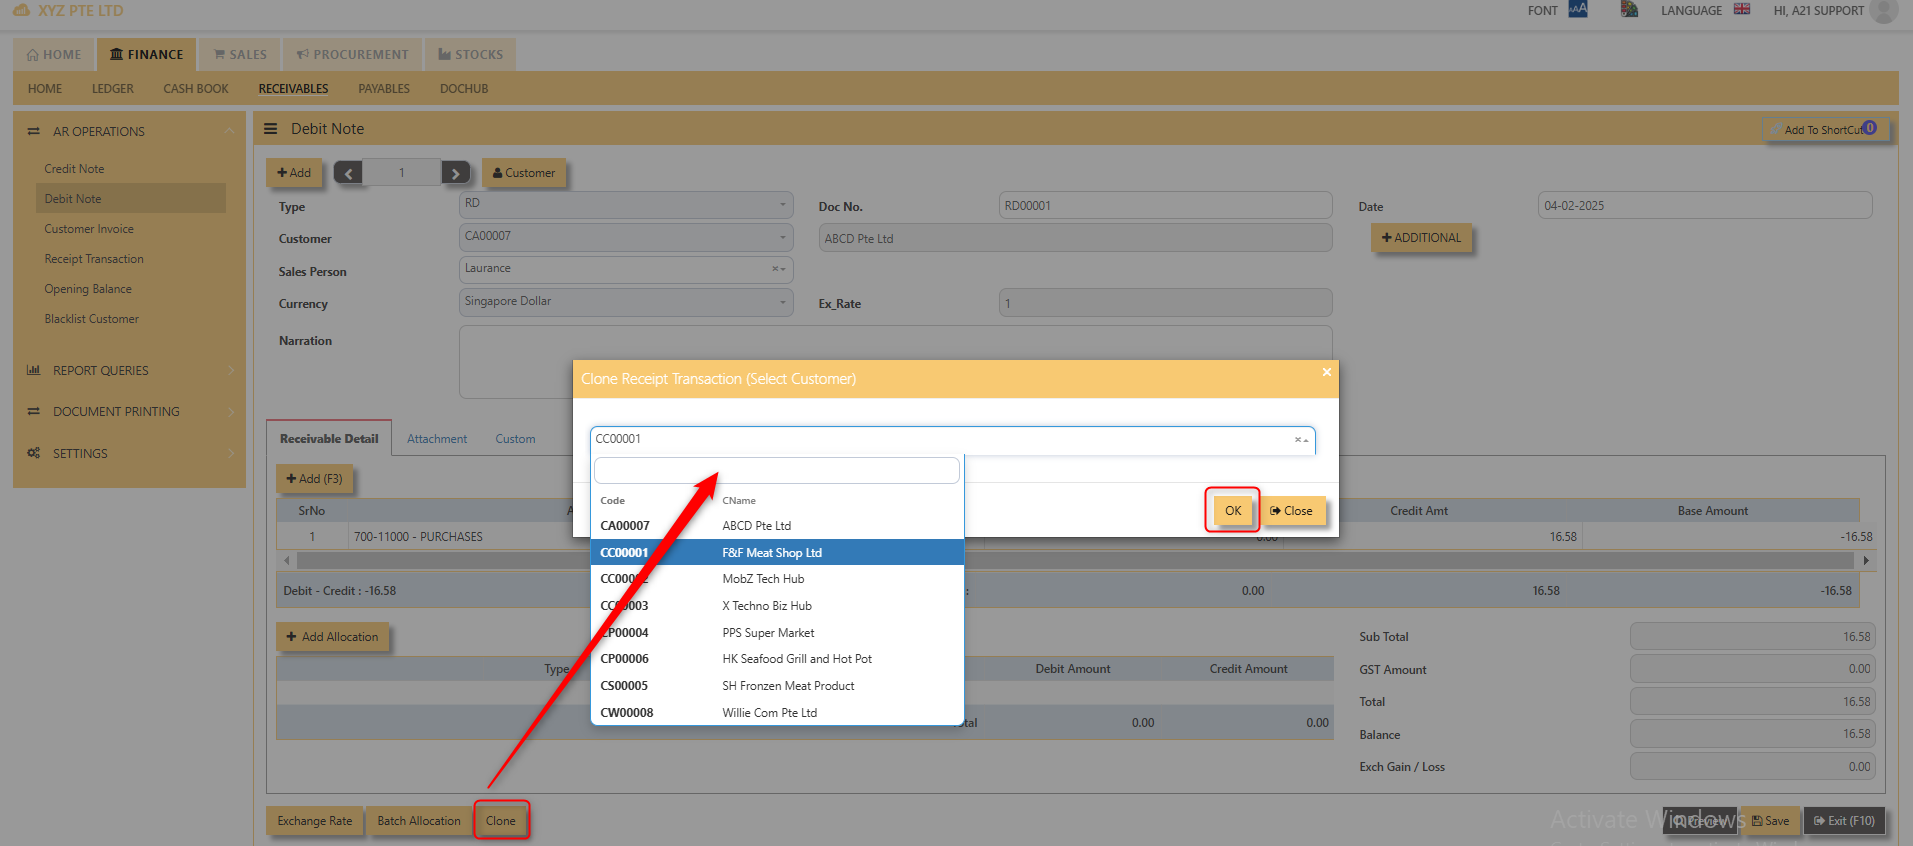
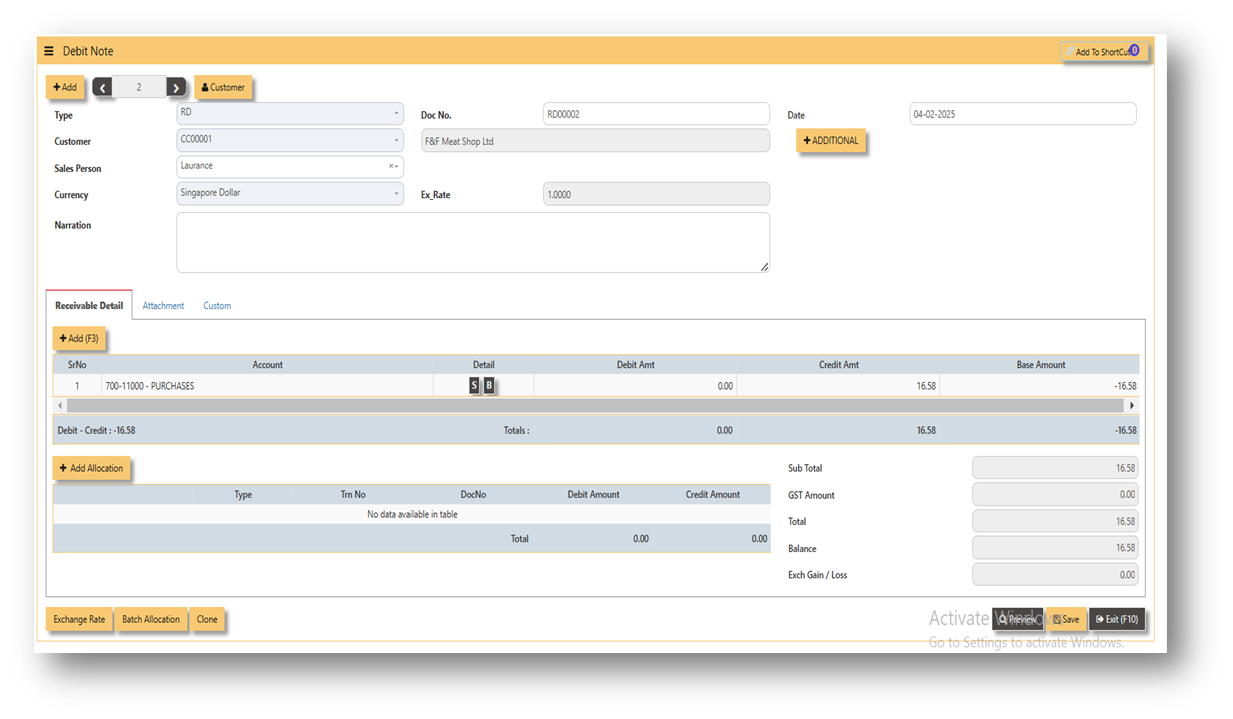
Attached photo is an example of transaction newly created from clone button.
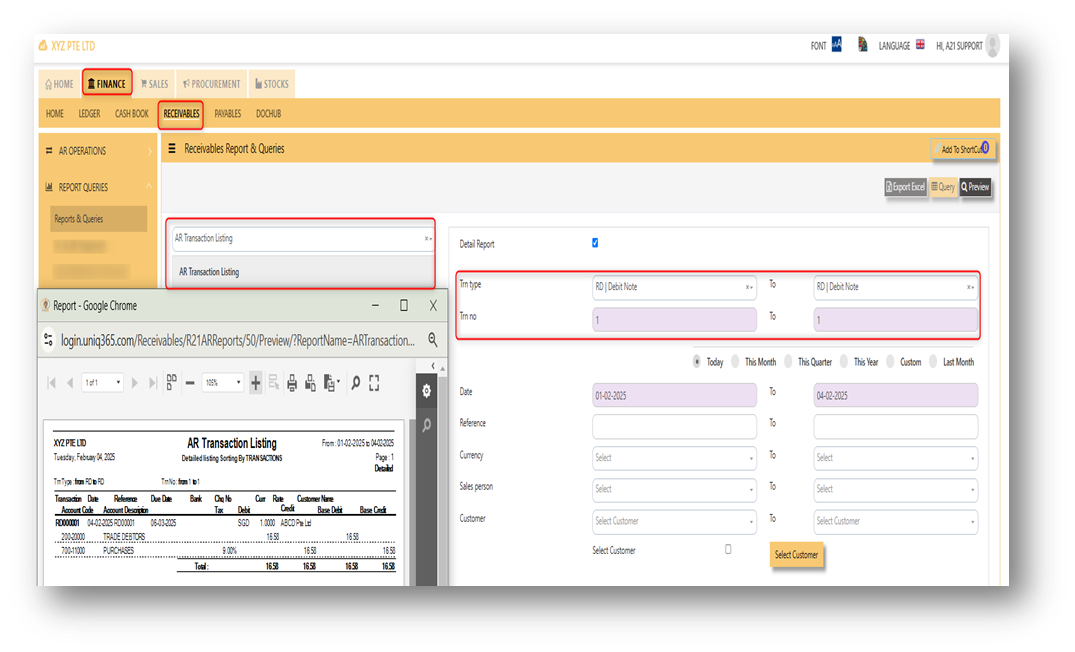
3. Report and Queries
For the double entries of the said RD transaction above, it can verify to check under AR transaction listing.
CUSTOMER INVOICE
CUSTOMER INVOICE
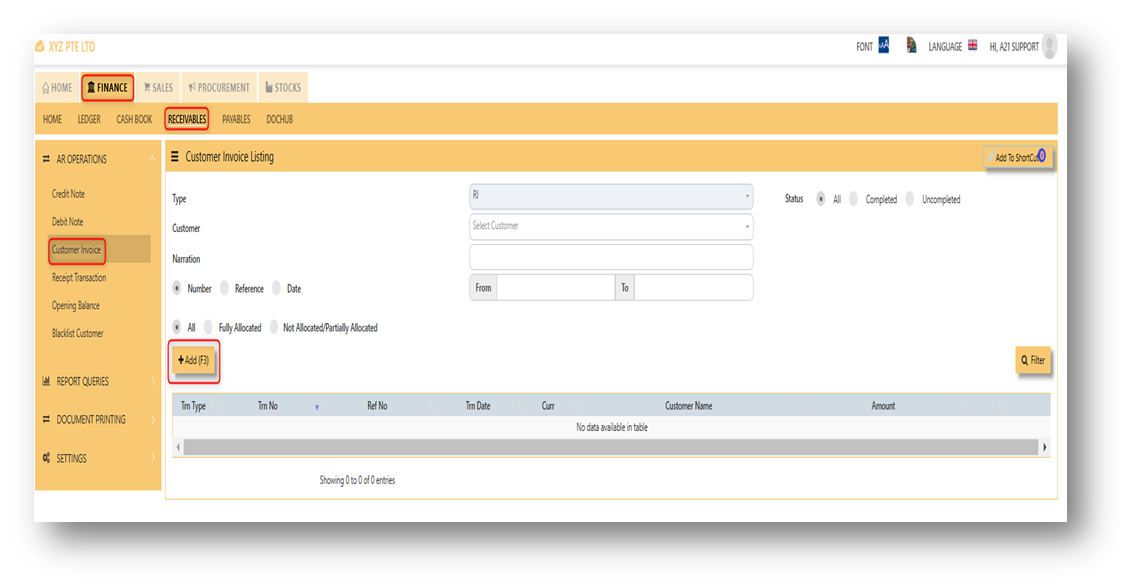
There may be times where there is a SALES of non-stock item. User may use Customer Invoice (RI) transaction to effect such a transaction. The customer invoice or RI can be found under receivable module. Please refer to attached photo where to find the customer invoice.
Steps on how to enter new transaction in Credit Note:
- Click on Receivables – AR Operations – Customer Invoice (RI) and the following screen will appear.

2. Click on Add button to create a new transaction.
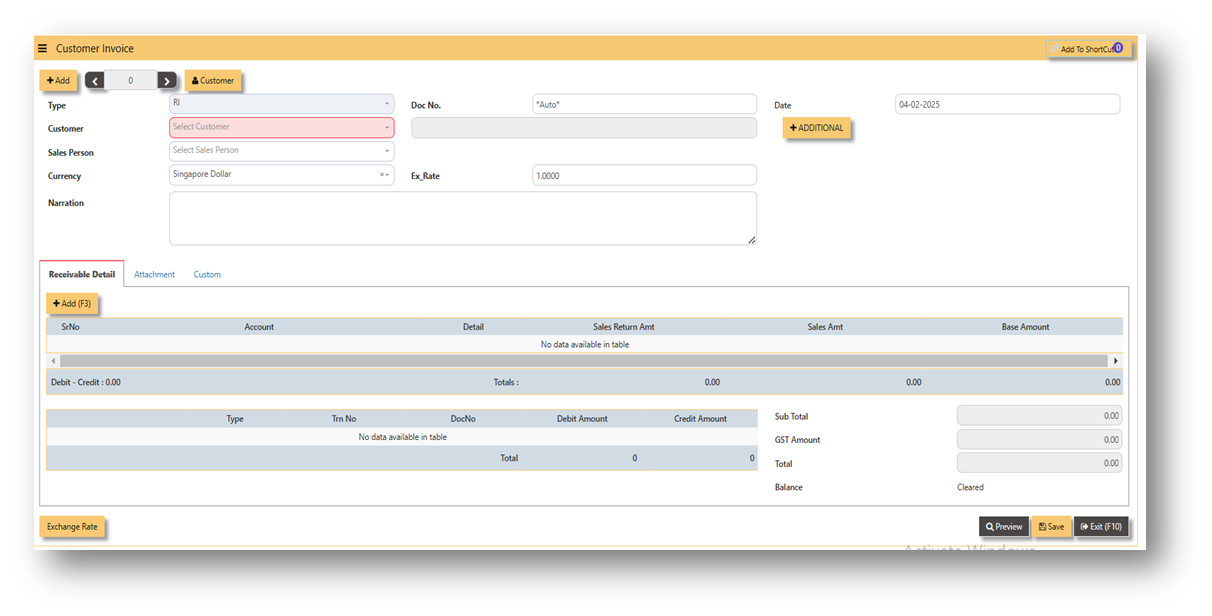
- Fill up the fields in the header section such as Ref No, Date, Supplier, Contact Person, Currency and Exchange Rate.
- Then select the account concerned at the detail section.
- Click on SAVE button to complete the entry.
3. Attached photo is a sample transaction of Customer Invoice (RI).

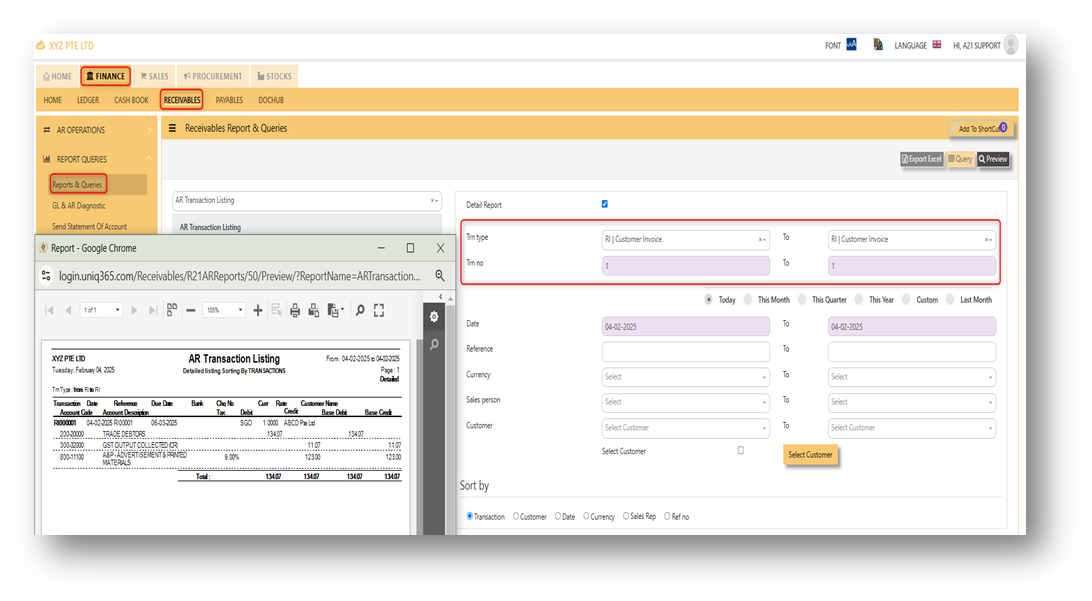
4. Report and Queries
For the double entries of the said RI transaction above, it can verify to check under AR transaction listing.
RECEIPT TRANSACTION
Receipt Transaction
A receipt transaction menu is where you can record of a payment received from a customer. In UNIQ 365, the receipt transaction can be found in receivable module.
Steps on how to enter new transaction in Receipt Transaction:
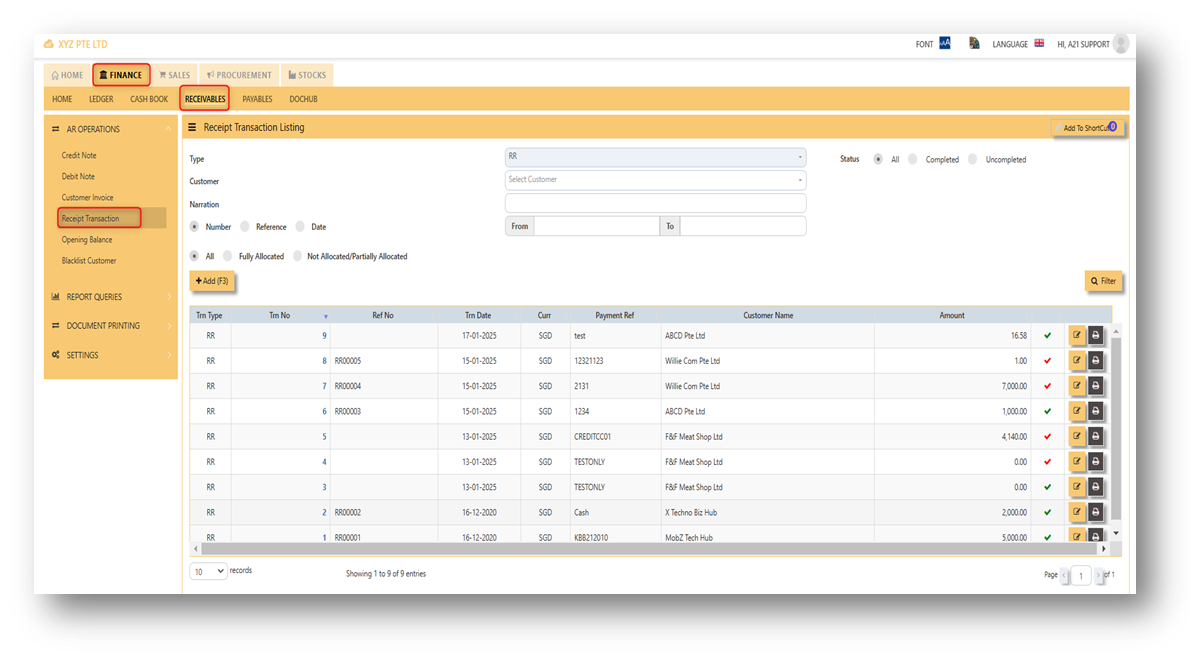
- Click on Receivables – AR Operations – Receipt Transaction (RI) and the following screen will appear.
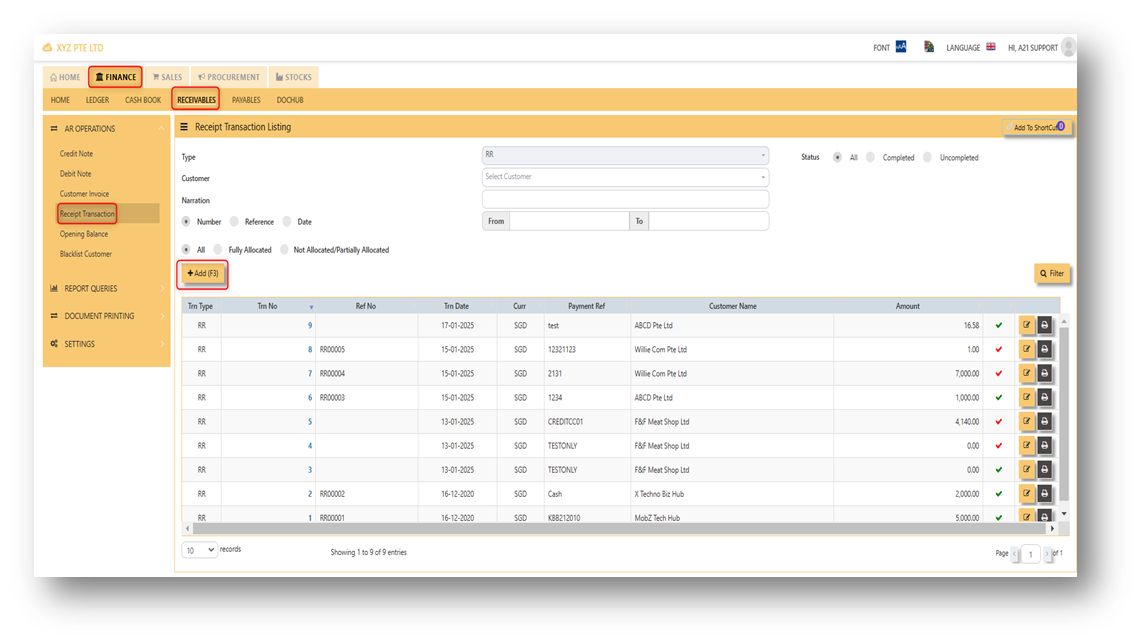
2. Click on Add button to create a new transaction.
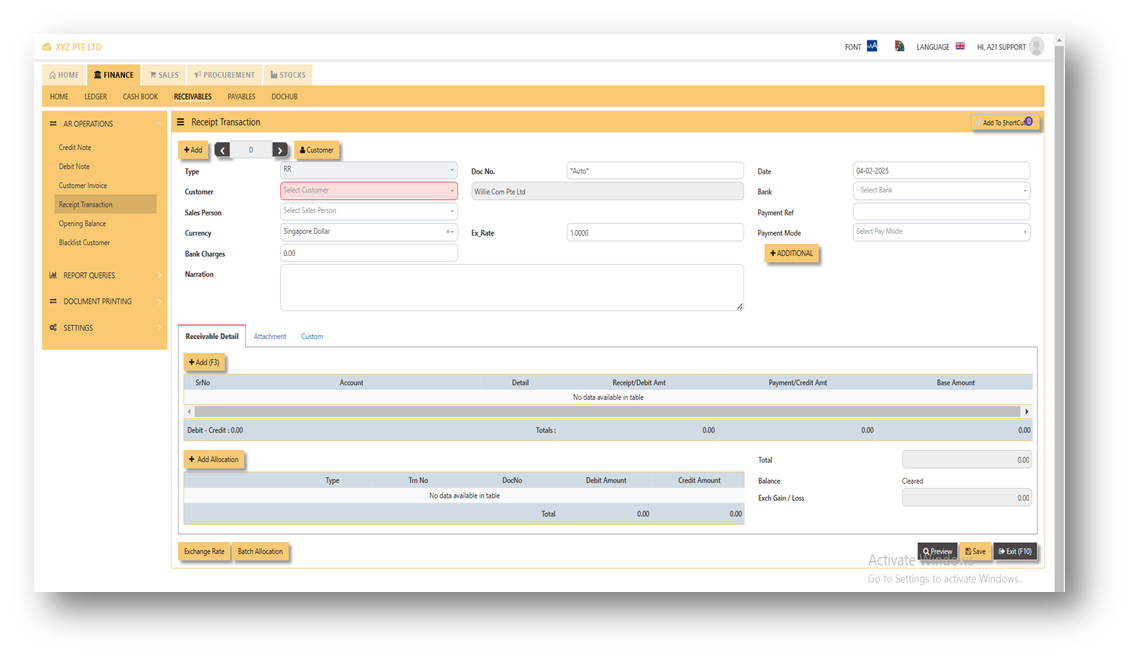
- Fill up the fields in the header section such as Ref No, Date, Supplier, Contact Person, Currency, Payment Ref, Payment mode and Exchange Rate.
- Fill up the Select a bank code and click on detail line, The system will automatically populate the detail line with account code that is being set to the cash bank.
- Then select the account concerned at the detail section.
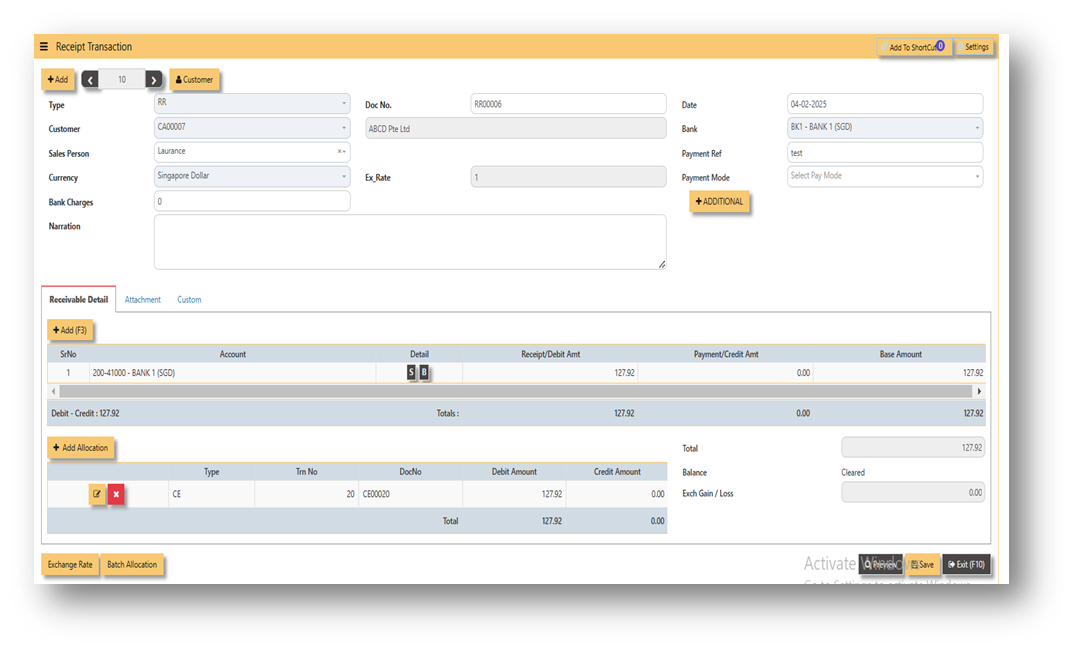
- Click on SAVE button to complete the entry.
Attached is an example of new receipt transaction.
ADDITIONAL INFORMATION:
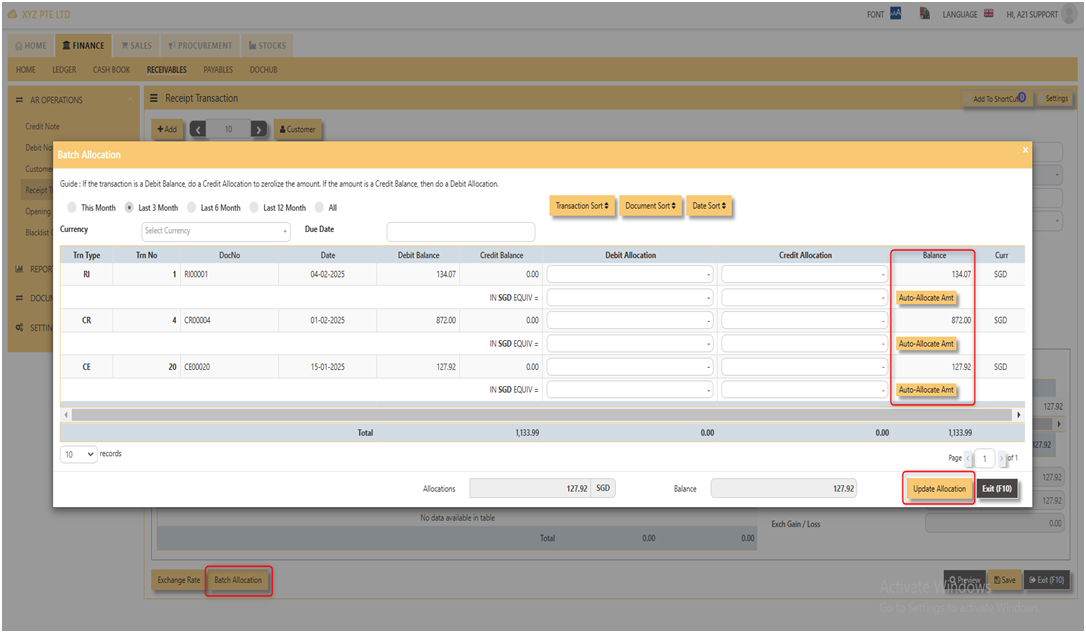
2.1 Batch Allocation
If user has a lot of transactions needed to allocate, they may use the batch allocation button to allocate more transactions in convenient way. Refer to attached photo on how batch allocation works.
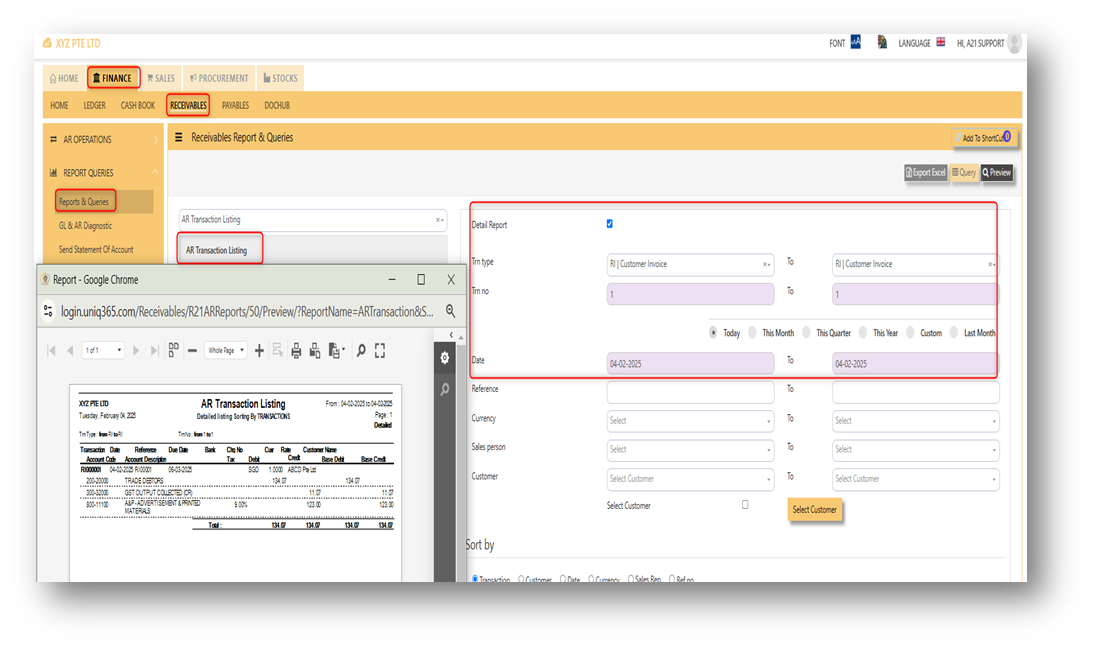
3. Report and Queries
For the double entries of the said RI transaction above, it can verify to check under AR transaction listing.
OPENING BALANCE
BLACKLIST CUSTOMER