AP- OPERATIONS
AP OPERATIONS
Payable Transaction
Transactions for Supplier Invoice (PI), Credit Note (PC), Debit Note (PD) and Payment transaction (PV) can be done at this option. Allocation of outstanding invoices can be made via PI, PC, PD and PV transactions.
This option posts on-line to Supplier/Creditors account and GST account if applicable. Upon allocation of foreign currency transactions, realized exchange gain/loss will be captured and its amount posted to the account concerned.
Credit Note (AP)
How to enter Credit Note (PC)?
Steps to enter PC are as follow:
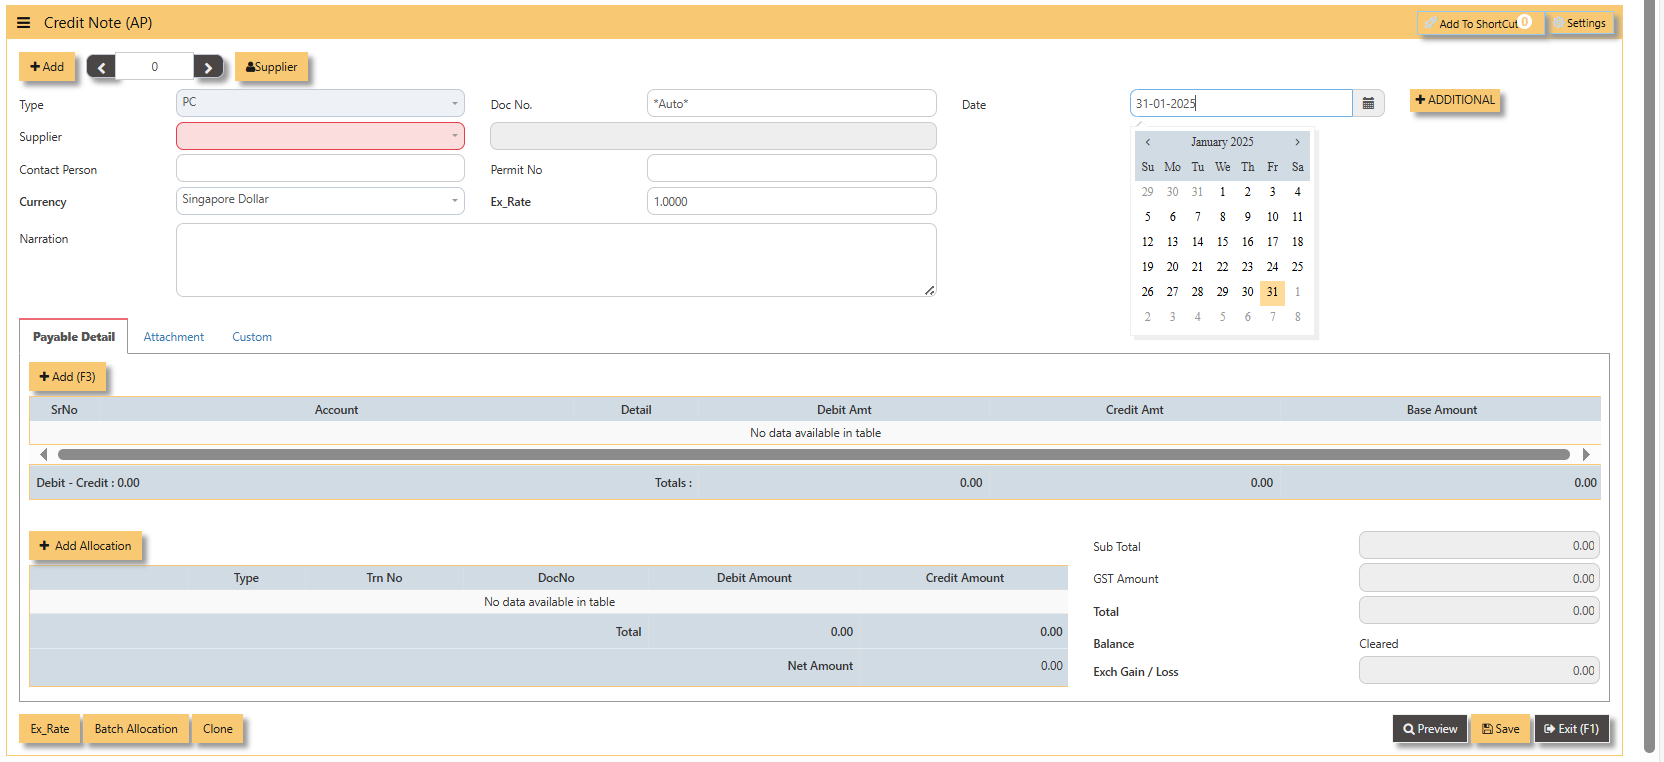
1. Click on Payables – AP Operations – Credit Note (AP) and the following screen will appear.
2. Click on Add button to create a new transaction.
- Fill up the fields in the header section such as Date, Supplier, Contact Person, Currency and Exchange Rate.
- Then select the account concerned at the detail section.
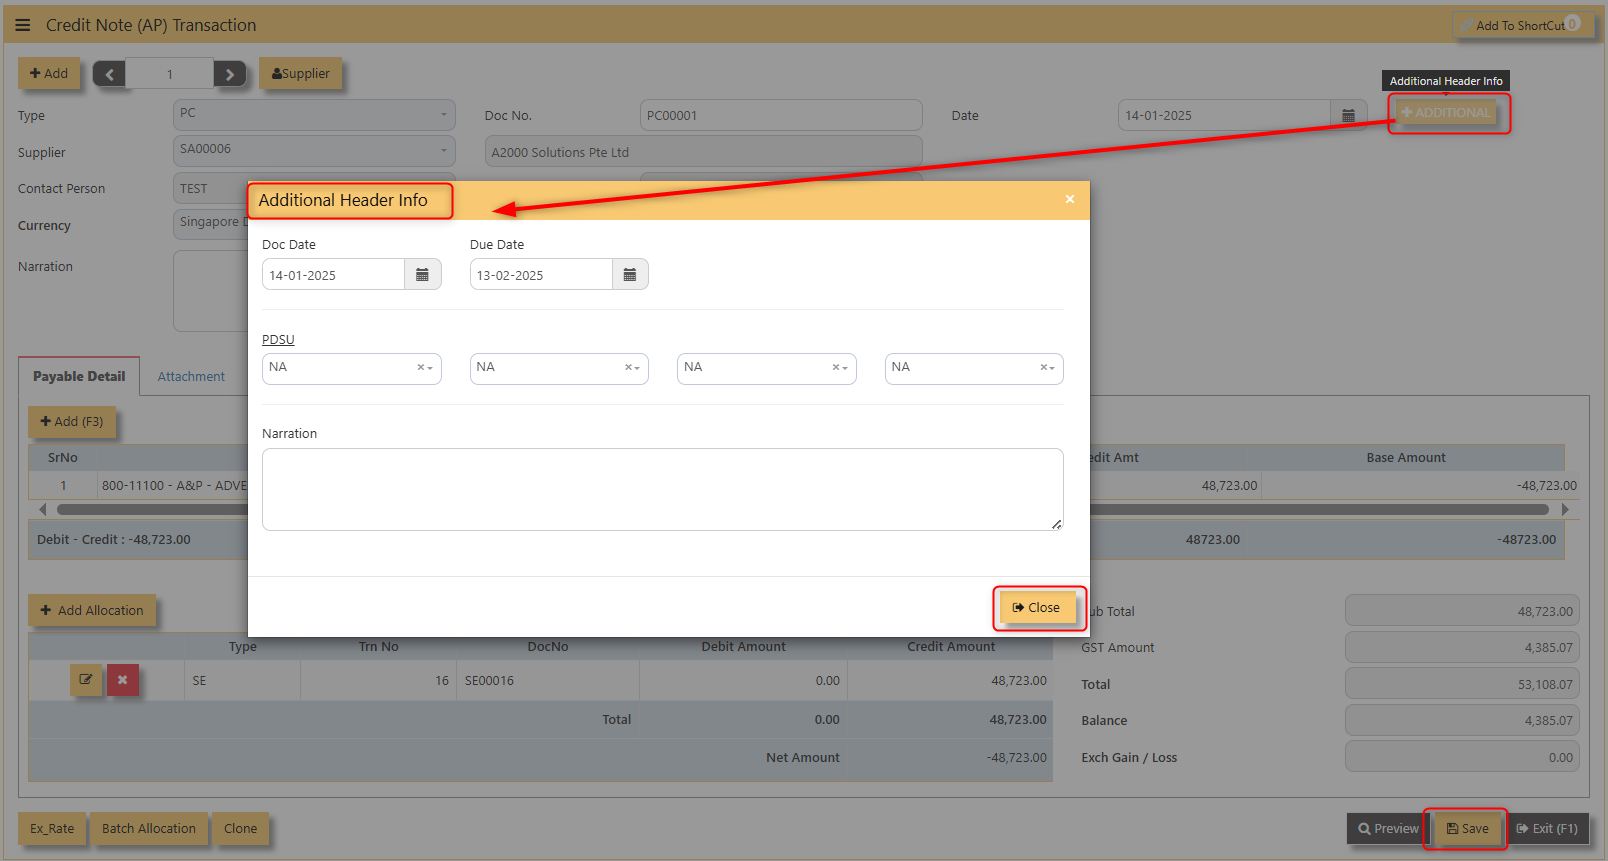
- Click for Additional Info for necessary details to add.
- Click on SAVE button to complete the entry.
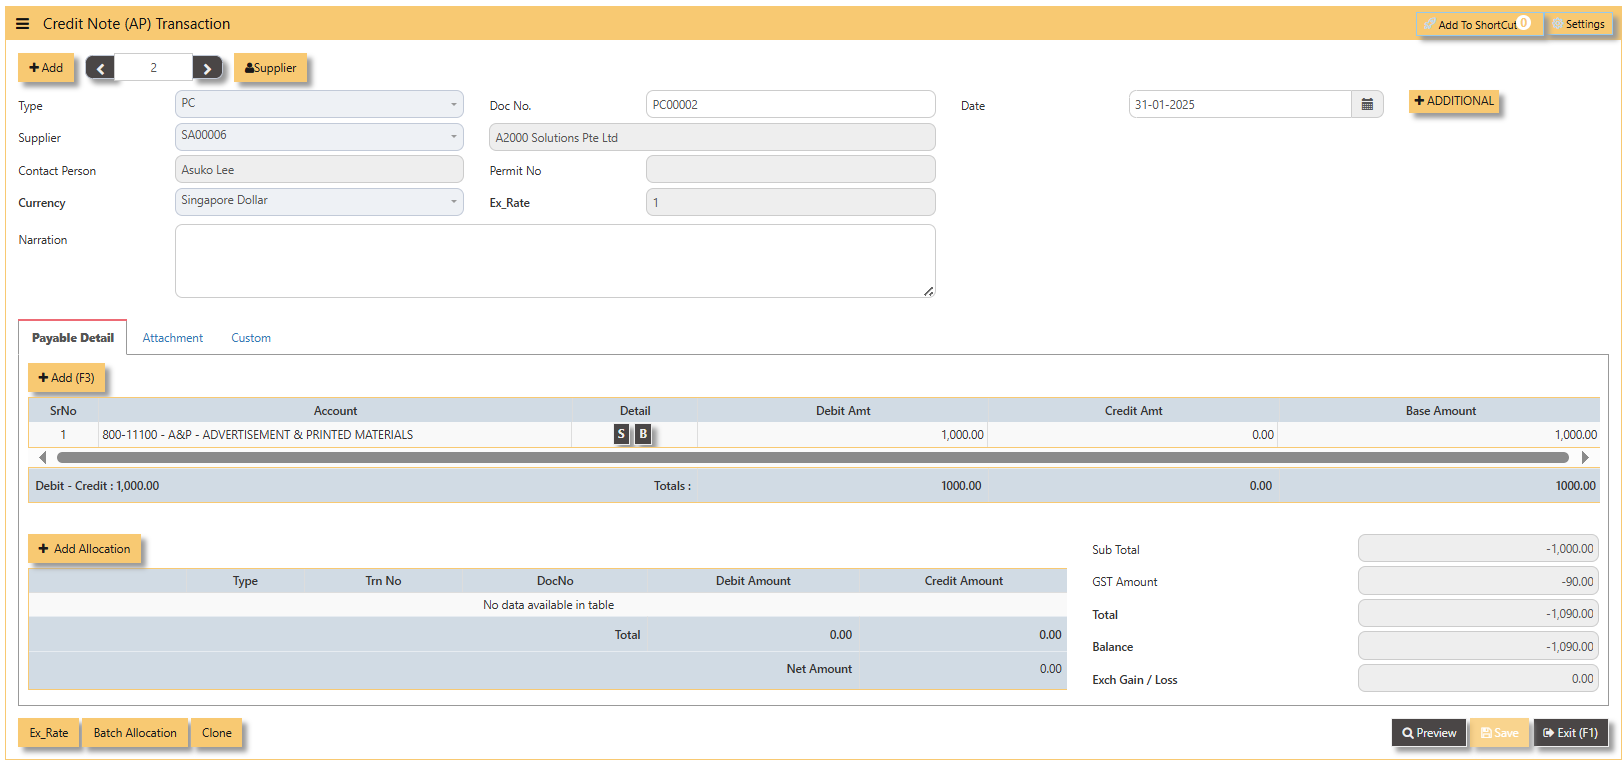
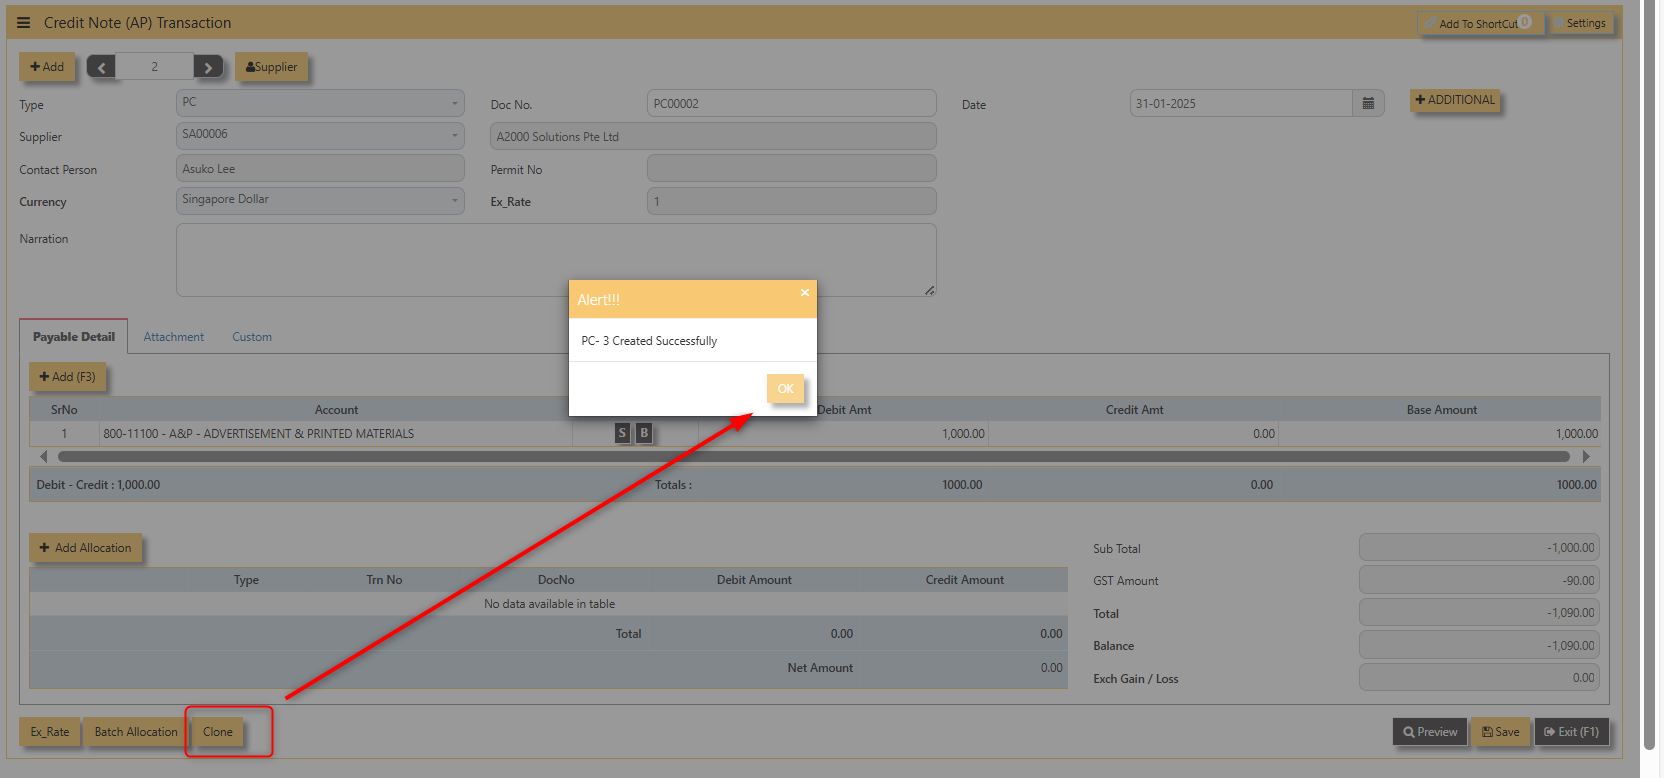
3. Below is a sample PC transaction screen.
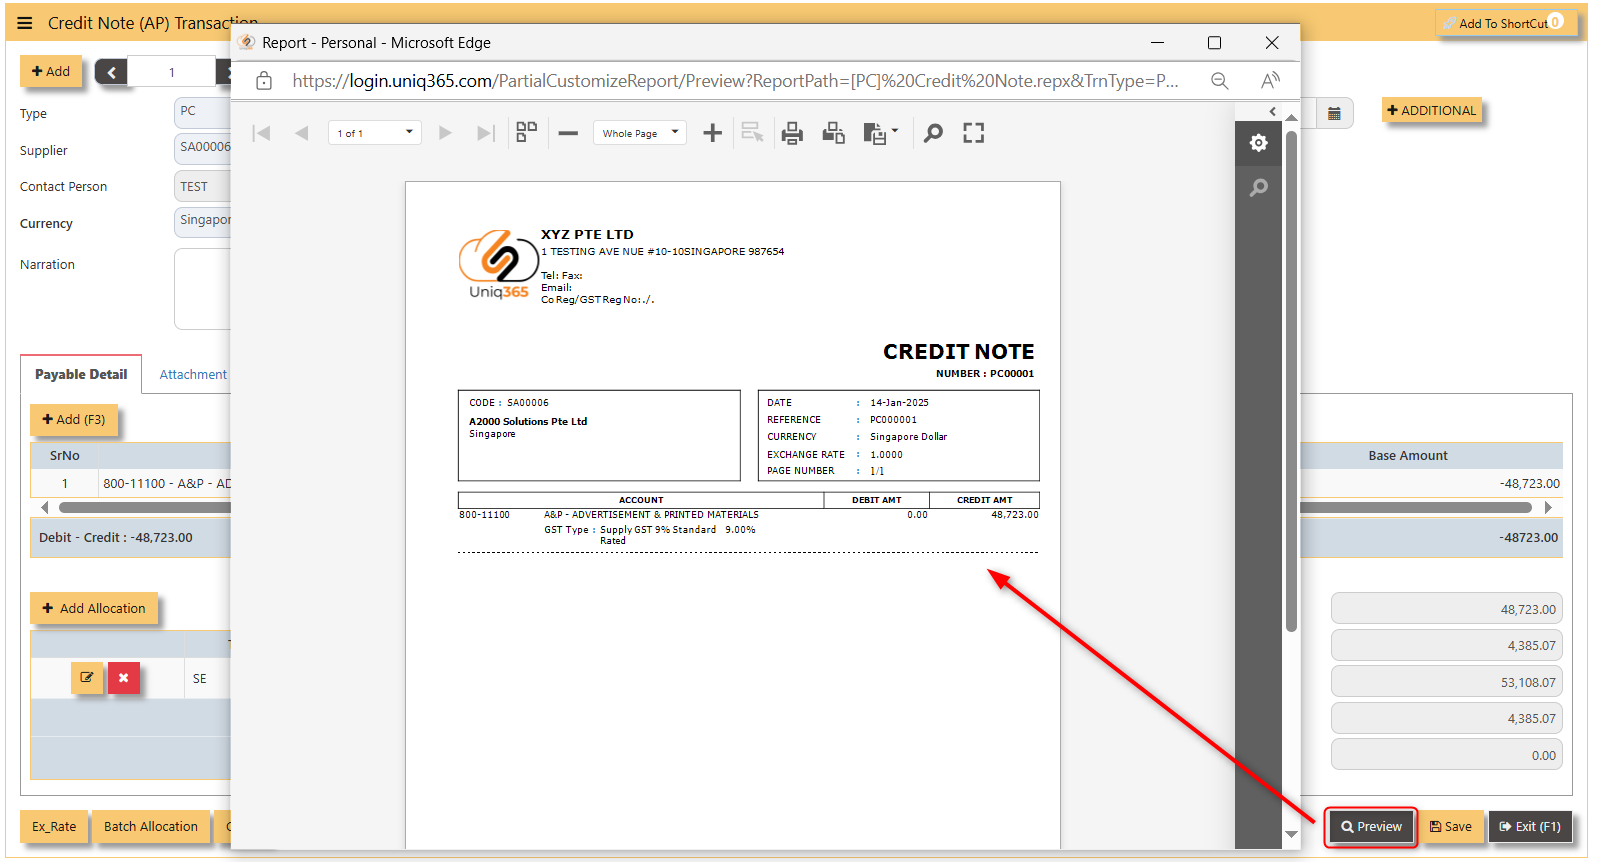
4. Click preview to view the transaction created.
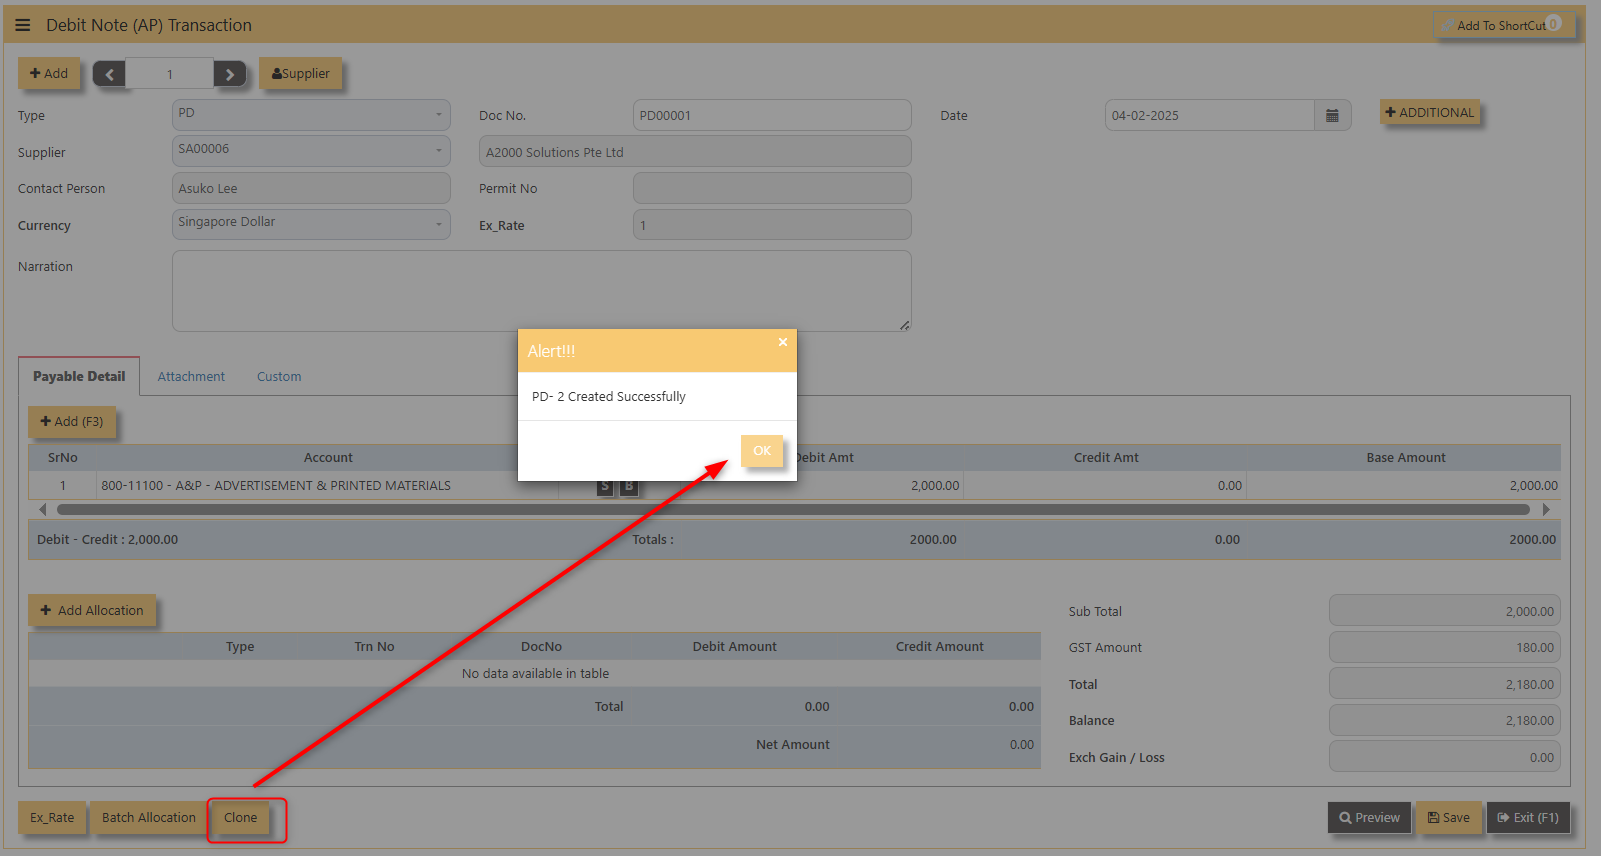
Additionally, if you tick CLONE button. It will copy the exact transaction created. Sample below,
Note: The steps to enter Credit Note (PC) & Debit Note (PD) are identical to PI. User will need to select transaction type PC or PD respectively to enter the record.
Debit Note (AP)
How to enter Debit Note (PD)?
Steps to enter PD are as follow:
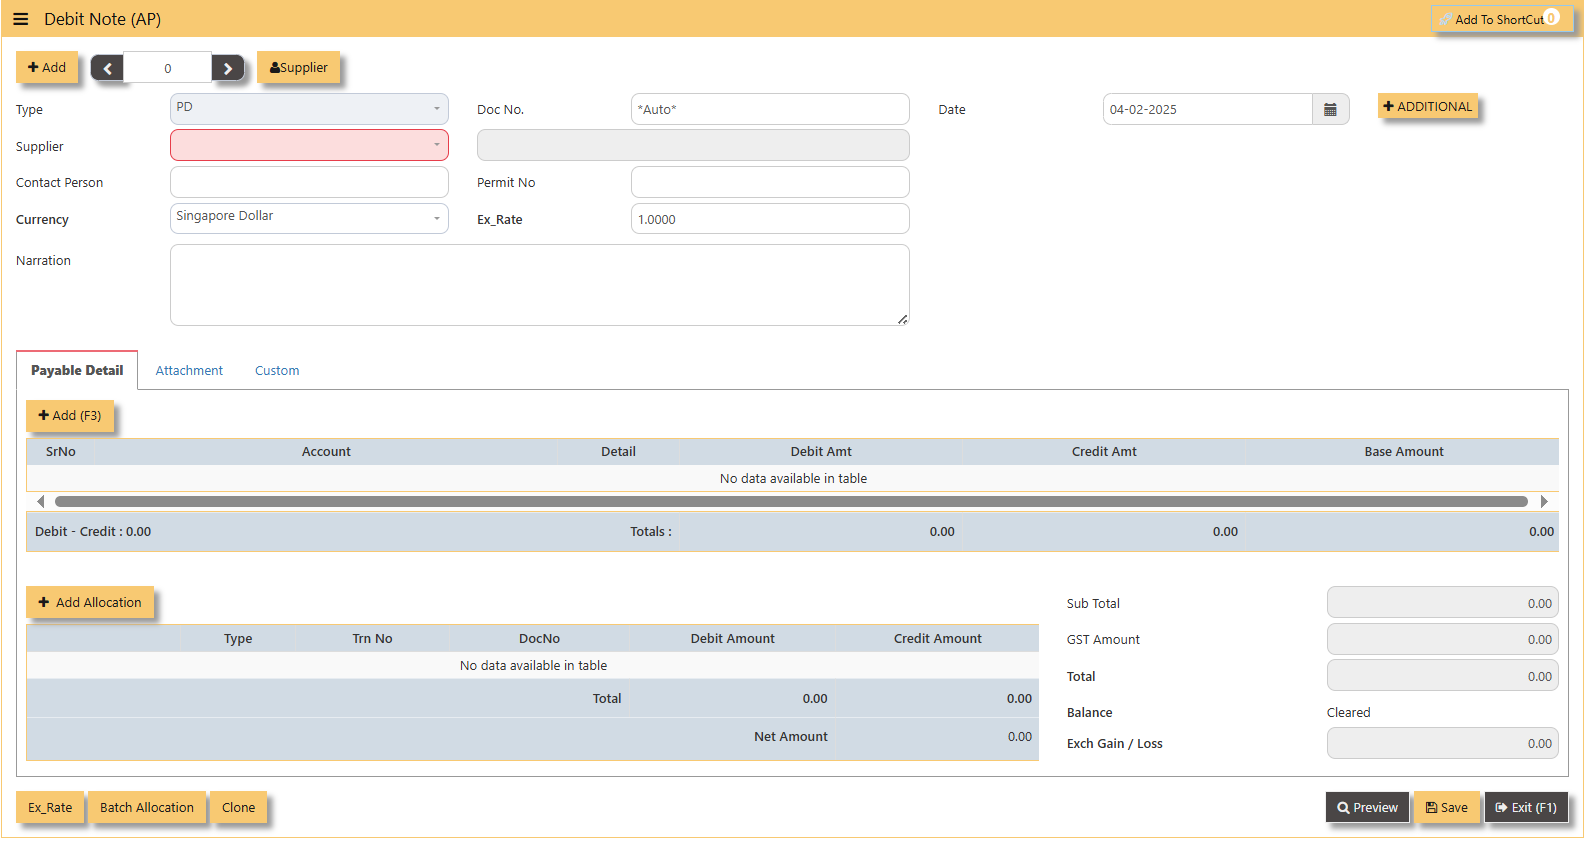
1. Click on Payables – AP Operations – Debit Note (AP) and the following screen will appear.
2. Click on Add button to create a new transaction.
- Fill up the fields in the header section such as Date, Supplier, Contact Person, Currency and Exchange Rate.
- Then select the account concerned at the detail section.
- Click for Additional Info for necessary details to add.
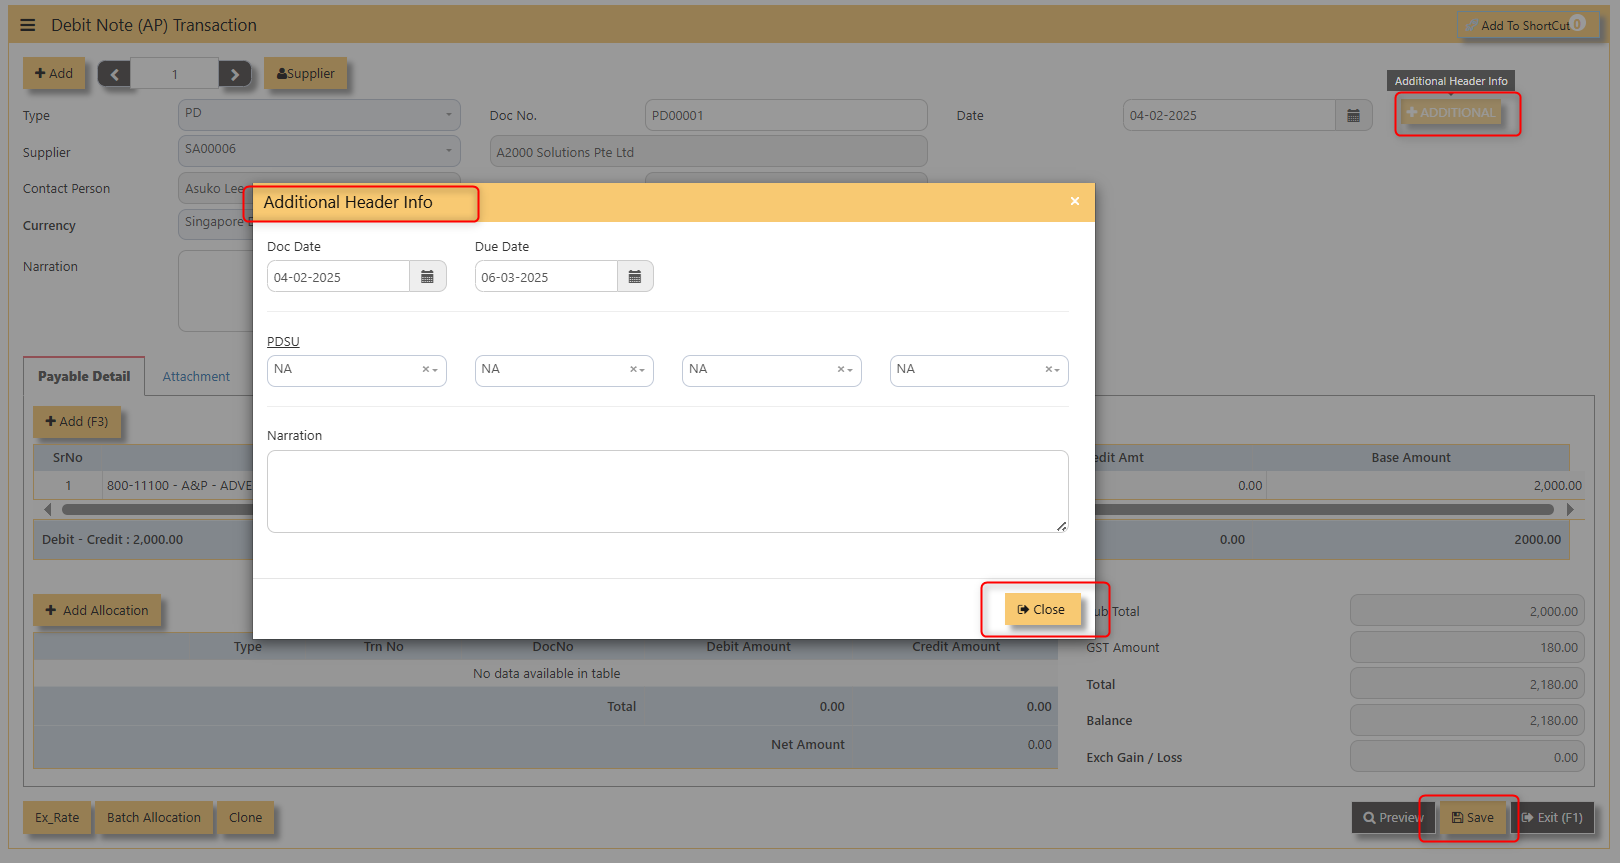
- Click on SAVE button to complete the entry.
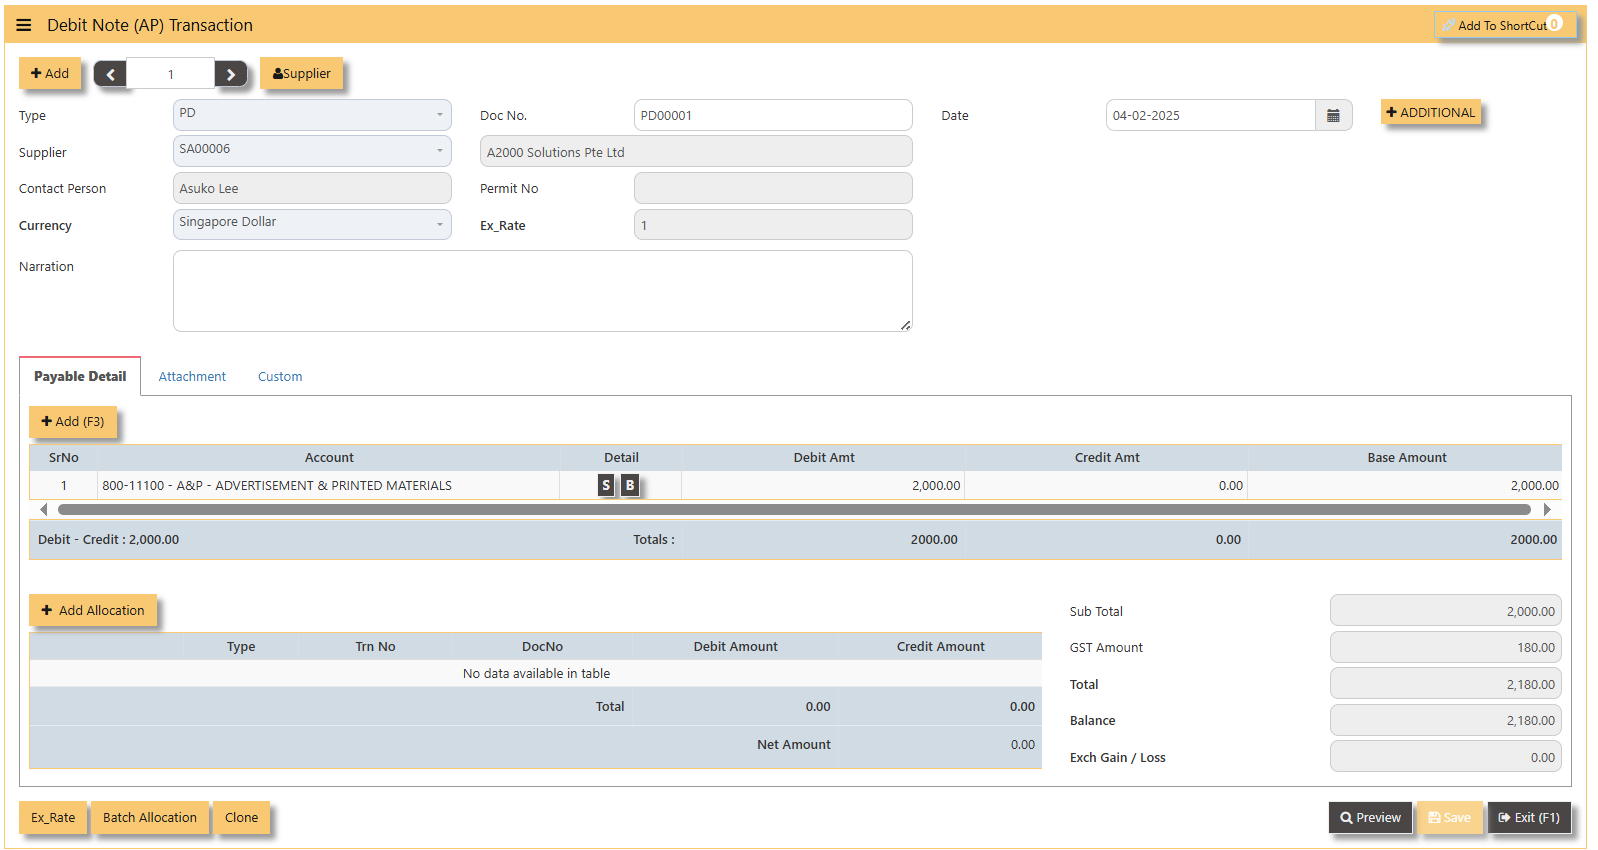
3. Below is a sample PC transaction screen.
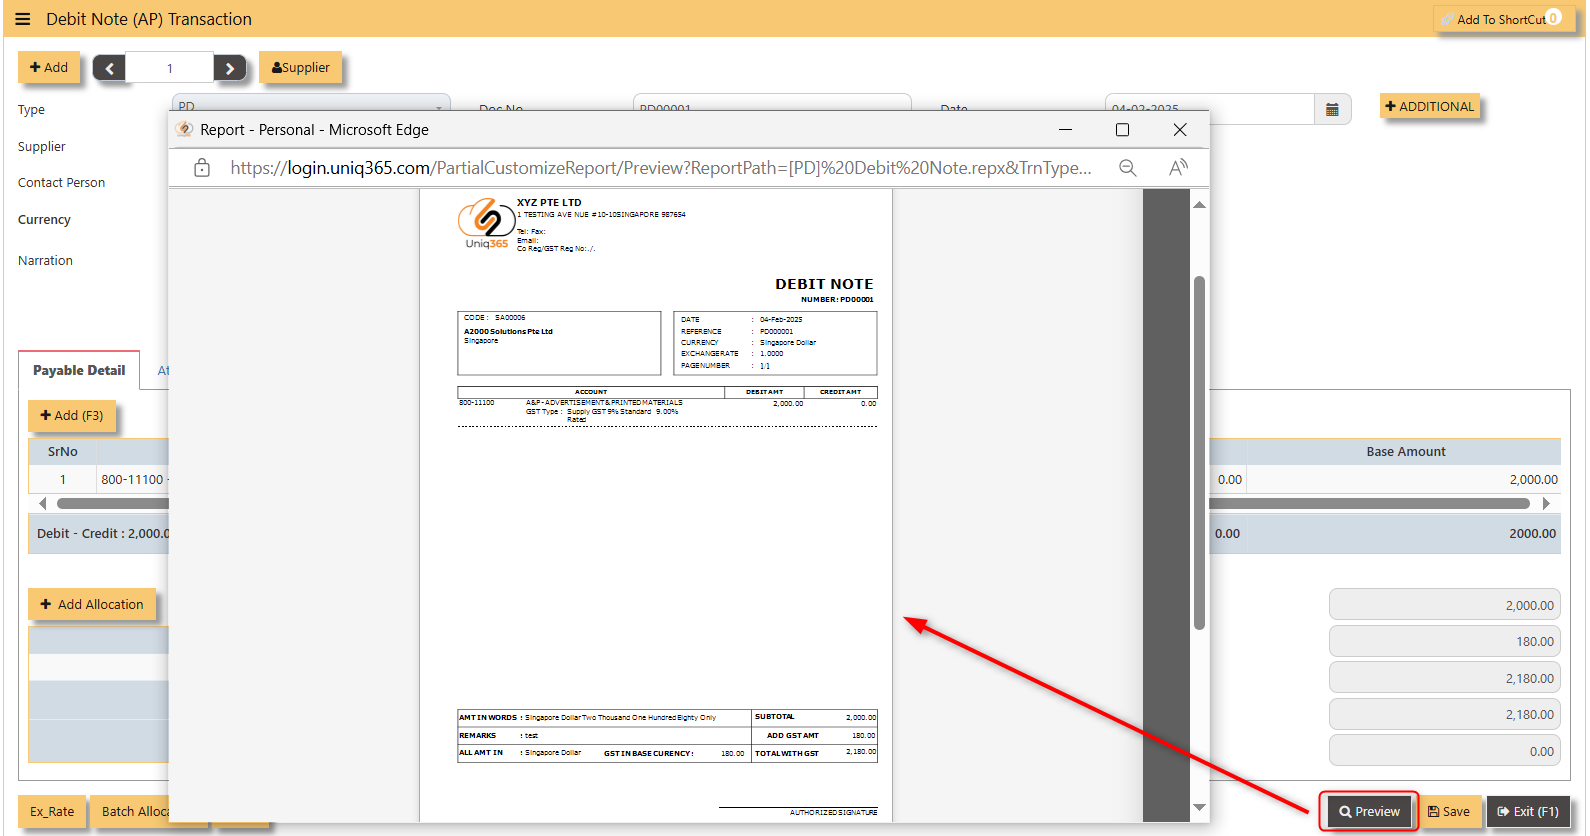
4. Click preview to view the transaction created.
Additionally, if you tick CLONE button. It will copy the exact transaction created. Sample below,
Note: The steps to enter Credit Note (PC) & Debit Note (PD) are identical to PI. User will need to select transaction type PC or PD respectively to enter the record.
Supplier Invoice (AP)
How to enter Supplier Invoice (PI)?
There may be times where there is a purchase of non-stock item. User may use PI transaction to effect such transaction.
Steps to enter PI are as follow:
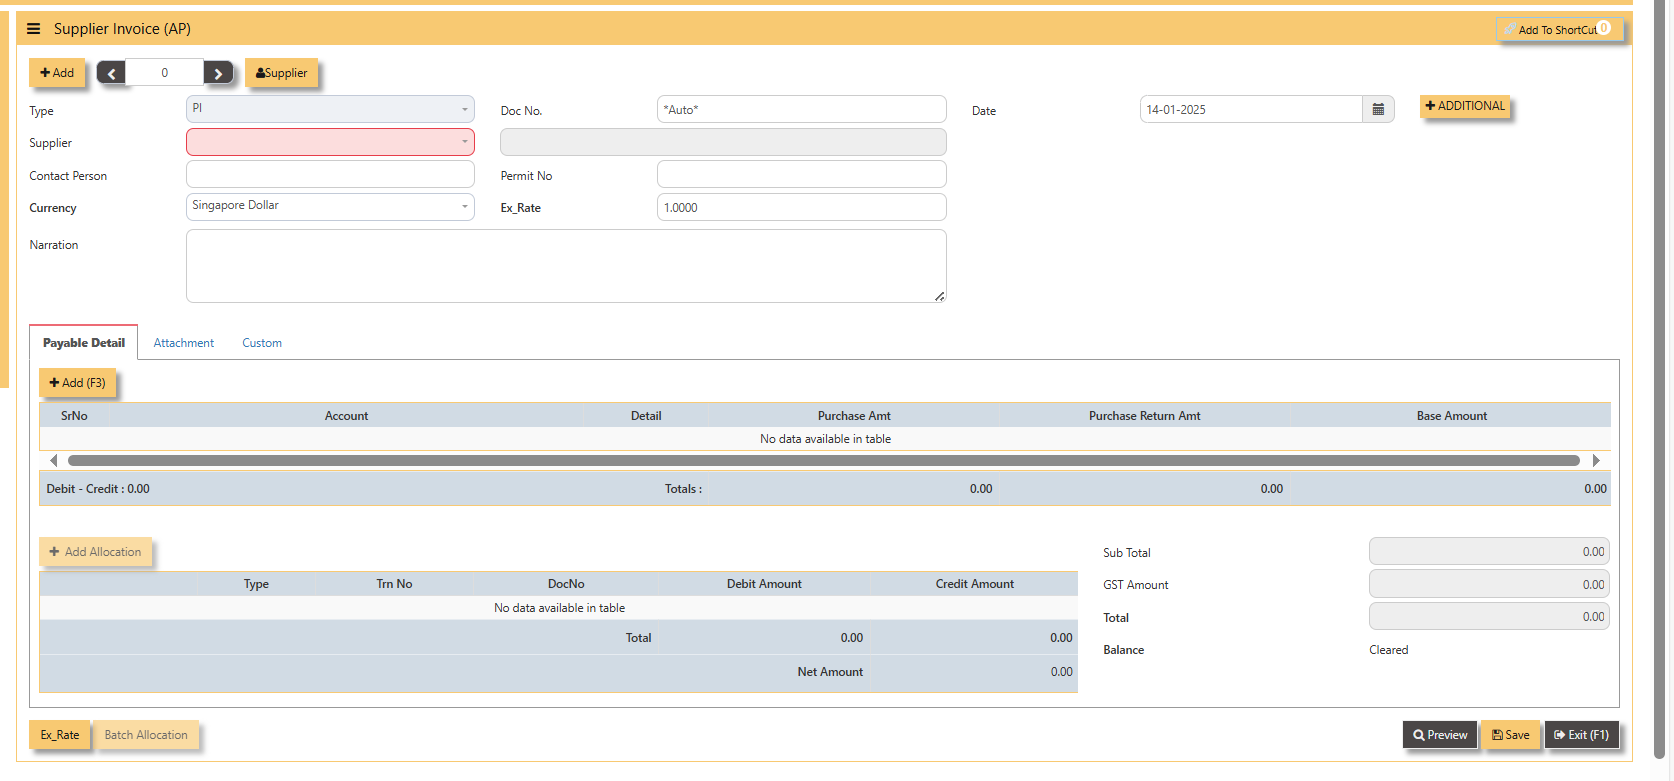
- Click on Payables – AP Operations – Supplier Invoice (AP) and the following screen will appear.
- Click on Add button to create a new transaction
- Fill up the fields in the header section such as Ref No, Date, Supplier, Contact Person, Currency and Exchange Rate.
- Then select the account concerned at the detail section.
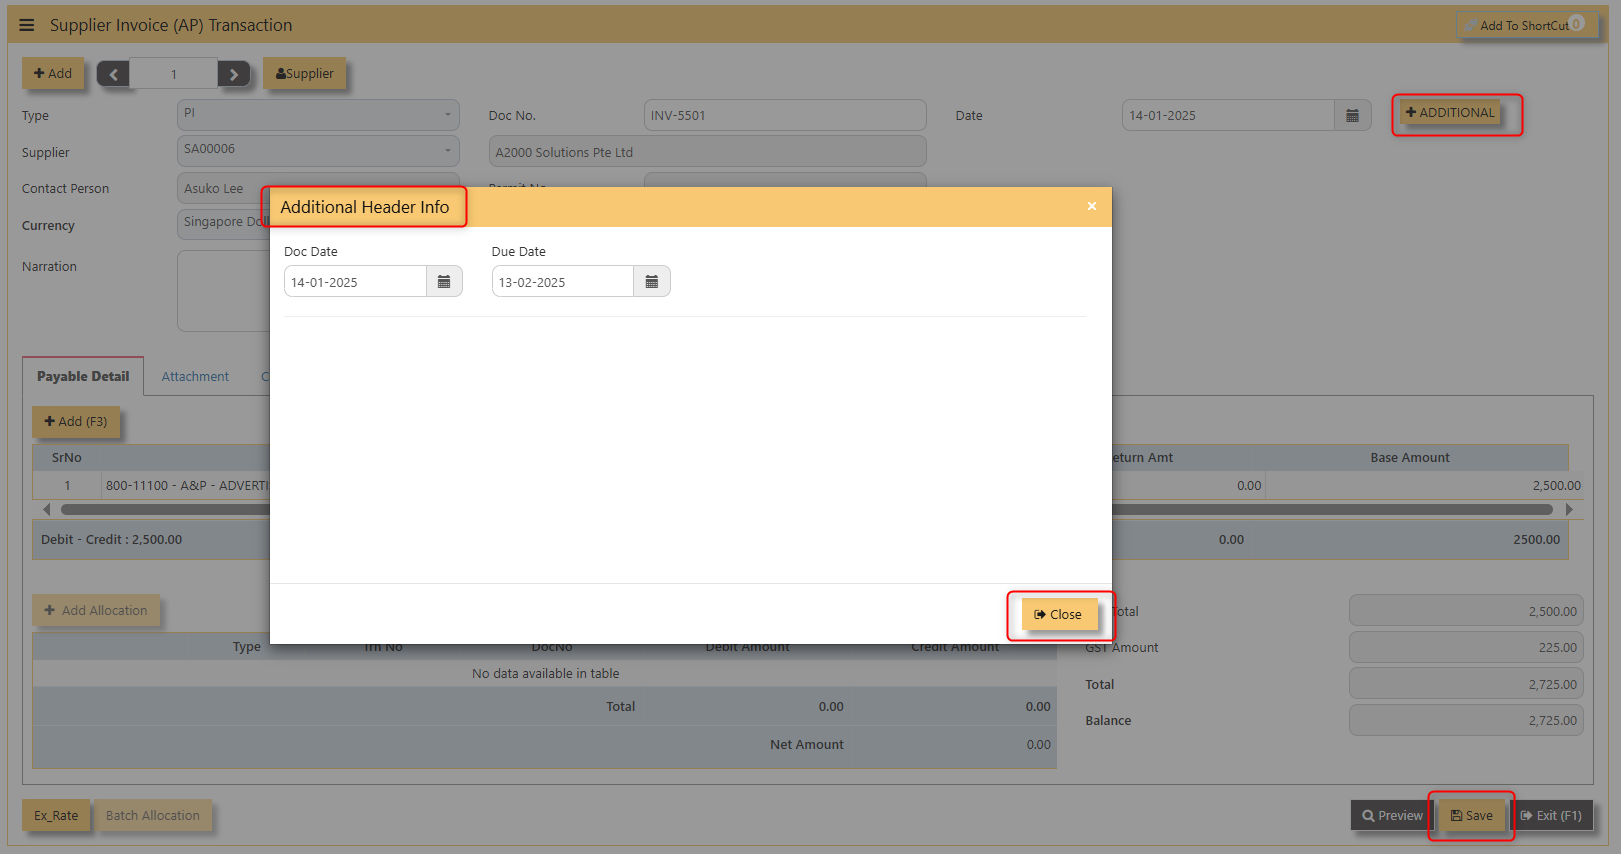
- Click for Additional Info for necessary details to add.
- Click on SAVE button to complete the entry.
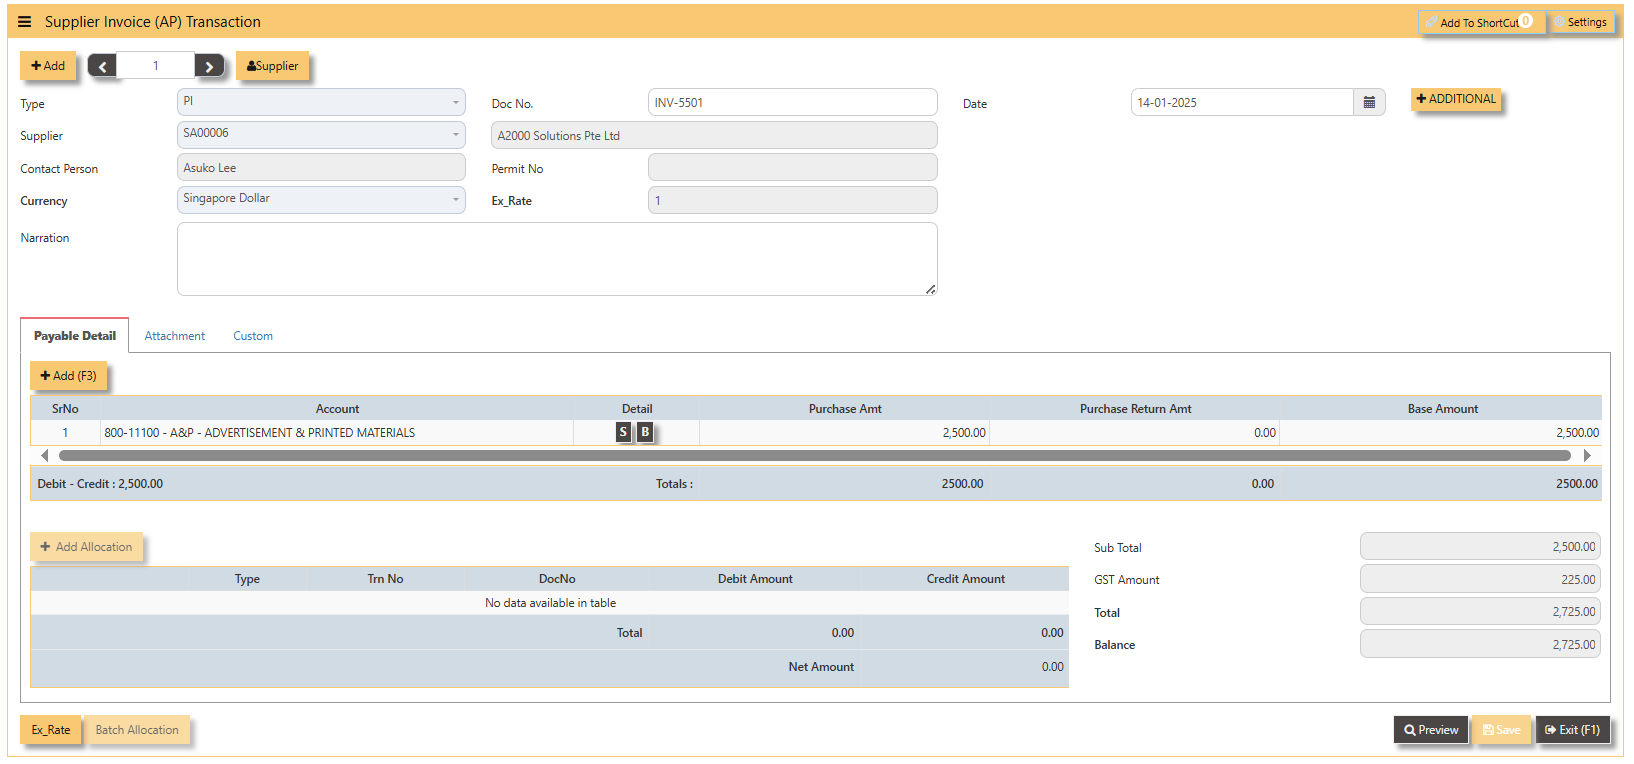
3. Below is a sample PI transaction screen.
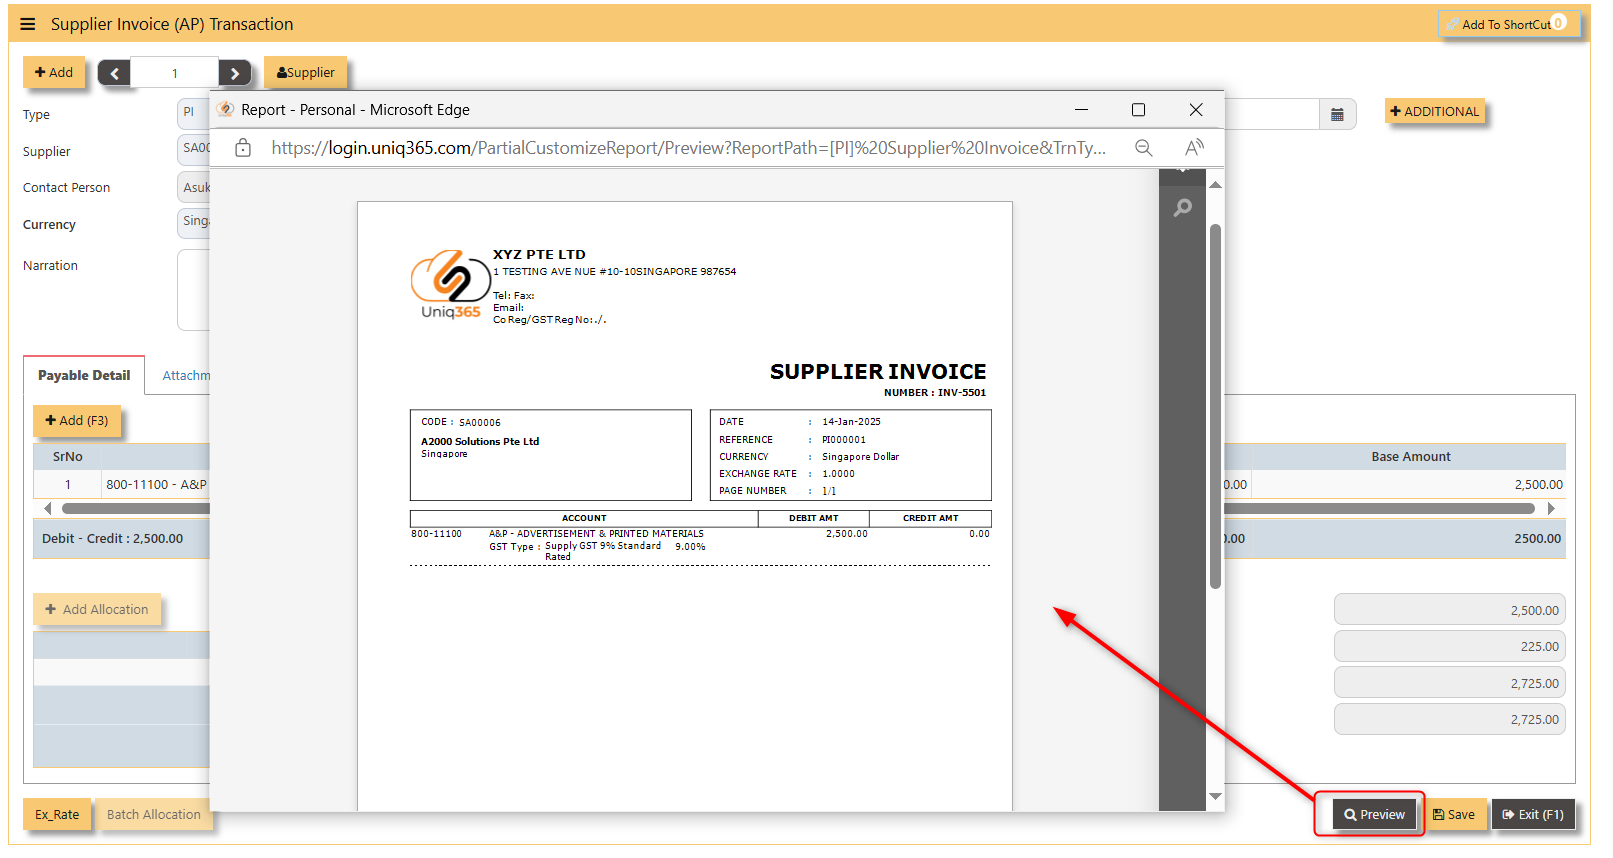
4. Click preview to view the transaction created.
Note: The steps to enter Credit Note (PC) & Debit Note (PD) are identical to PI. User will need to select transaction type PC or PD respectively to enter the record.
How to allocate Foreign Currency Invoice with Base Currency Payment?
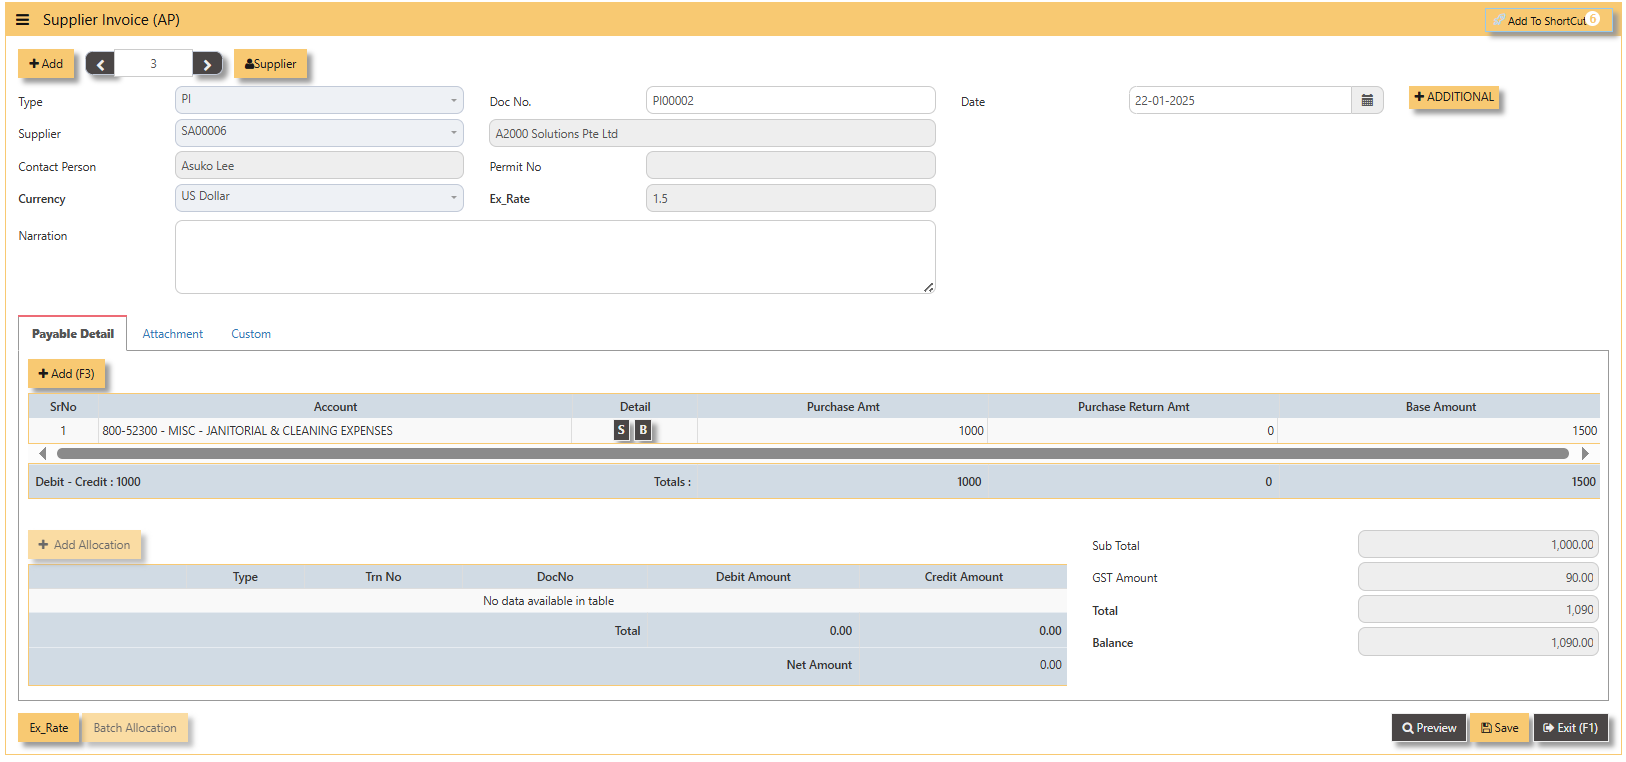
Let's use the following example to do this type of allocation:
- Create a foreign currency invoice as follow:
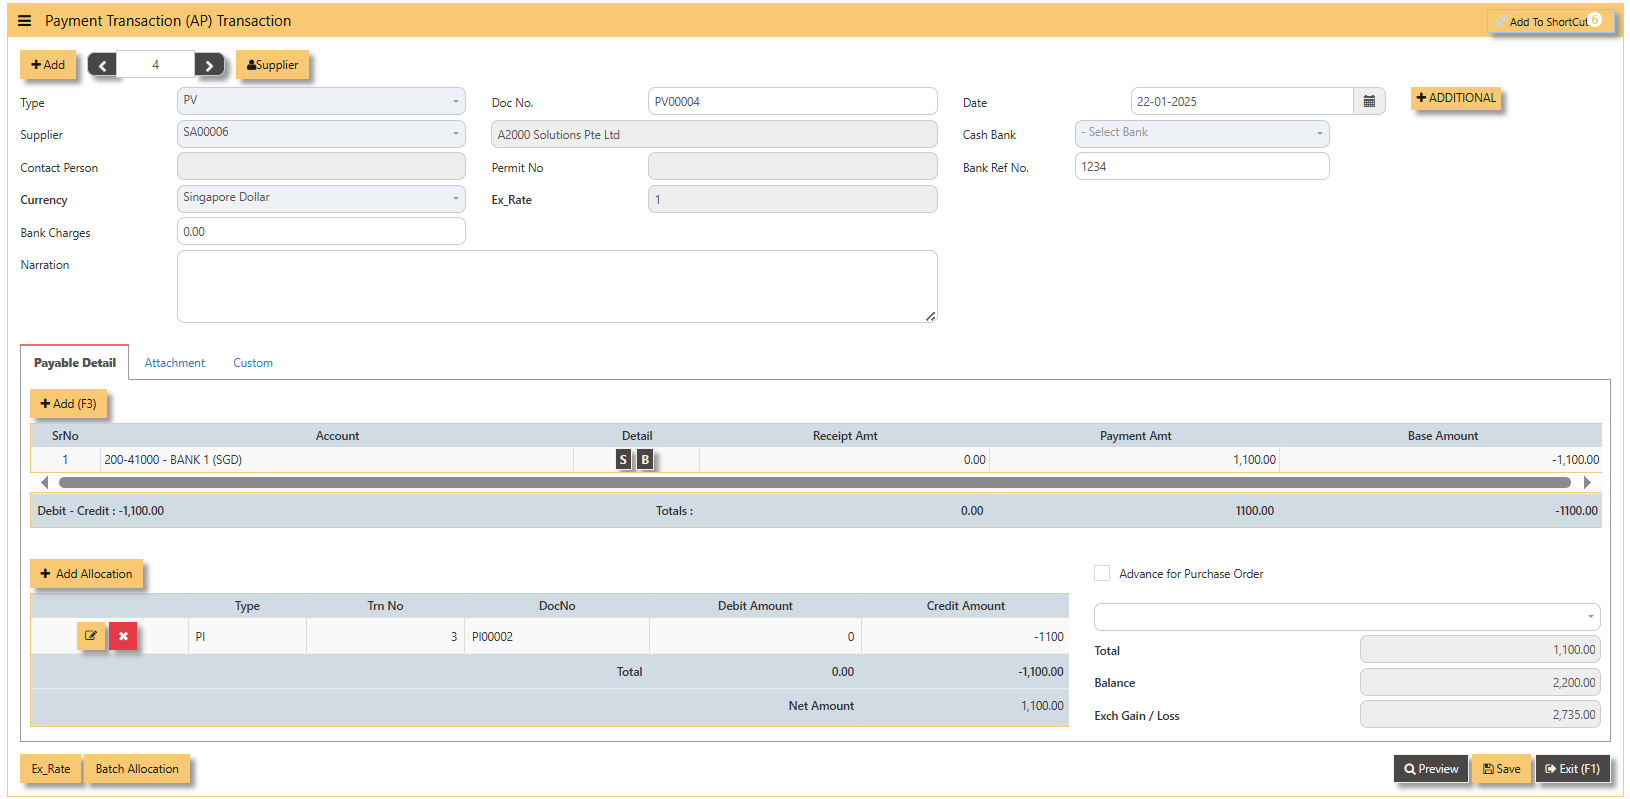
- Payment is made in base currency and in this example, it is SGD. The payment voucher should be entered as follow:
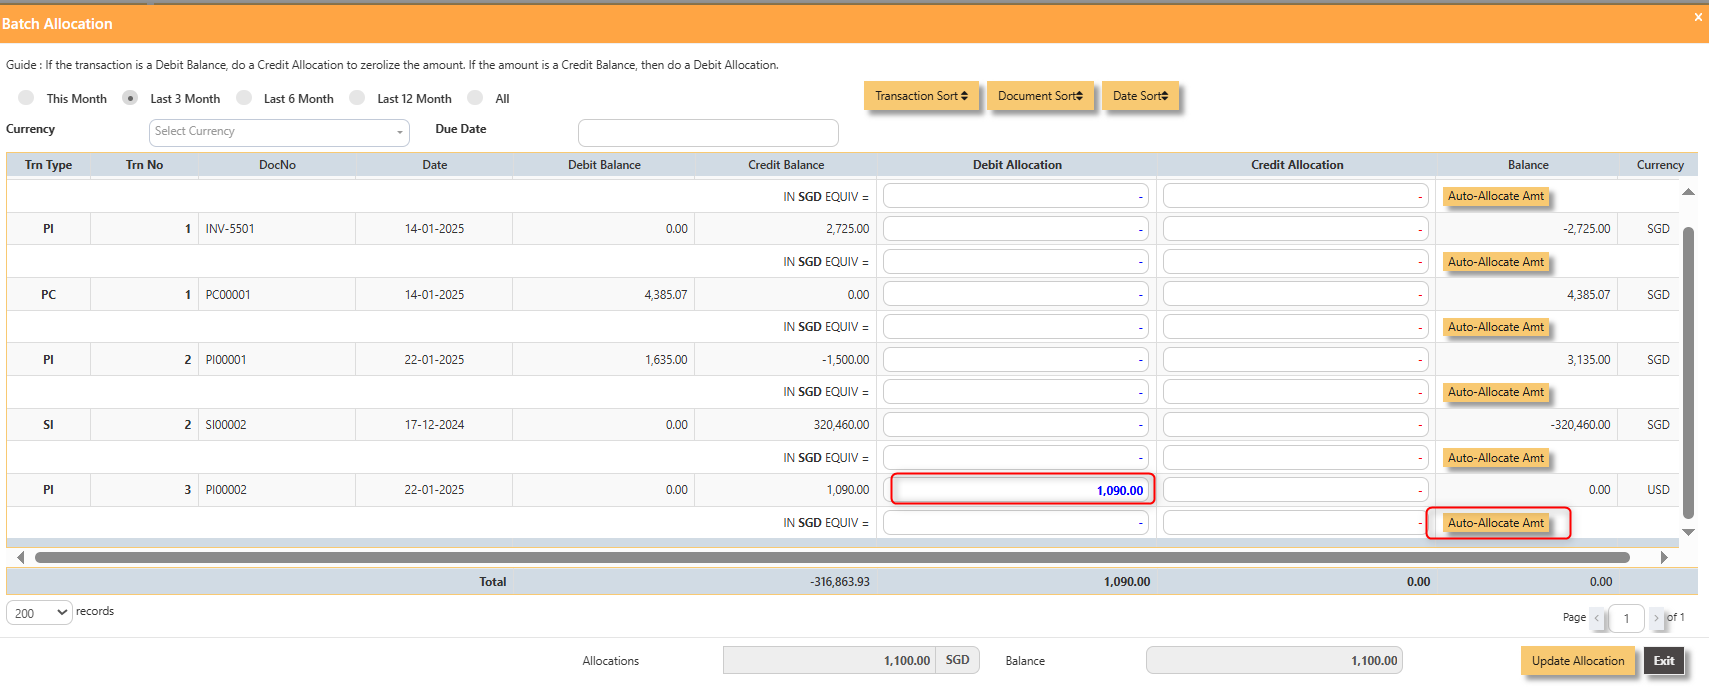
- Click on Batch Allocation button for the screen below:
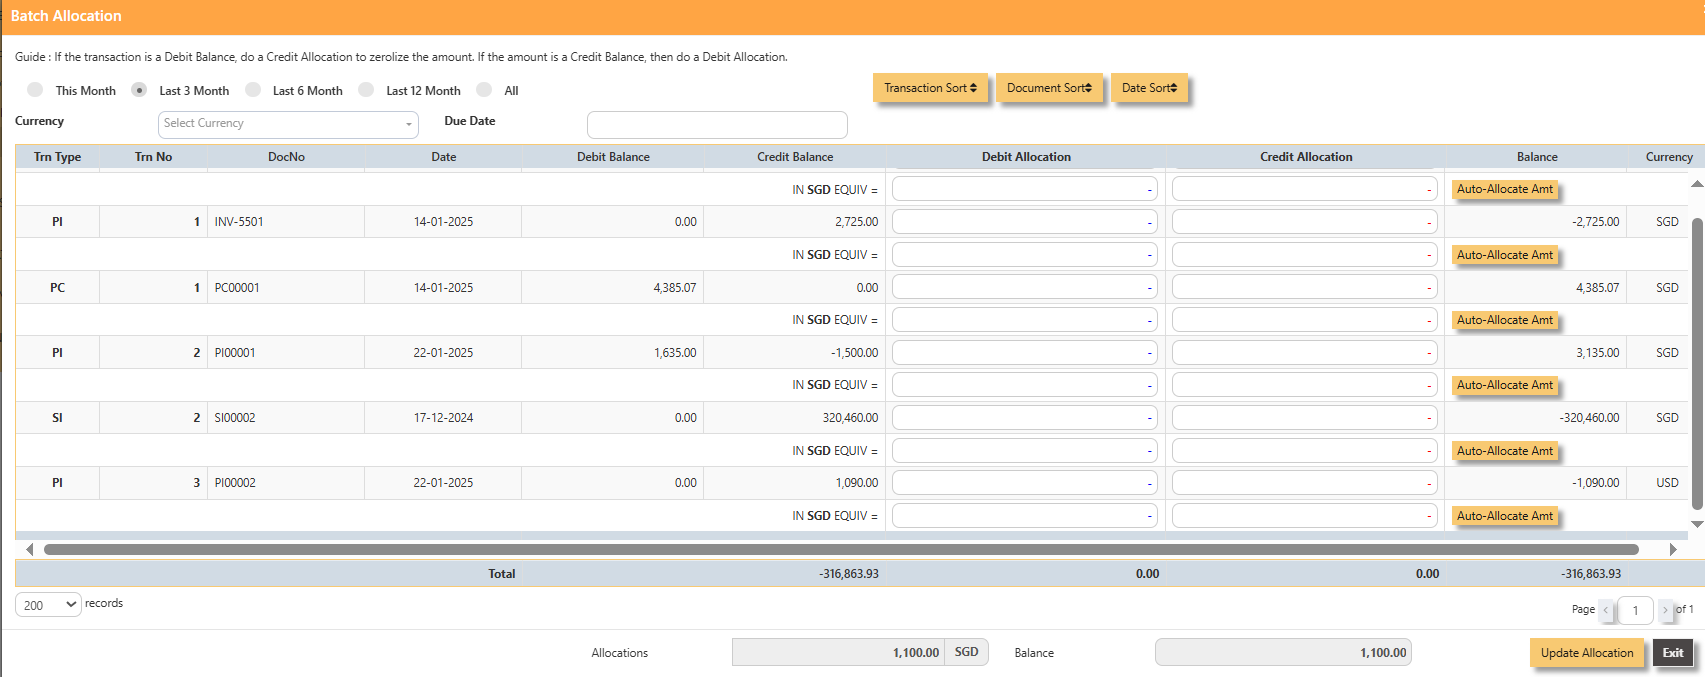 For PI00002, click on Auto-Allocate Amt button, you will notice that the full amount of the invoice will be populated at
the 1st line. You should manually type in the base currency amount in SGD field as shown below. Click on Update Allocation to complete the allocation and save the PV transaction.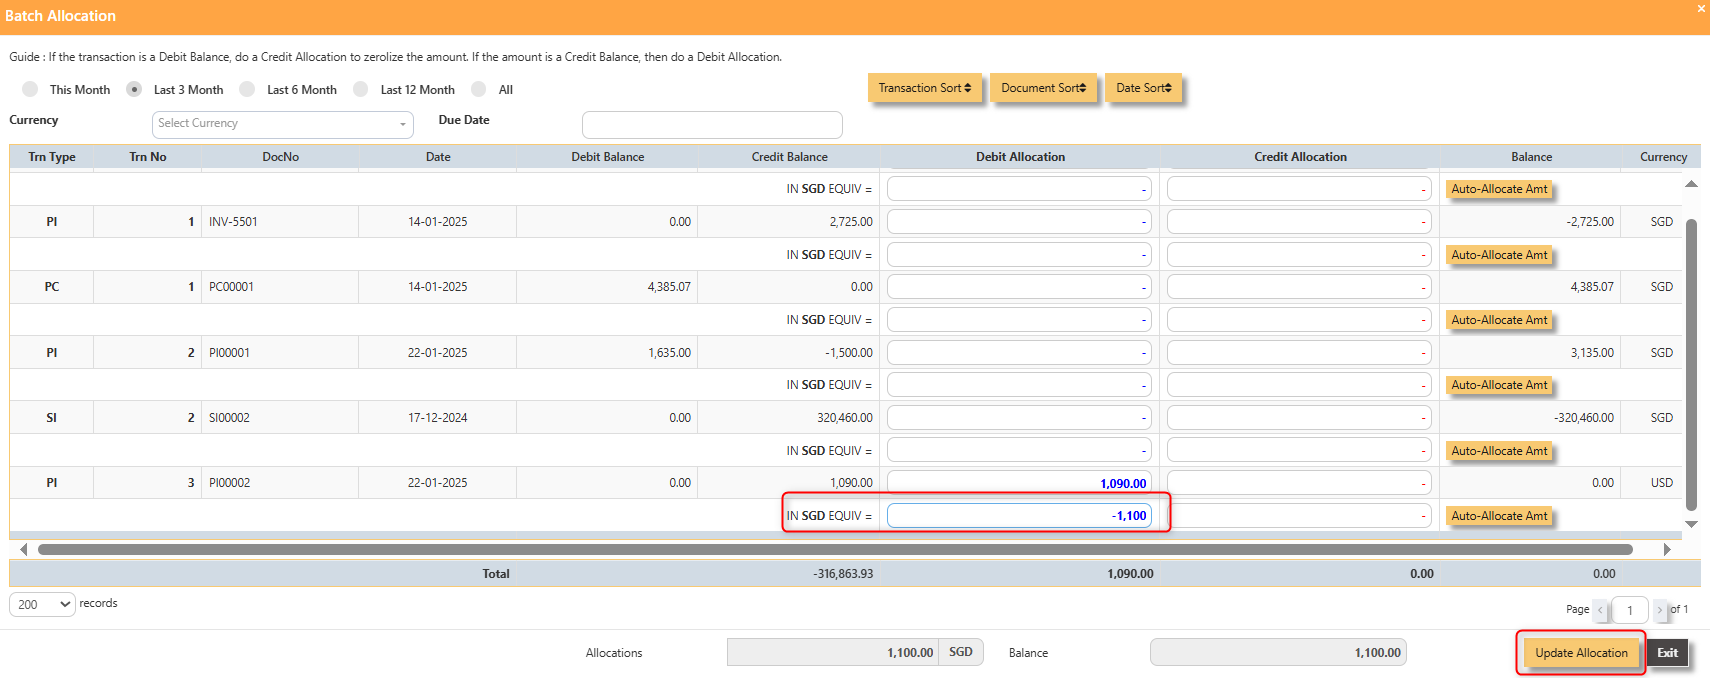
- The completed payment transaction is as follow:
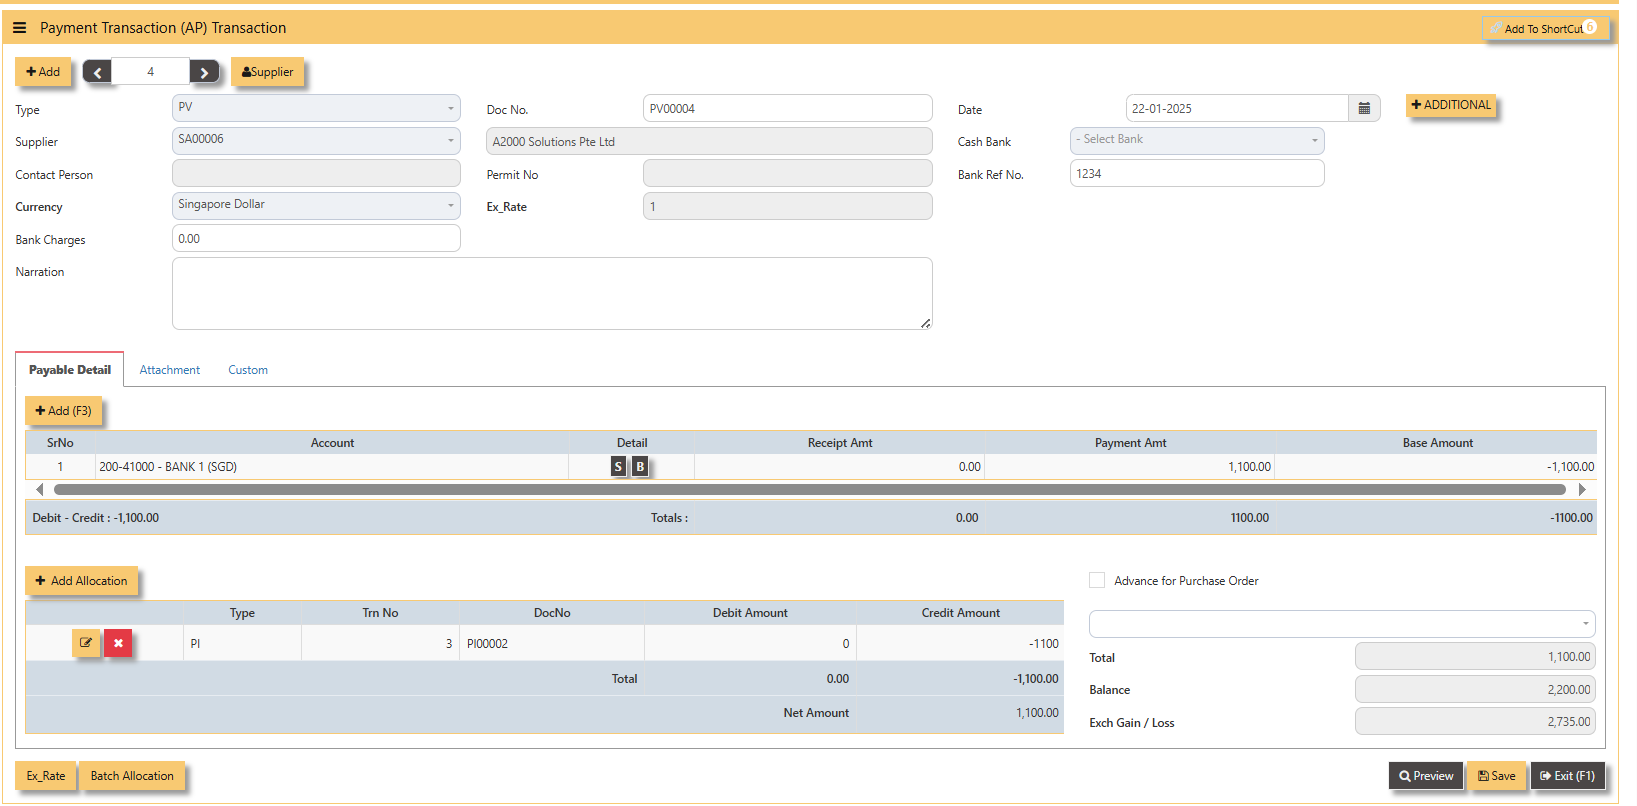 5. A2000ERP will capture the Realized Exchange Gain/Loss automatically upon allocation. The double entry of the above
transaction is shown below: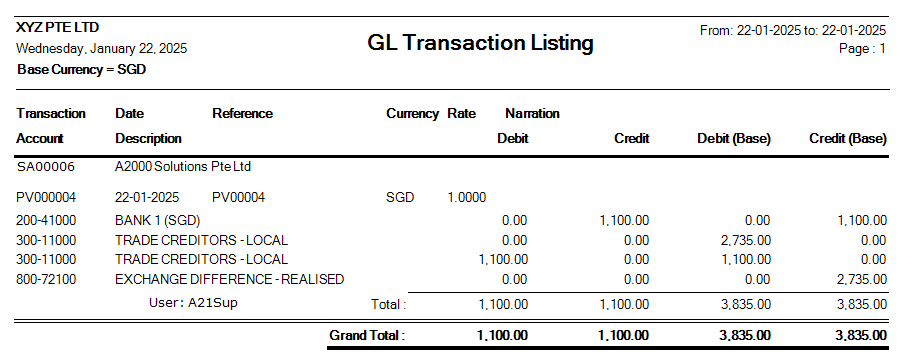
Payment Transaction (AP)
Opening Balance
To start on a new database, AP Opening Balances must be updated in order for user to trace all the outstanding supplier invoices at the start of the 1st financial year.
Important: The total amount entered under AP Open Item must tie with the opening amount in the General Ledger Opening for Trade Creditor Control Account/(s) if the Posting Type selected in Payable Control Account is Supplier.
You may use the report under Payables – Reports & Queries – AP Open Item Listings to tie the figures.
Below is the Account Payable – Opening Items screen. There is NO double entry posting for this option. The records entered will be retained for current year usage like allocations, verification of outstanding invoices etc.
1. Click on Payables – AP Operations – Opening Balance and the following screen will appear.
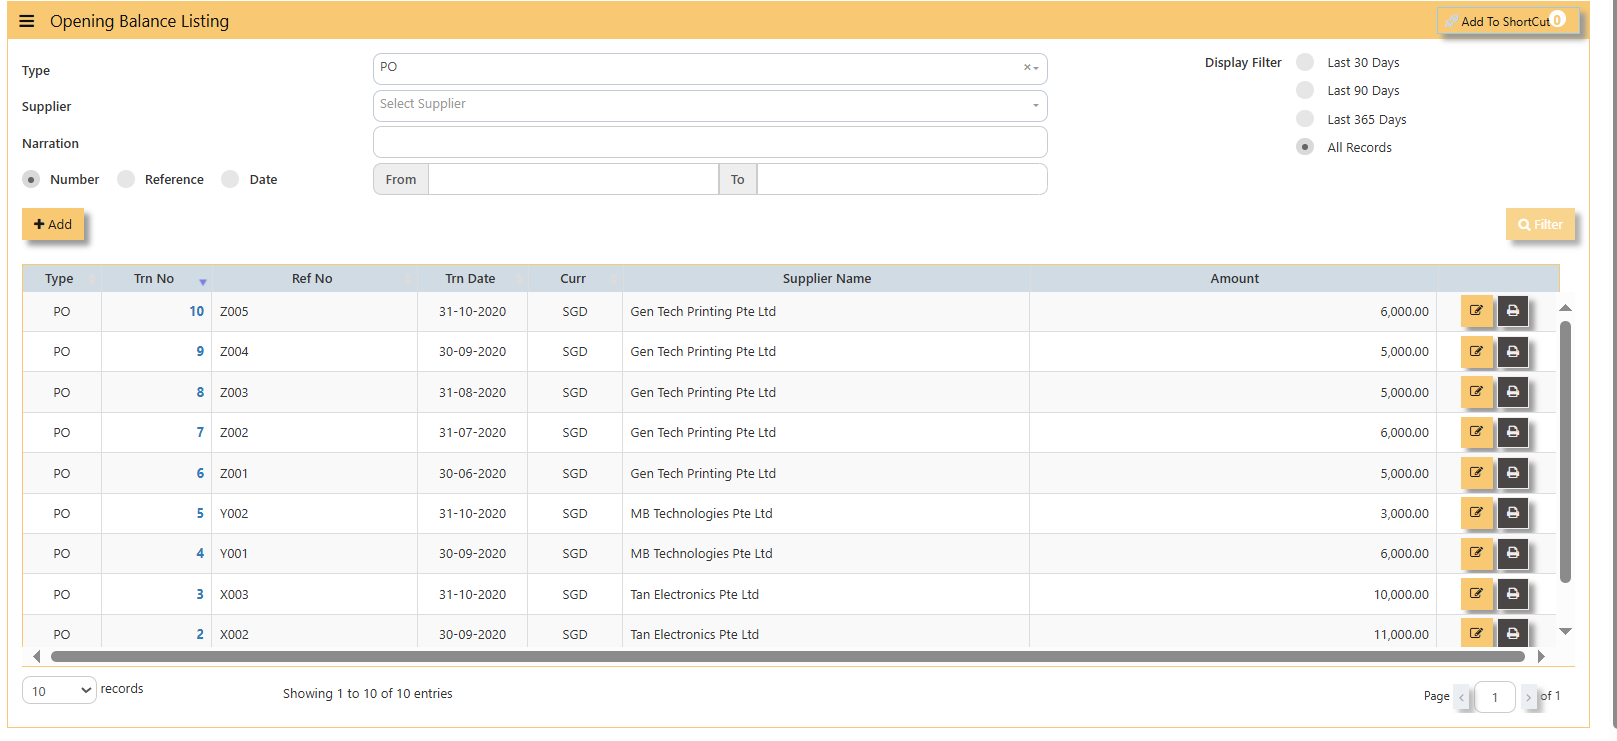
- Fill up the fields such as Ref No, Date, Dock Date, Due Date, Supplier, Buyer, PDSU, Currency, Exchange Rate, Narration, and amount.
Note: The date must be the actual date of invoices concerned in order for the system to capture the correct supplier aging. If supplier invoice the amount is credit side and if is a supplier credit note is a debit side.
Blacklist Supplier
This option enables user to blacklist customers and suppliers. Once a supplier is black-listed, user will be blocked from entering any purchase transactions for the supplier concerned.
How to enter Blacklist Supplier?
Steps to enter Blacklist Supplier are as follow:
1. Click on Payables – AP Operations – Blacklist Supplier for the entry screen.
2. Click on Add button. Select the supplier from the drop-down list, enter the Blacklist date, key in the Remarks and select the A2000ERP user who performed the entry.
Screen below is an example of the entry.
- To delete a supplier from the blacklist record, user must click on Edit button, select the supplier concerned, and then click
on Delete button to clear the record. - User may print the report of all the Blacklisted Suppliers for reference via Payables – Reports & Queries – Blacklisted
Supplier Listing.


