
AP- OPERATIONS
AP OPERATIONS
Payable Transaction
Transactions for Supplier Invoice (PI), Credit Note (PC), Debit Note (PD) and Payment transaction (PV) can be done at this option. Allocation of outstanding invoices can be made via PI, PC, PD and PV transactions.
This option posts on-line to Supplier/Creditors account and GST account if applicable. Upon allocation of foreign currency transactions, realized exchange gain/loss will be captured and its amount posted to the account concerned.
Credit Note (AP)
Debit Note (AP)
Supplier Invoice (AP)
How to enter Supplier Invoice (PI)?
There may be times where there is a purchase of non-stock item. User may use PI transaction to effect such transaction.
Steps to enter PI are as follow:
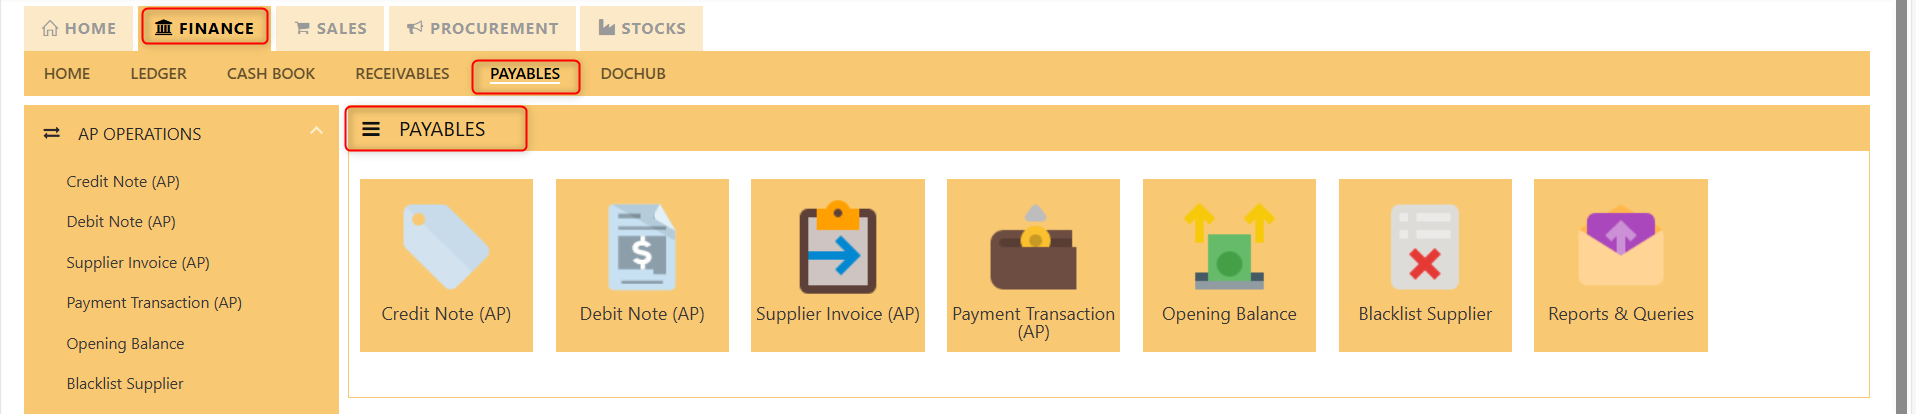
- Click on Payables – AP Operations – Supplier Invoice (AP) and the following screen will appear.
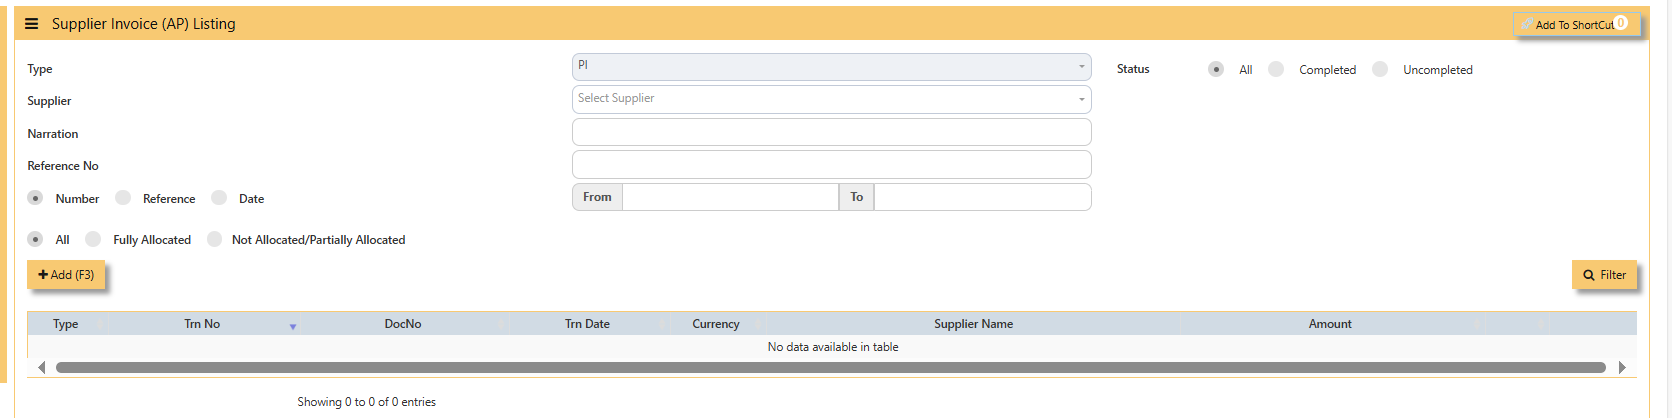
- Click on Add button to create a new transaction


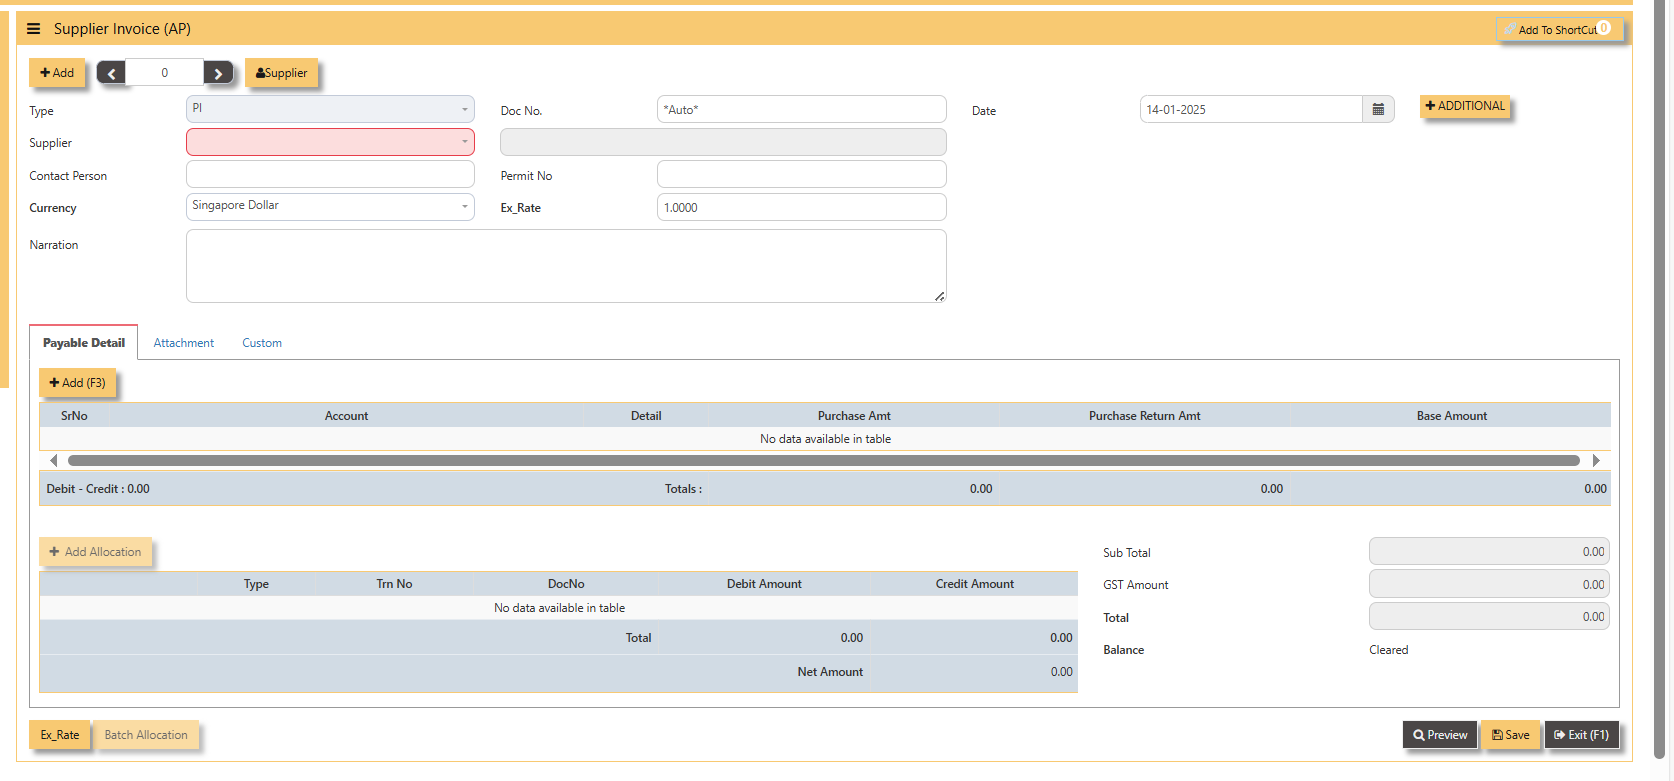
- Fill up the fields in the header section such as Ref No, Date, Supplier, Contact Person, Currency and Exchange Rate.
- Then select the account concerned at the detail section.
- Click on SAVE button to complete the entry.
3. Below is a sample PI transaction screen.
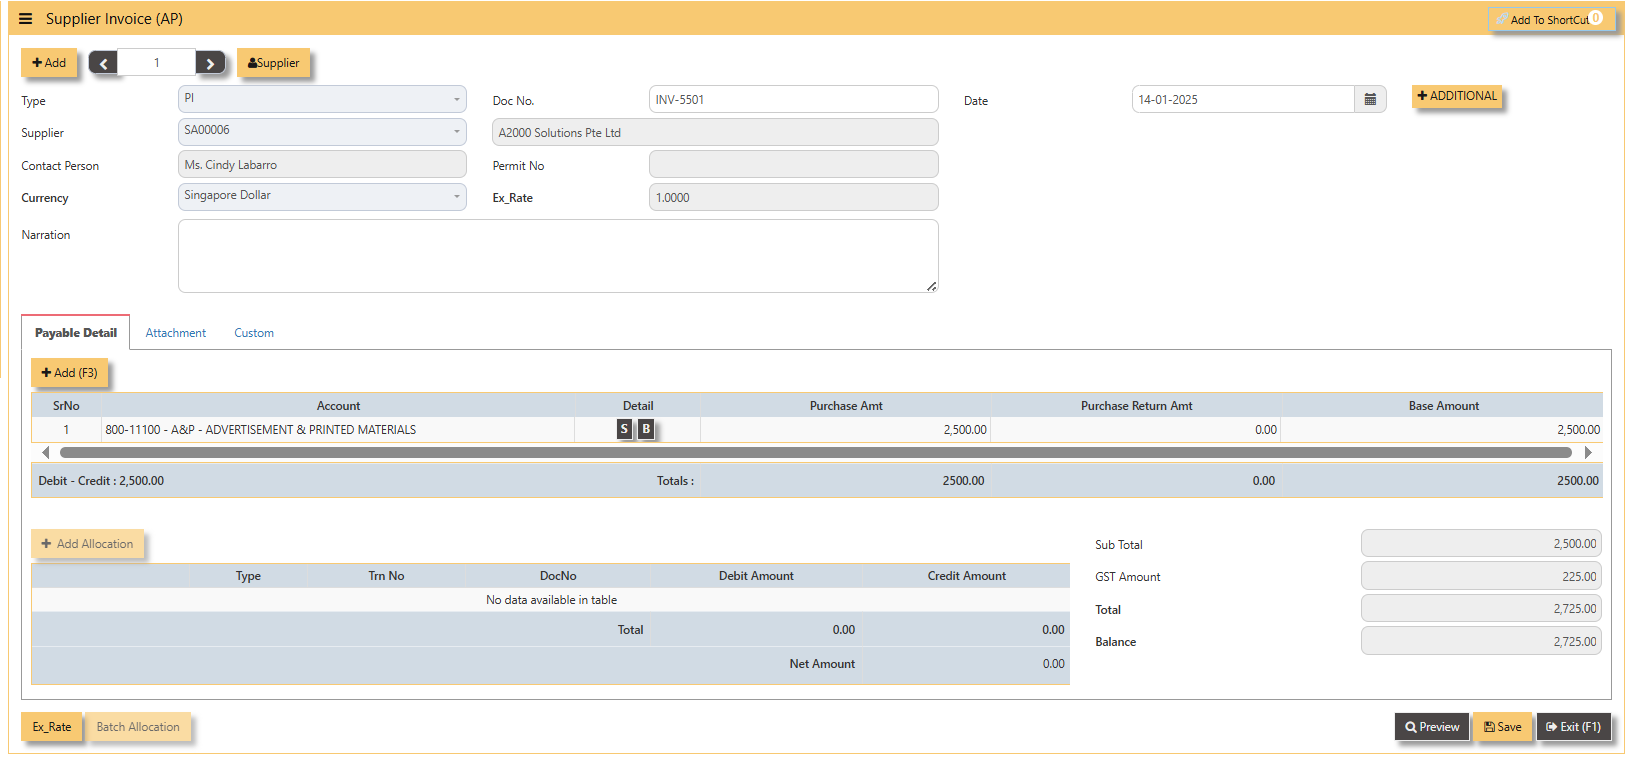
Note: The steps to enter Credit Note (PC) & Debit Note (PD) are identical to PI. User will need to select transaction type PC or PD respectively to enter the record.
Steps
How to enterallocate PVForeign areCurrency Invoice with Base Currency Payment?
Let's use the following example to do this type of allocation:
- Create a foreign currency invoice as follow:

1. - Payment
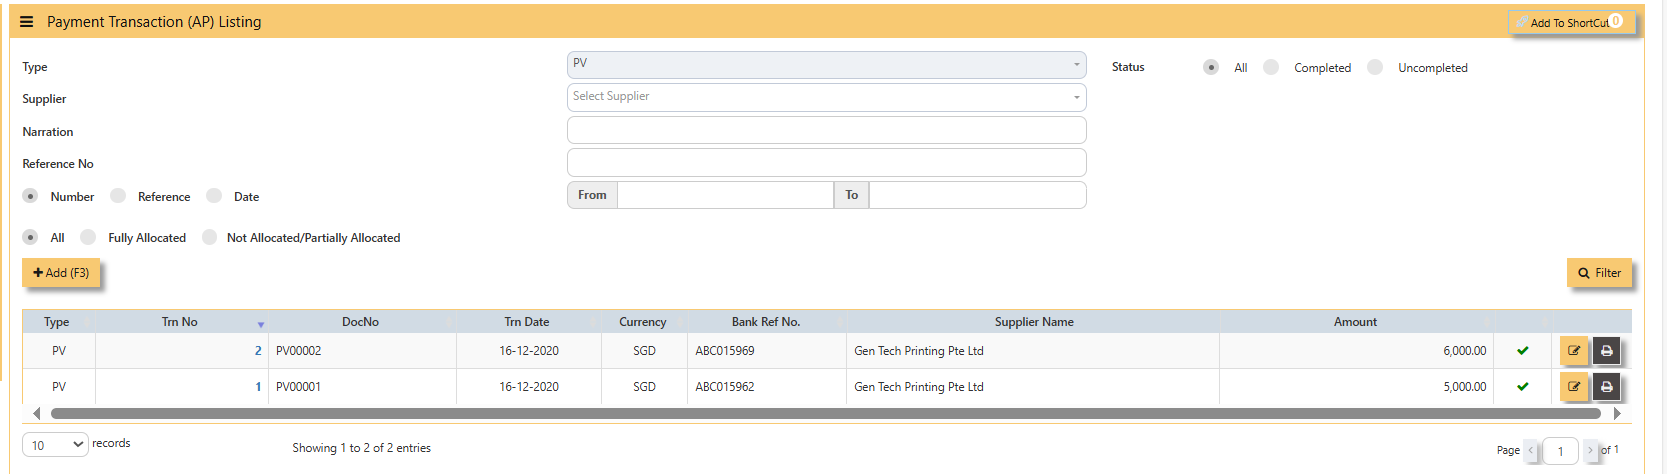
Transactionis(AP)made in base currency andtheinfollowingthisscreenexample,willitappear.is SGD. The payment voucher should be entered as follow: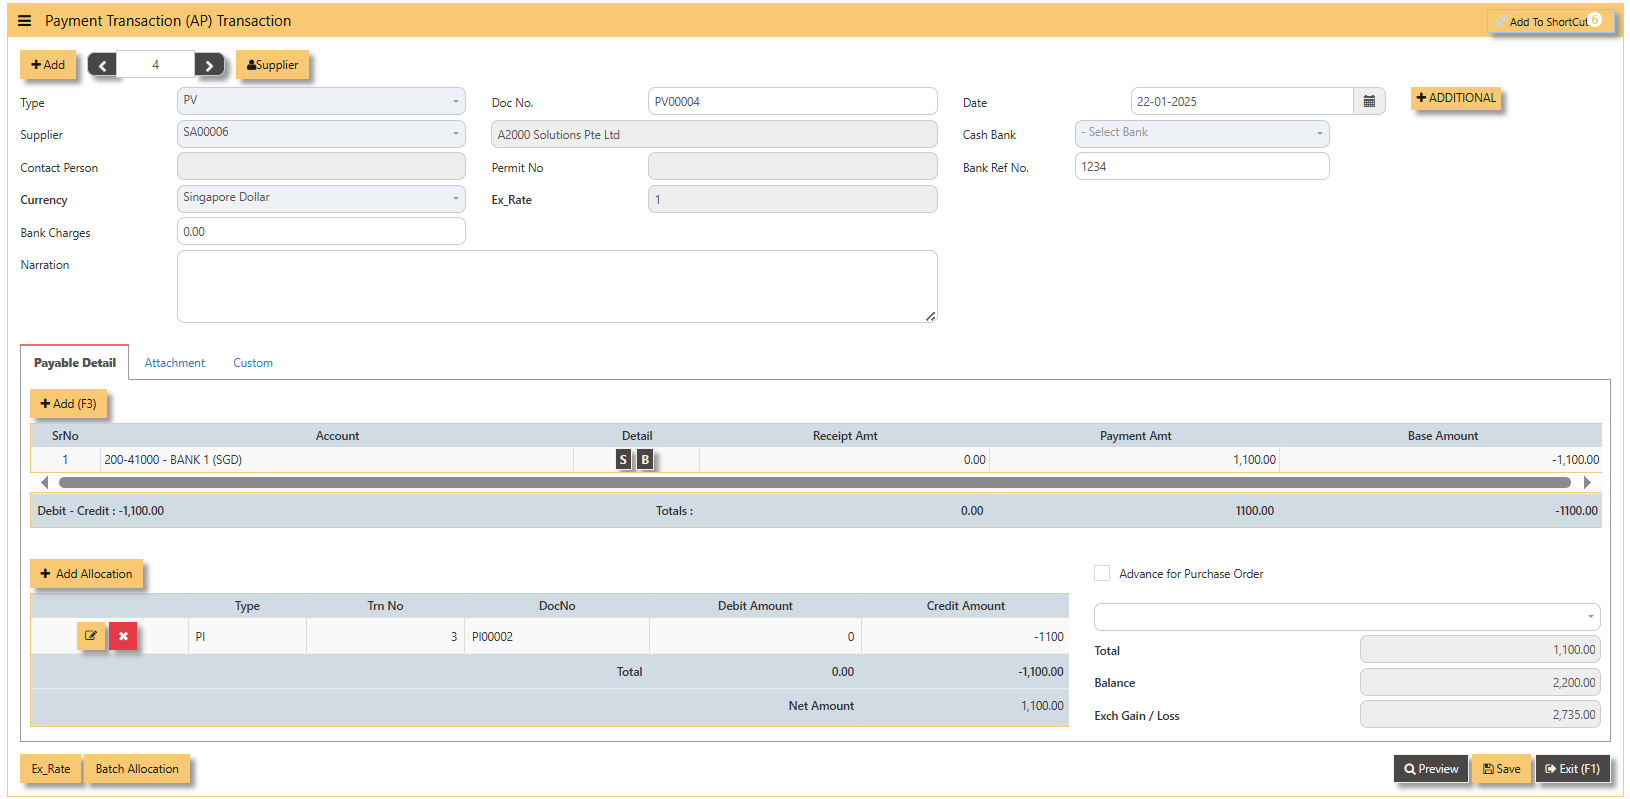

- Click on
AddBatch Allocation button fornew transaction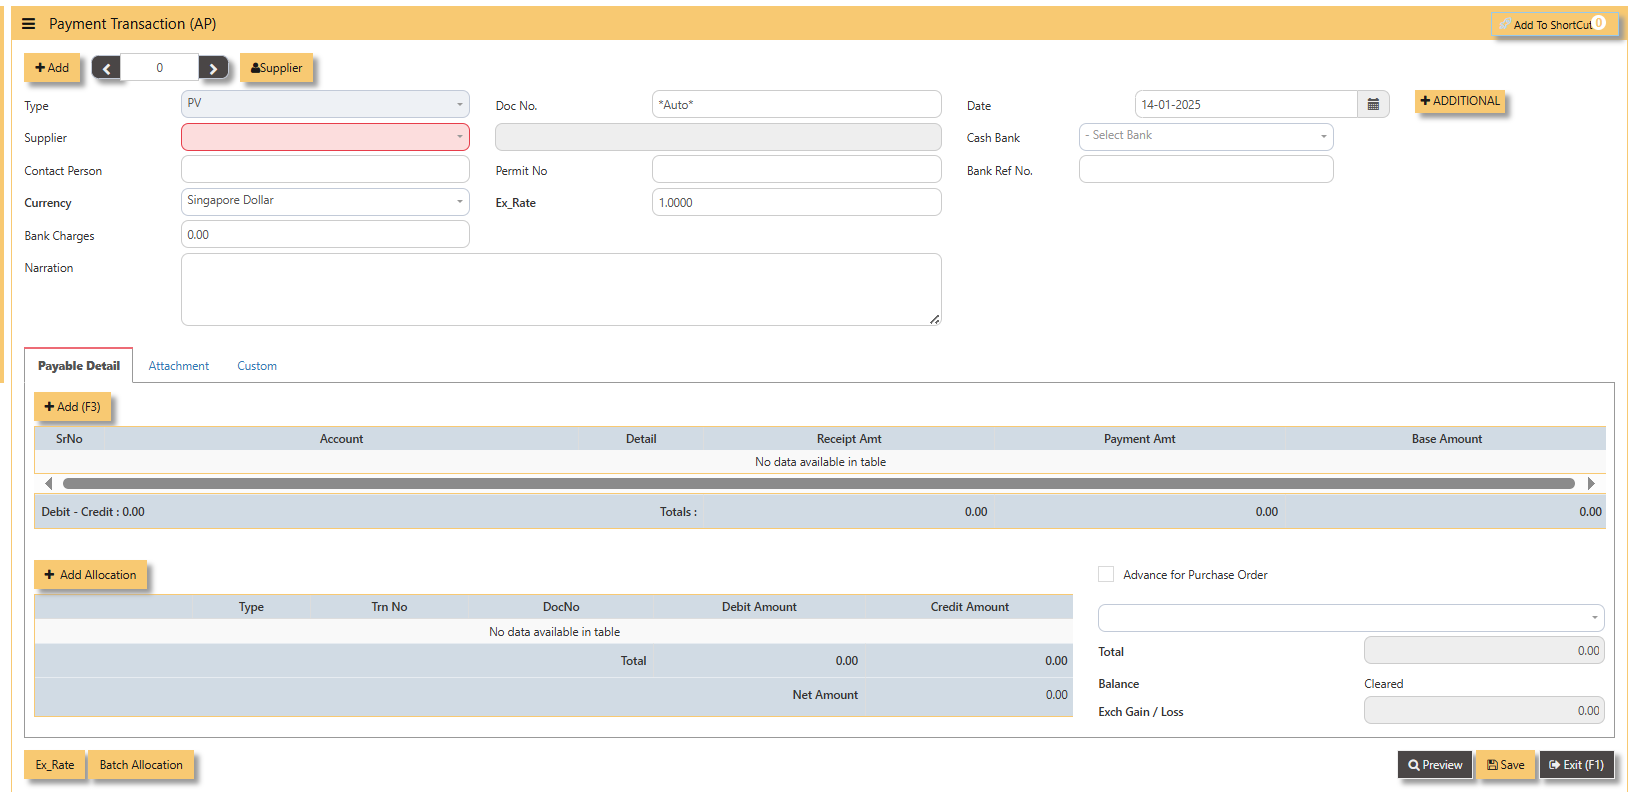
Fill upthefieldsscreenatbelow:the
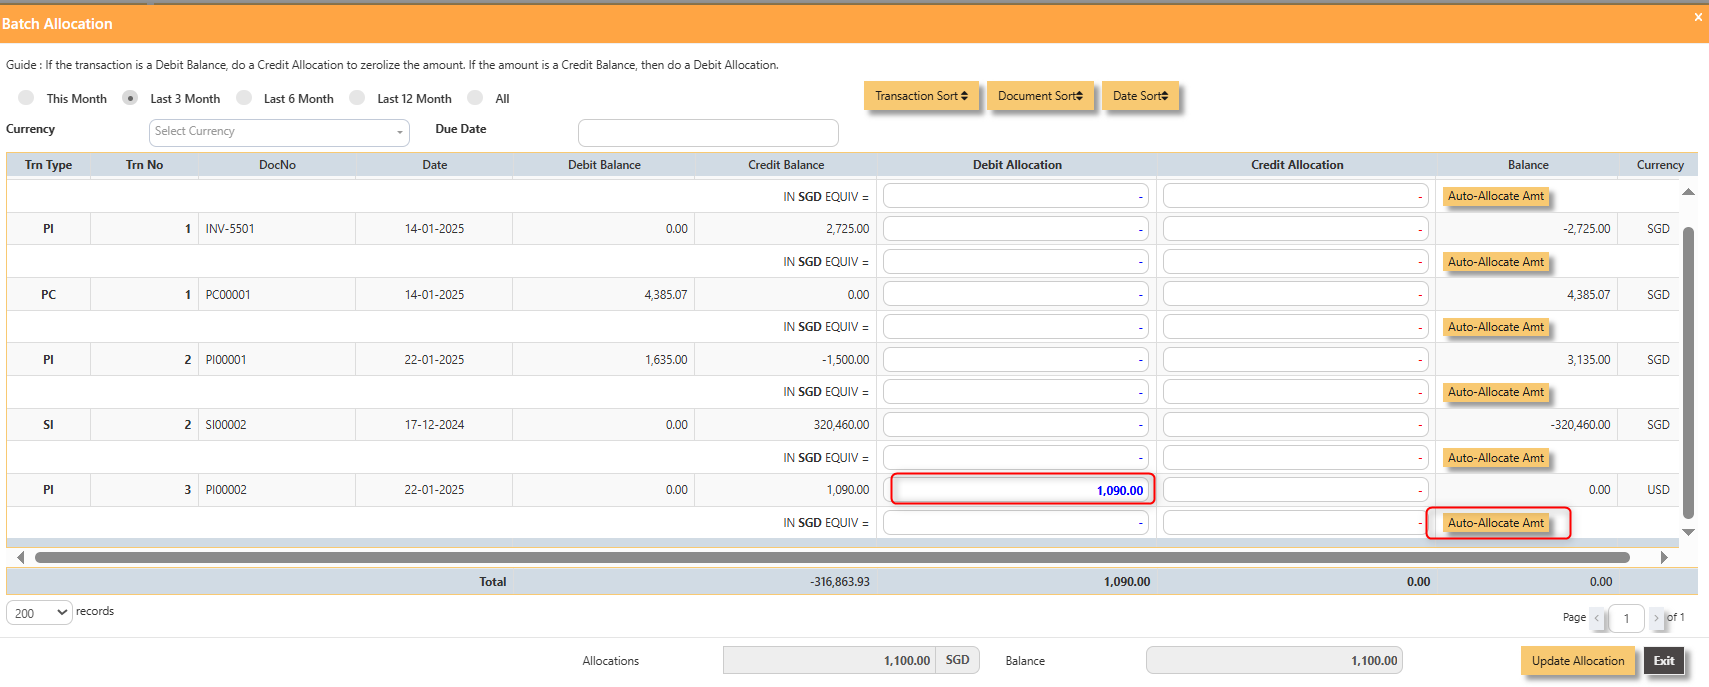
 For
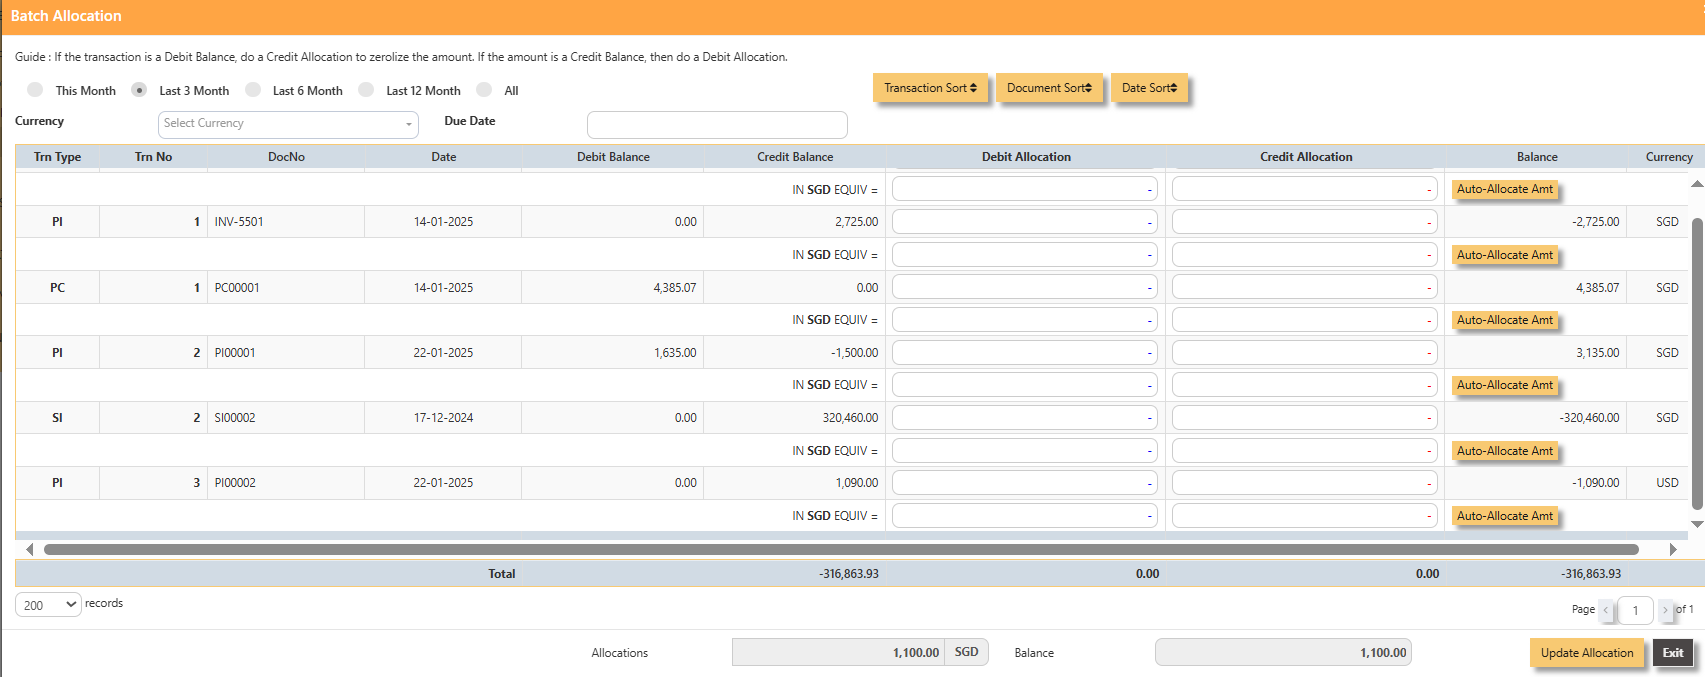
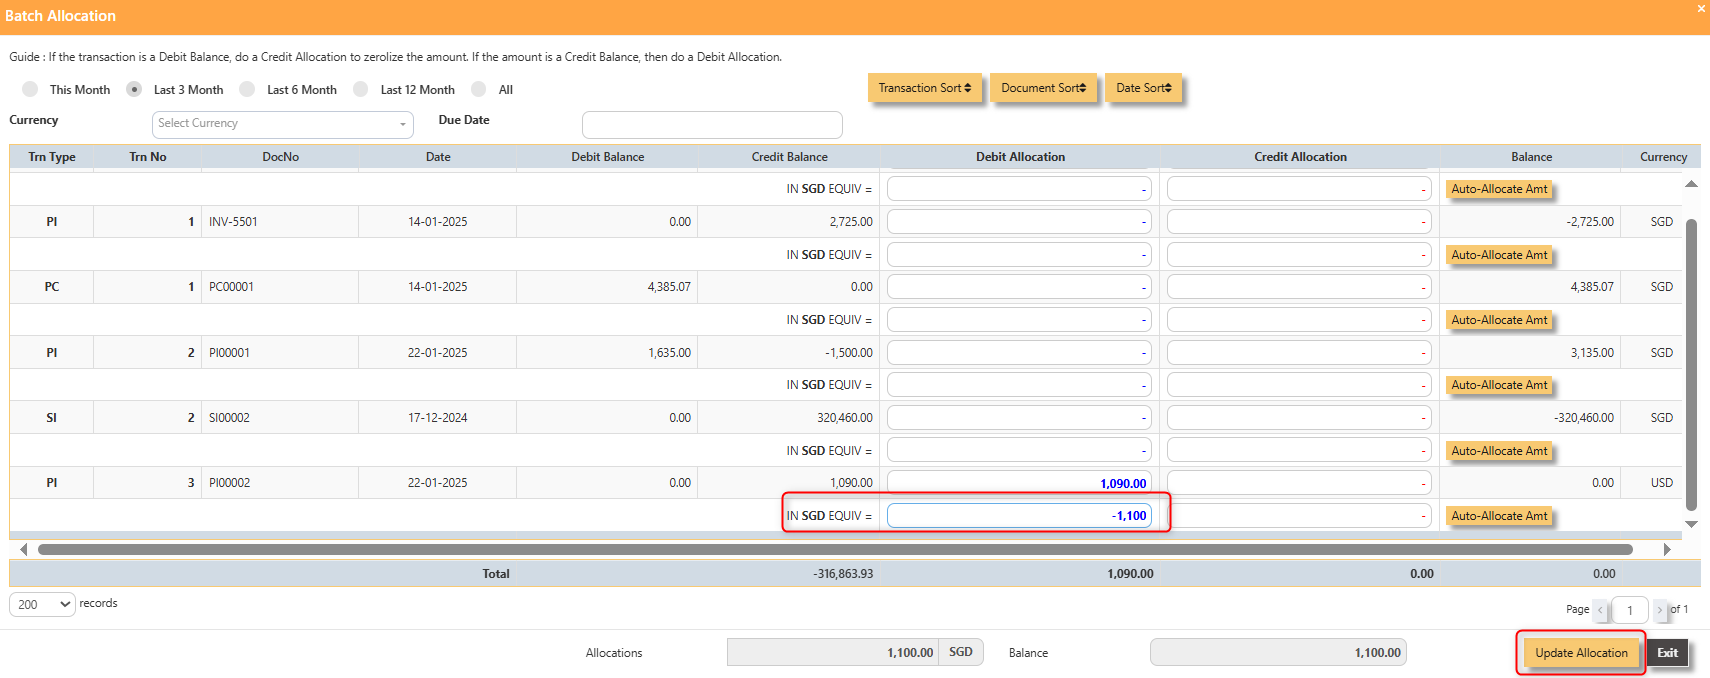
For header section such asRef No, Date, Supplier, Contact Person, Currency and Exchange Rate, Cheque number, Narrationetc. Select the Bank code andPI00002, click ondetailAuto-Allocate Amt button, you will notice that the full amount of the invoice will be populated at
the 1st line.Thesystem
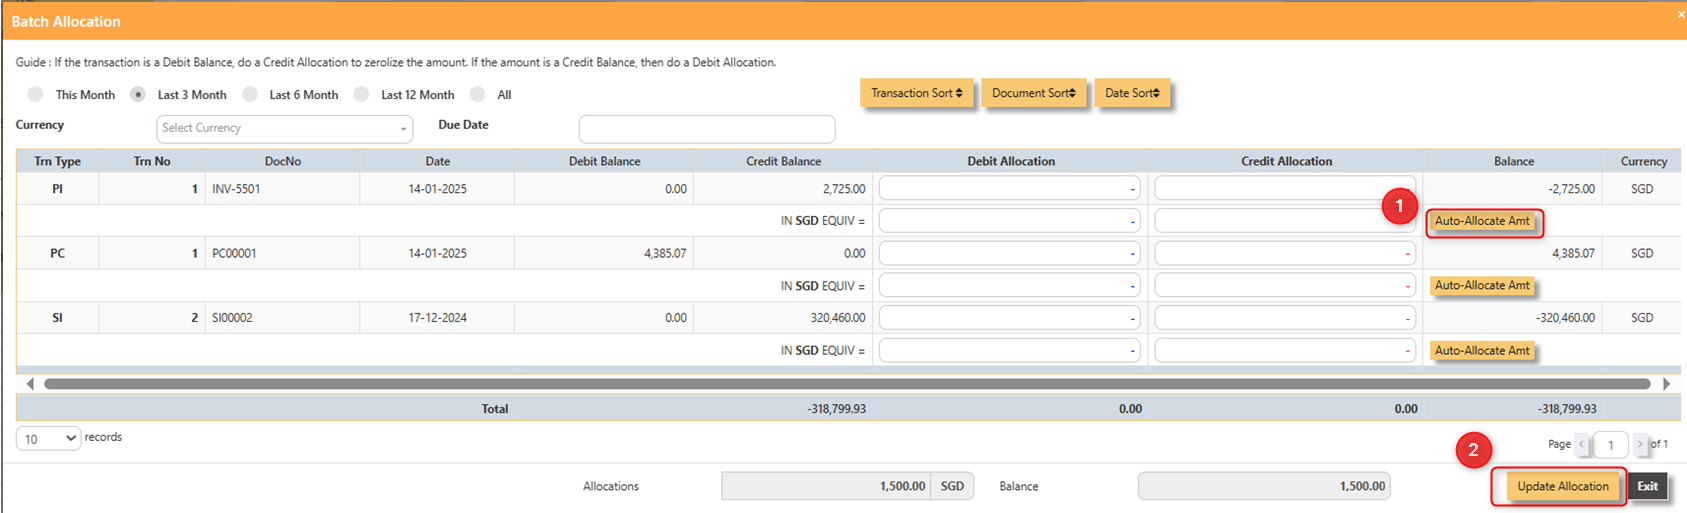
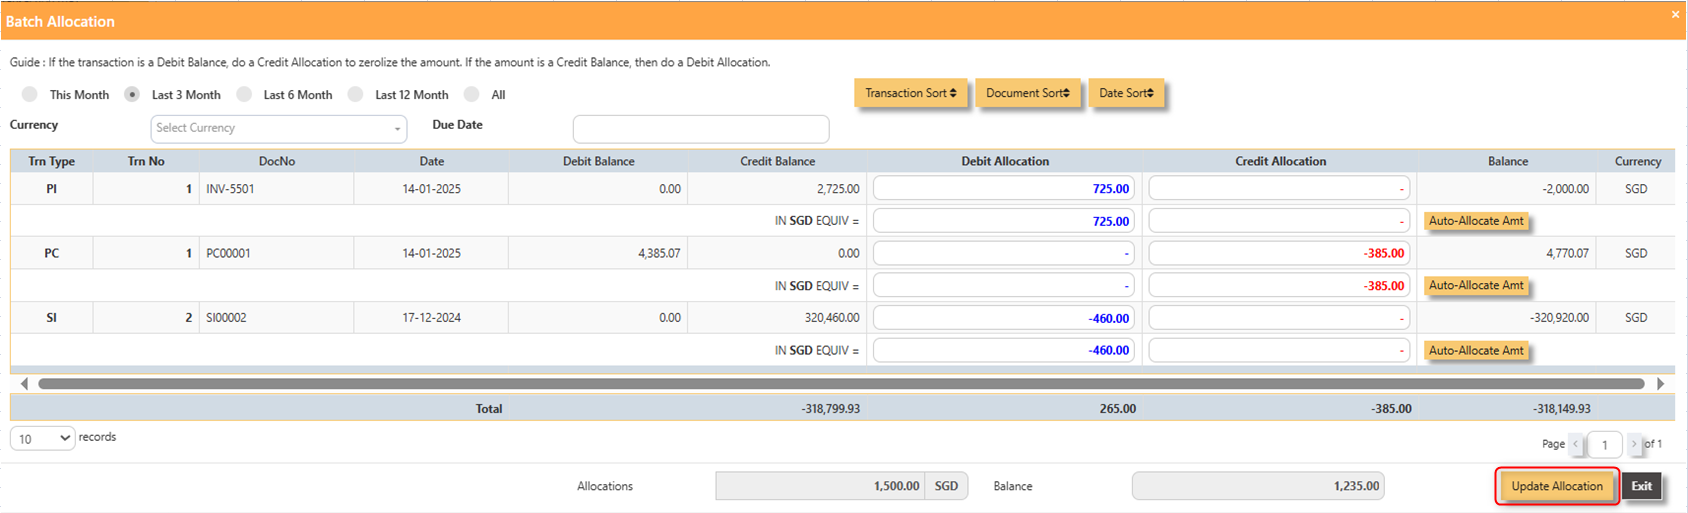
willYouautomaticallyshouldpopulatemanually type in thedetailbaselinecurrencywithamounttheinaccount code that is being set to the Cash Bank.Click on theBatch Allocationbutton and the following screen will appear. To do a full allocation, click on theAuto Allocate Amtbutton. Once the relevant allocations are done, click onUpdate Allocation. You will return to the main PV Screen. Save the entry.The following screen is an example of a partial allocation payment. Just click inside the debit/credit allocationSGD fieldandasentershownthe amount accordingly.below. Click on Update Allocationbutton upon completion.
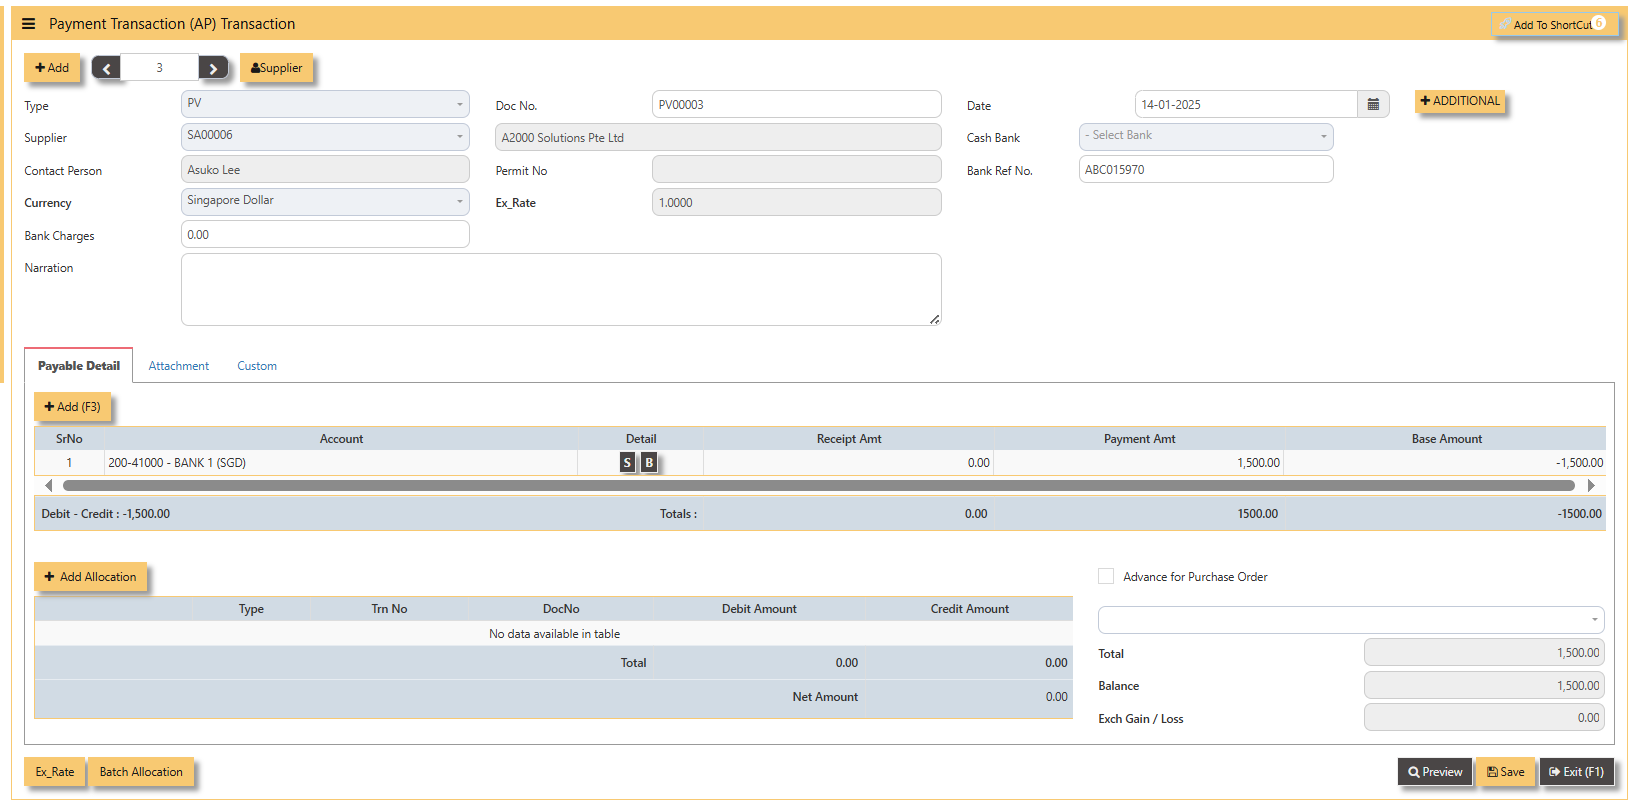
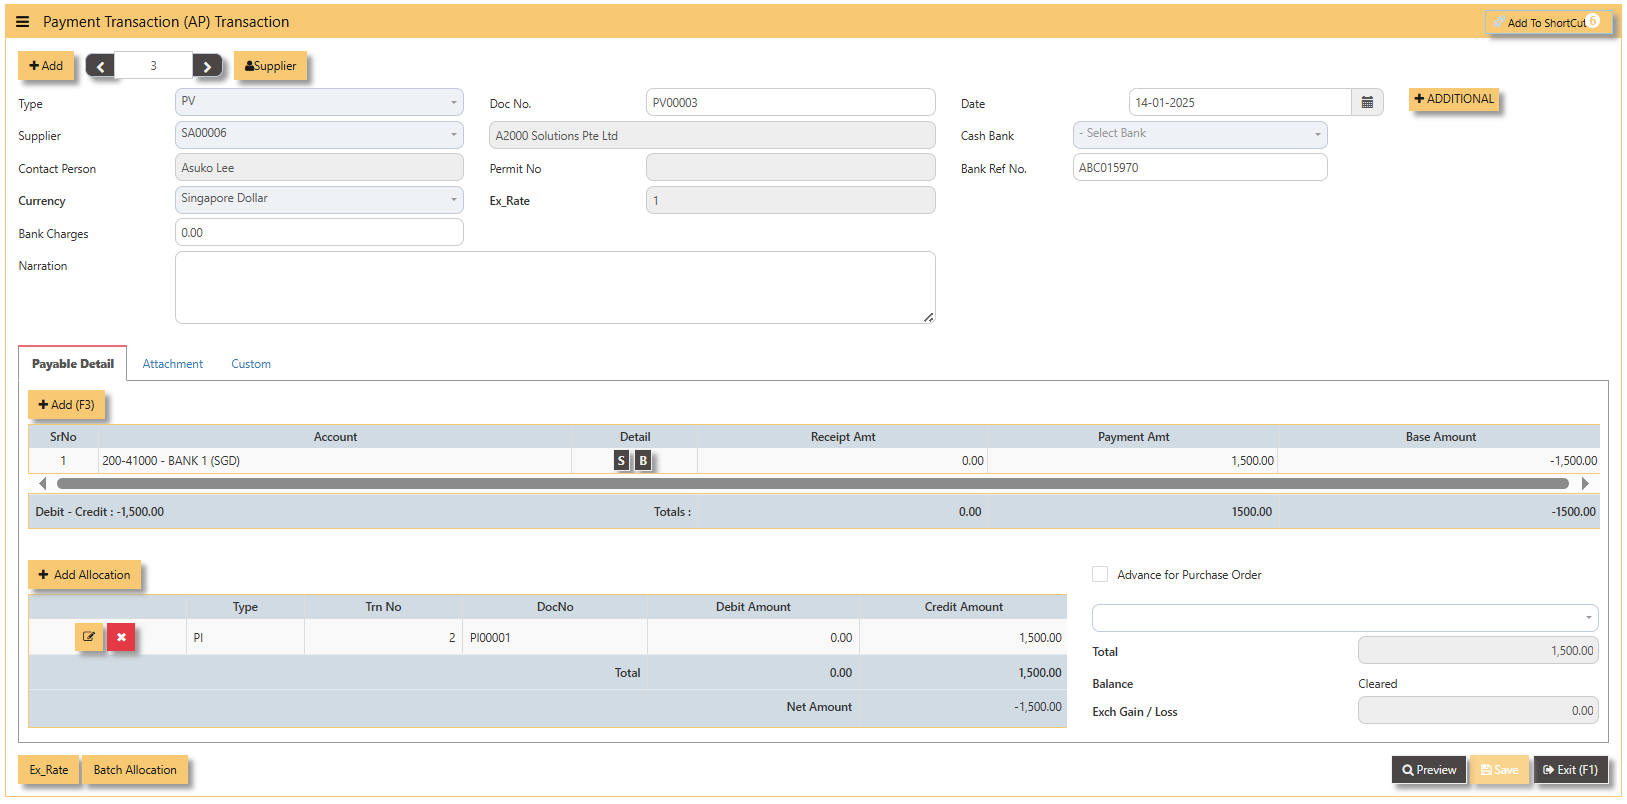
The following screen shows a sample PV transaction after allocation. Take note of the Balance field. It should be indicated asclearedif the allocation is done correctly.
To undo the allocation, click on delete button. Re-do the allocation thereafter.Click onsavebuttonto complete theentry.allocation and save the PV transaction.
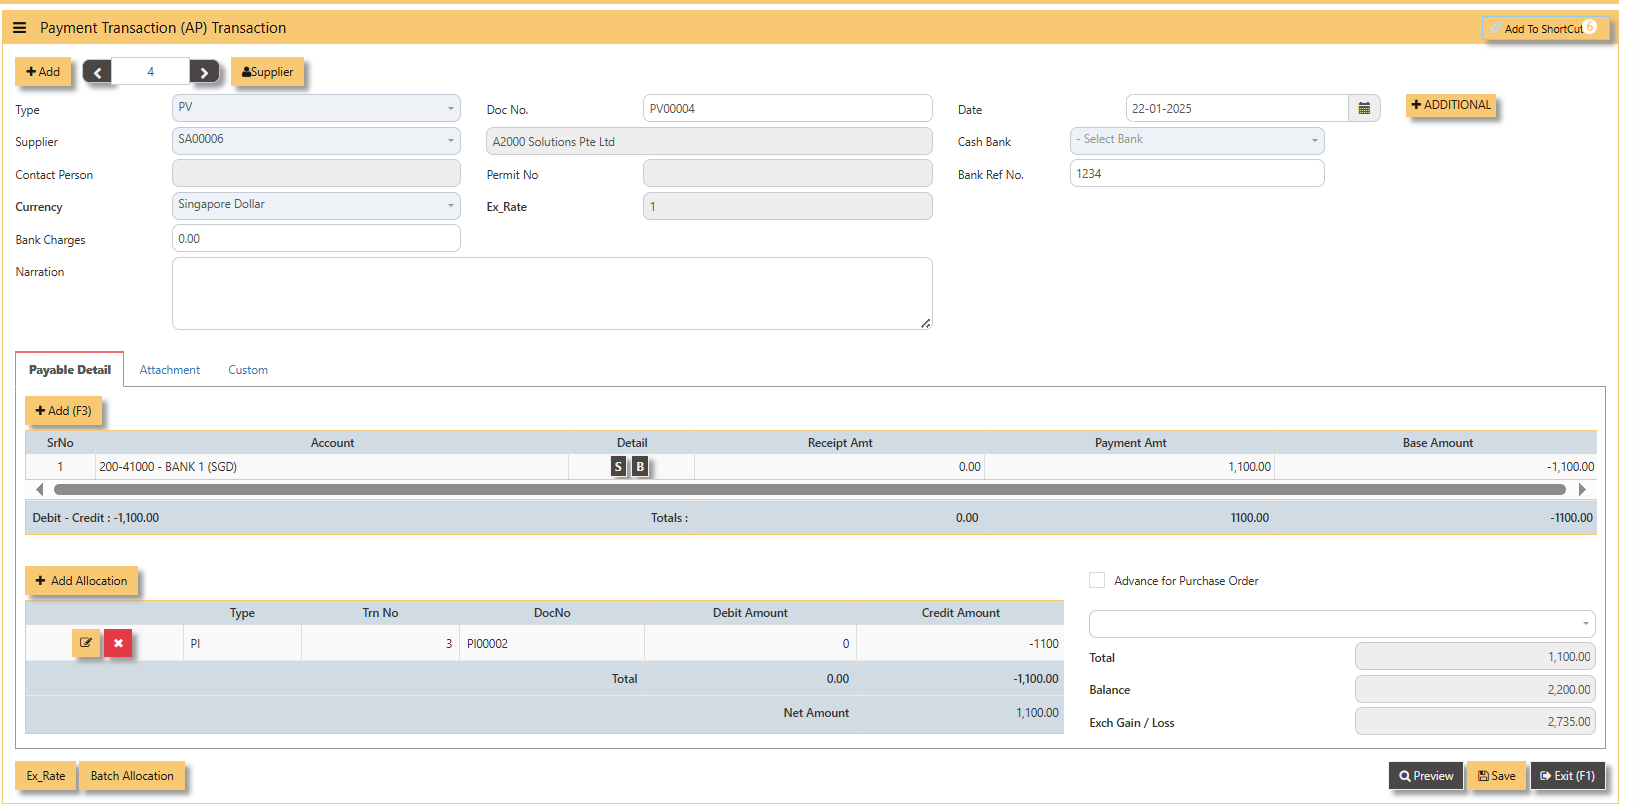
- The
Note:completed payment transaction is as follow: 5. A2000ERP will capture the Realized Exchange Gain/Loss automatically upon allocation. The
 stepsdoubletoentryperformofallocationtheforaboveCredit
transactionNoteis(PC)shown&below:Debit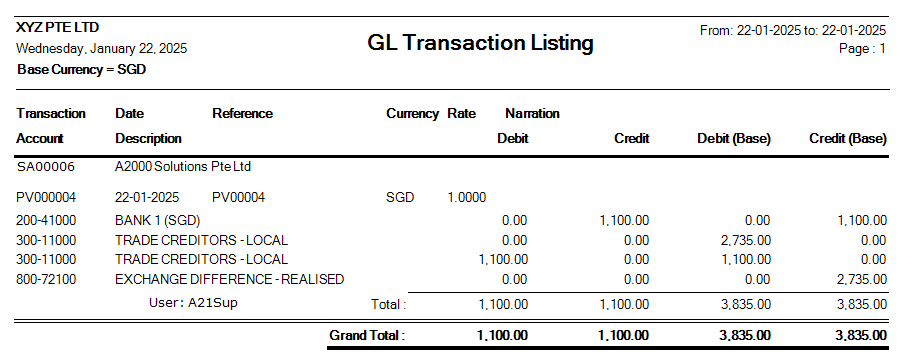


2.


3. Below is a sample PV transaction before allocation.

are
to
Opening Balance
Blacklist Supplier