Additional Accountbook Creation
How To Clone an Existing Accountbook
This manual will going to teach you how to Clone an Accountbook.
___________________________________________________________________________________________________________________________________________
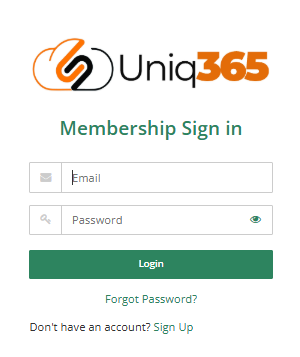
1. Login in the Customer Subscription Portal using this provided link.
https://member.uniq365.com/Membership/MemberShip/Login
Encode the Email and Password Accordingly.
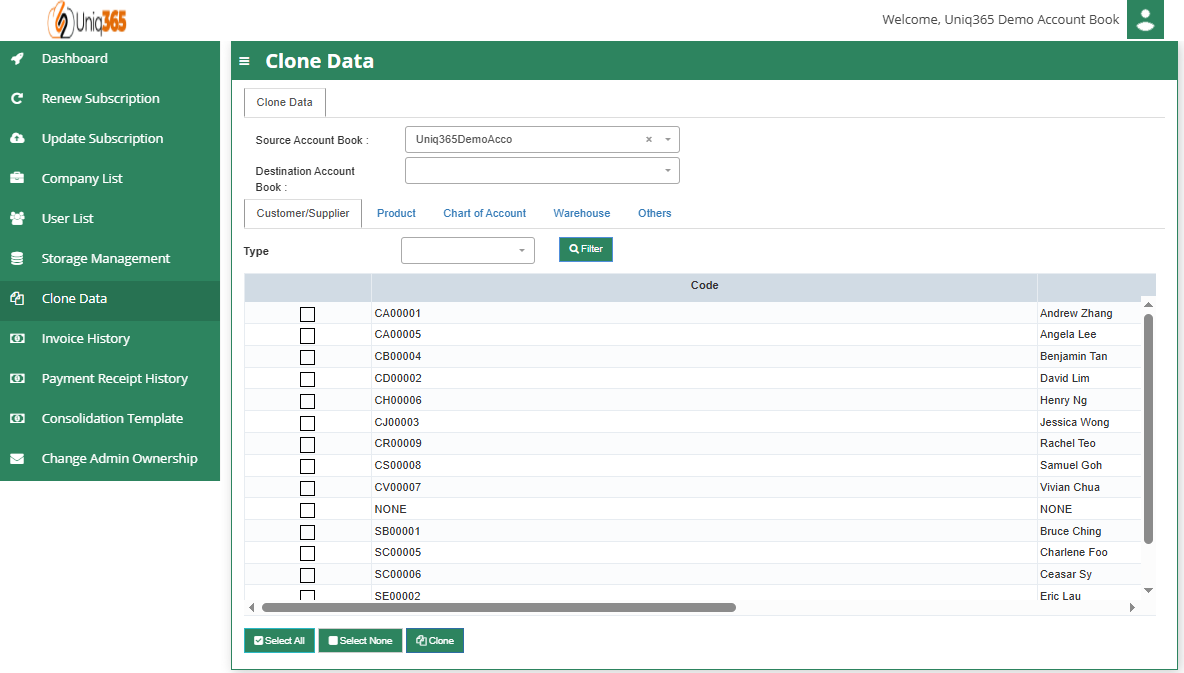
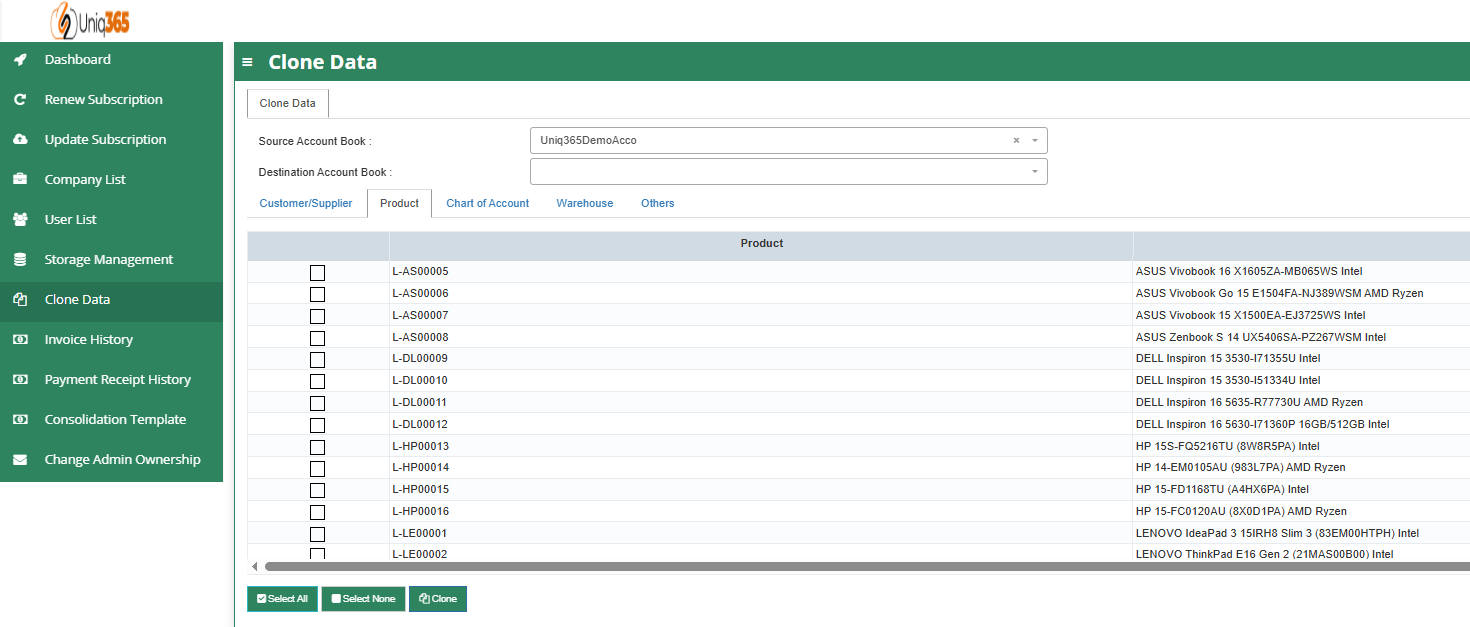
2. Navigate to CLONE DATA and fill up the required fields.
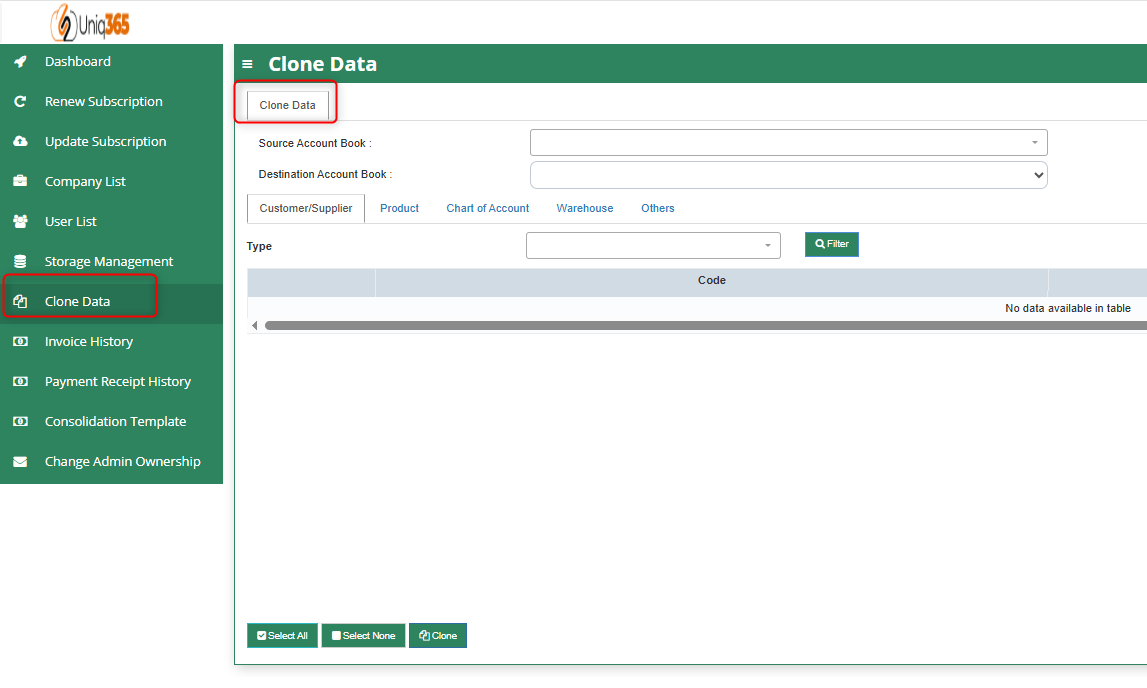
Fill up the following fields:
- Source Accountbook - Pertaining to the Accountbook that you want to copy for the master files.
- Destination Accountbook - Pertaining to the Accountbook destination for cloning purposes.
- Customer Supplier Configuration
Select the Customer/Supplier that you want to add on the new accountbook.
You can Select all or only select prefered customer/supplier.
- Product Configuration
Select Product that you want to add on the new Accountbook.
You can Select all or only select preferred Products.
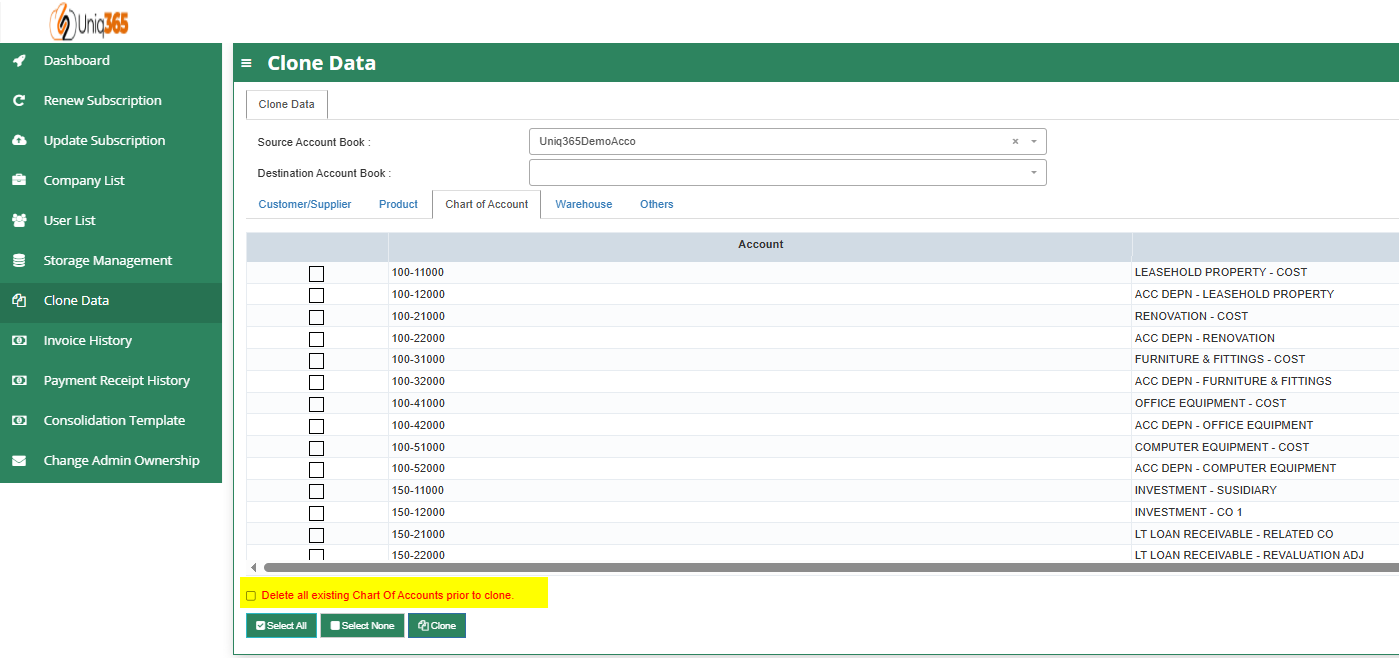
- Chart of Accounts Configuration
Select specific COA that you want to add on the new Accountbook.
You can Select all or only select preferred COA.
Has the option to delete existing COA Accounts prior to cloning process.
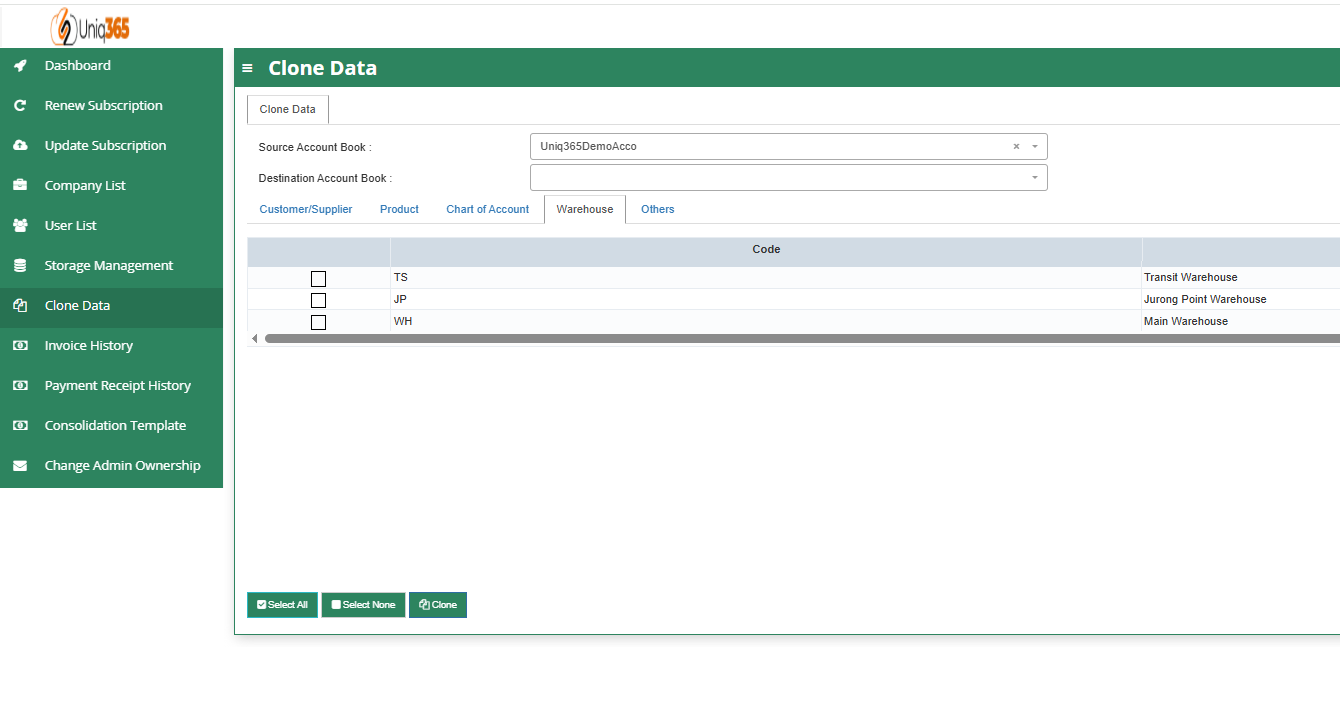
- Warehouse Configuration
Select specific Warehouse that you want to add on the new Accountbook.
You can Select all or only select preferred Warehouse.
- Others Configuration
Select specific Master tables to be carry forward on the new clone Accountbook.

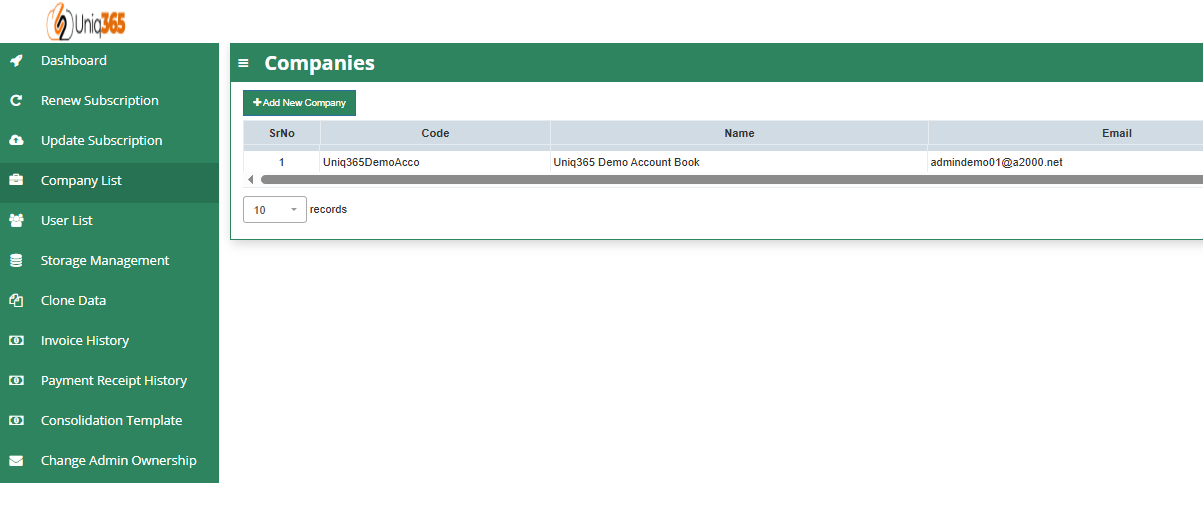
3. Once all are properly configured CLICK the CLONE Button to proceed with the process. Once done check the Company Listing if the new cloned Accountbook if created.
How to Add a New Accountbook in the Customer Subscription Portal
This manual will going to teach you how to create a new additional Accountbook in the Customer Portal.
___________________________________________________________________________________________________________________________________________
- Login in the Customer Subscription Portal using this provided link.
https://member.uniq365.com/Membership/MemberShip/Login
Encode the Email and Password Accordingly.
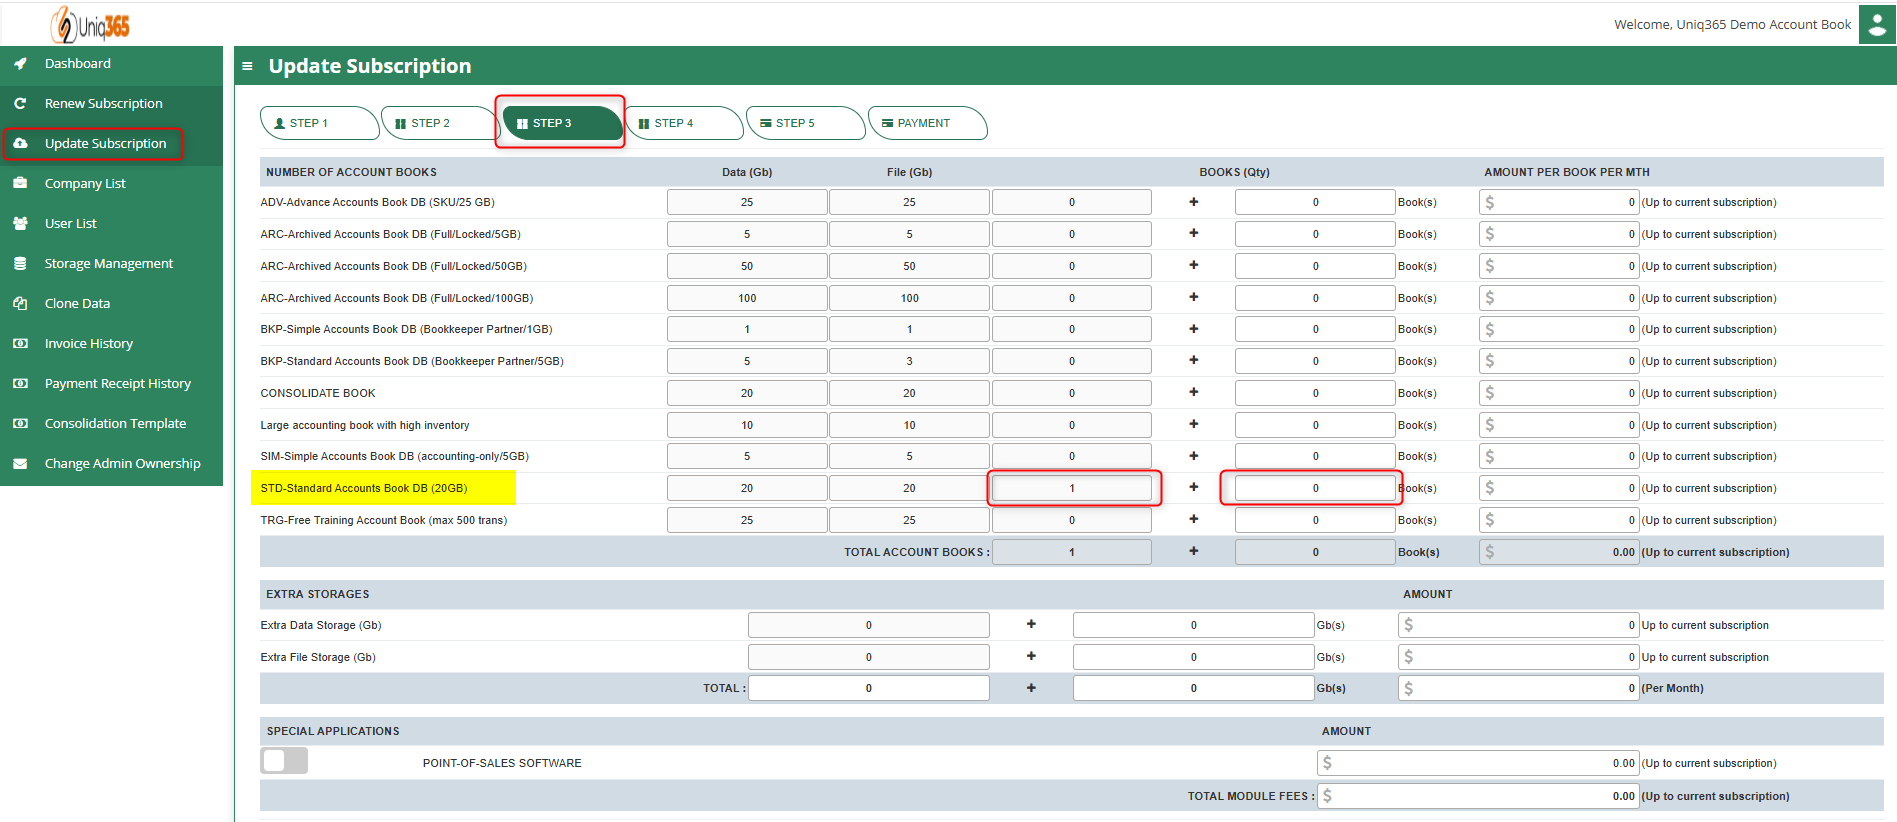
2. Before Accountbook Creation, check first the Allowable Accountbook for Creation.
You can navigate in UPDATE SUBSCRIPTION -> STEP 3 -> Look for the value STD-Standard Accounts Book DB (20GB) and update accordingly.
You only have to configure this if you have no available balance for accountbook in the Customer Subscription Portal. Continue to STEP 4, STEP 5 and Payment to update successfully.
3. Once you've already added new Accountbook on the Subscription, You can now Add the new book.
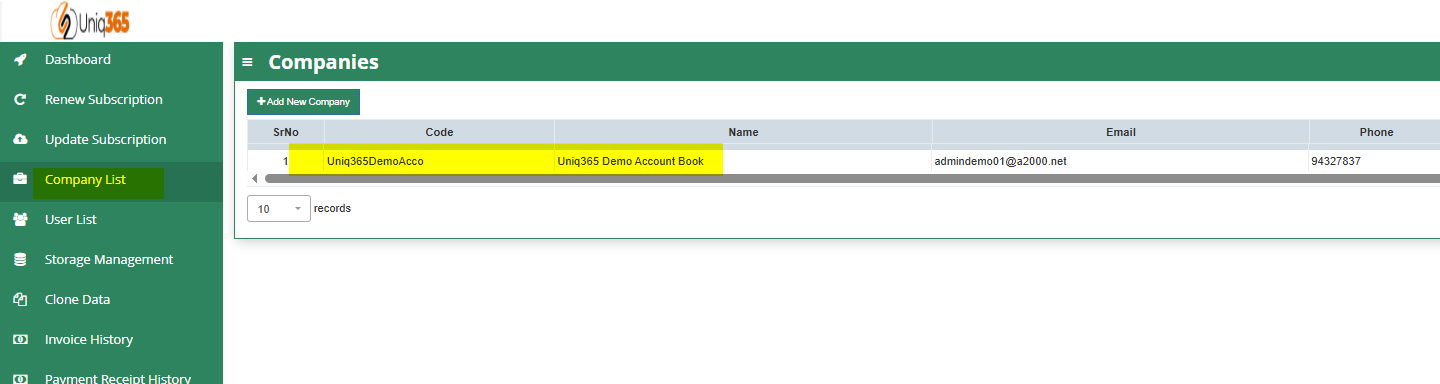
Navigate to Company List -> Click +Add New Company

Encode the Required Information on the new Accountbook. Once Done, Click the SAVE Button.
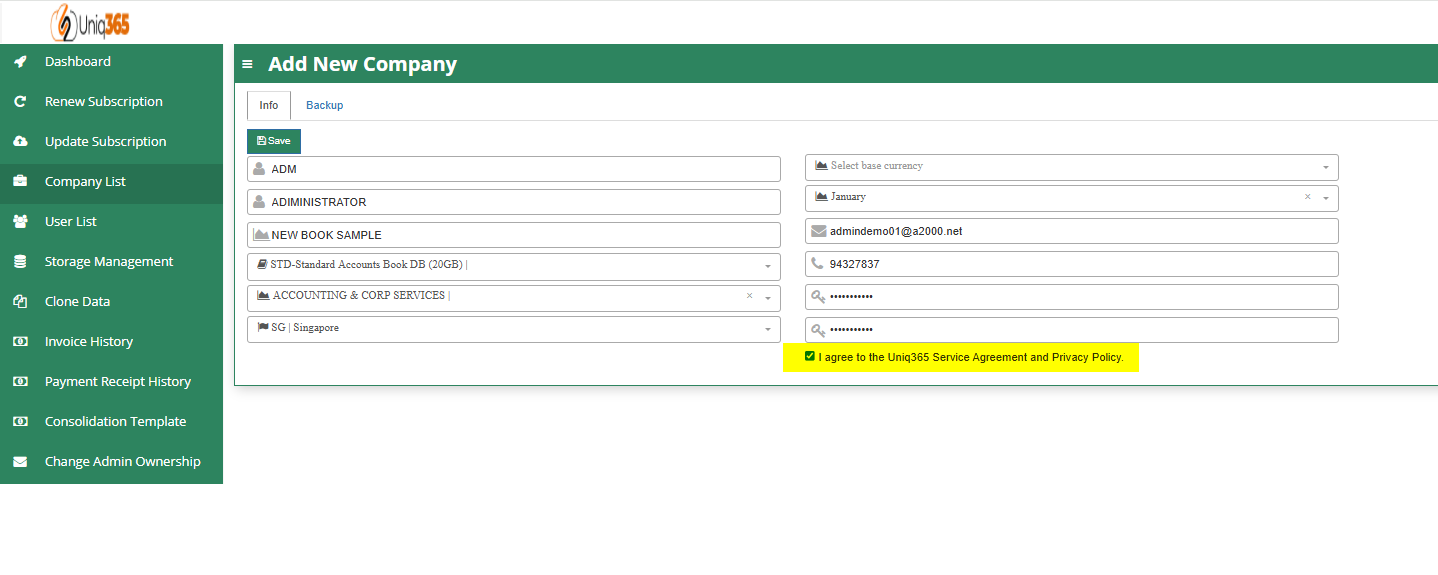
4. Go back to the Company List to verify the newly created Accountbook.